

. If I understand correctly, it is necessary to arrange 10 panels in 2 rows, which is indicated by fractional numbers in red and yellow?David Baillie wrote:Based on the posted specs of the inverter I would say you go for the strings of 10 Panels. With these lower end all in one inverters they often have a "turn on" voltage for the charge controller higher then the low voltage cut out for the charge controller. So it says it can go down to 90 volts on the solar string but really needs 120-140 volts just to Wake up. If you were to go with 3 strings of 6 you would risk having them not turn on until they are in direct sun with any shading shutting down the string. I would say with your setup a string of 10 would be your best bet. You will have to play with the arrangement in terms of shading but you might end up with the east one producing all day despite the chimney and the west one loosing power in the afternoon due to the roof shading. That is a better option then trying to balance the two strings so they are equally mediocre. Without doing a full workup of your site that is what i would recommend. You will have to watch out for high voltage in the string. On cold days when the sun first hits the panels the voltage they produce spikes and can exceed the high limit of the charge controller. The newer all in one charge controllers usually just overload and refuse it but some of the older ones burned out and died. We usually design max string voltage to 1.25x the VOC of the solar panel x # of panels. That value should be bellow your max voltage of the string. Of course time of year, angle to sun, gauge of wire, length of wire from panels to charge controller all play a role.
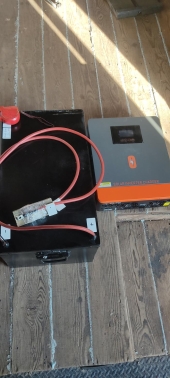
I am attaching a modified picture showing how I would do the strings. you will have to figure out the best wire path for each string and I killed three panels to give you 20 total. Based on experience the three closest to the intersecting roofs will have the biggest loss due to shading and snow. In terms of safety replace the inverter wire when you can with a 0 or 00 gauge wire, I put a fusible link in the positive wire near the positive terminal for safety. Usually the breakers rated CE that can be mounted on a din rail even of chinese manufacture I find work well enough. I do not like the black square screwed on ones with the resetable temp overload as they are usually low voltage marine gear and unreliable. The din rail mounted fuse holders you showed are good. Make sure they are rated for the voltage you will be using. I wish you well as winter rolls in.
Cheers, David Baillie


