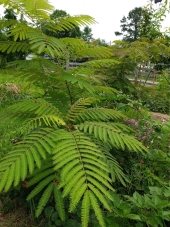
Chris Clinton

+ Follow
since Oct 14, 2024
Merit badge: bb list bbv list
Biography
Georgia native. semi feral neo-peasant animist skill collector. Founder with my wife, Isia, of Crack in the Sidewalk Farmlet located on the edge of Atlanta in 2008. Been growing an expansive diversity of produce and more recently flowers for local farmer's markets as well as offering many foraged edible plants and mushrooms continually full time since. Turned on by traditional and primitive skills, natural building, bioregioning, community, the outdoors, old tools and machines, books, etc etc blah blah blah
Looking for a larger landbase to steward in lower Appalachia, generally near where Ga, TN, and NC meet. might start a village.
Apples and Likes
Apples
Total received
In last 30 days
4
Forums and Threads

Recent posts by Chris Clinton

First time doing this, probably not executed flawlessly, but it was an experience...

This was my oldest bee nesting box, I built and put it up maybe 4 or 5 years ago and have never done any maintenance on it. It is on the front of my house where we can watch it from the porch. In the past it was very active but this last year it was way less, so I knew it was time for some housekeeping. I should have gotten to it earlier in the winter but so it goes. I definitely saw the task as a bit daunting.

Brought the whole box in the house in the evening to sit and do this. Took quite a while to open all the tubes. All were natural materials, mostly small diameter bamboo/rivercane but also some elderberry that I pushed the pith out of and some other hollow plant stalks. The cane was the easiest to open, by inserting a knife a short way and then giving it a twist it would split down its length. The elder tubes would sometimes do this but many of them would flake off in pieces, same with the less woody stalks. Pretty tedious and time consuming. Lot's of stopping to take a closer look at all the weird stuff going on. I found healthy cocoons, old cocoons. wasp cocoons (dirt dobbers (?) used the larger diameter tubes) old pollen, lots of frass, lots of dirt, dead bees, dead worm/caterpillar things, unidentified shed exoskeletons, packed together dead spiders, and one small obvious pocket of pollen mites, and one live bee emerged. Some tubes were celled off with pine pitch. Years of all kinds of diverse critter activity. If an opened tube looked like it might have good cocoons it was emptied into a bowl with the hook tip of my knife or a chop stick. Once all the tubes were empty I called it quits for the night.

The next day I sifted everything and then rinsed them twice in tepid water which made a significant improvement. I didn't want to buy oxygen bleach just for this and found this page www.greenbeehoney.ca/bee-blog/fall-care-for-mason-bees gave directions for using peroxide to sanitize the cocoons and that is what I had on hand. I let them soak in the peroxide/water solution for several minutes as directed then rinsed again in running water. I let them drain for a while and then put them on paper towels to dry. At this point there were still a lot of old cocoons and other matter mixed in with the good cocoons. I experimented with winnowing this off and it seemed effective but I left them to dry fully first, and went to attend to other tasks. The weather had reached into the seventies and when I came back to the cocoons I could hear lots of chewing and see them jostling about. I sat and watched a good number of bees emerge, most flew off immediately while some would linger for a moment first. It was cool to see. Obviously since the bees are already ready to go I did not do any over winter storage or release protocol. I placed the screen with the remaining cocoons under roof cover but that is all.

For refreshing the nest box I blasted it off with the hose and then doused it with peroxide in a bin. I added enough water to submerge one side at a time and soaked each side in turn. I made new tubes from Korean giant celery and Japanese knotweed stalks and re-hung the nest. I hit the bricks with peroxide too.

All in all an interesting task...but not my favorite....
6 days ago
I've been building this small pole barn for a handful of years as time and materials allow. It's plenty functional already but this represents some progress, this side shed will be where I setup my blacksmithing equipment so I'm excited to close it in. Lumber came from me dismantling a 100 year old house, literally a tar paper shack that somehow survived in the city.  The boards might look weathered and rustic but it's old growth true dimension heart pine and once the defective bits are cut off it's probably more solid than anything at the big box stores. Each board was selected in turn then freed from copious nails and tacks, cut to length and notched if it landed on a rafter tail. Hung with a hammer and nails. I had to clamp a straight edge to one board that was not in parallel to rip one side. Each board was cut to 75" and the 7 boards hung for this BB spanned 80" of wall, comes out to a little under 42 square feet. Of course I've sided much more on the barn already, the last photo is the back wall. It is possible I'll put up battens in the future but I doubt it, good for a barn to be drafty and a blacksmith shop needs lots of ventilation. I had a limited number of boards that were painted blue on one side (swab tested free of lead thankfully) so I oscillated between painted and unpainted on the interior side for some kind of design sense.
I make pretty large quantities of charcoal, but for smaller amounts coming out of the woodstove they either travel along with the ashes to be sifted out later or if picked out I can place them in this metal can. Once full and fully cooled the charcoal can continue onward to my bulk storage totes.
1 week ago
I try to build at least one more of these each year. Plenty of scrap wood around here and a simple build. I started out using small bamboo/rivercane for the tubes but that was too time consuming. Been using old Japanese knotweed stalks for a couple years which work well. I noticed the dead stalks of a perennial umbellifer that a landmate planted looked good for this and gathered them. I believe it's Korean Giant Celery or something. It might be my new favorite due to the length between its nodes being up to a foot and a half. I include many hole sizes for a broad range of species, I like to watch the diversity of crazy looking little bees that show up. Difficult to identify but the book "The Bees in your backyard" helps get it to the genus many times. Installed on the woodshed. Added photo strip of my previous builds.
1 week ago

paul wheaton wrote:I would like to see a three legged sawhorse where two legs on one side has a really wide stance.  Can be round on the top.


Here's my submission going for those criteria much like in the video in the description for the BB. Starting with a section of fresh cherry log, I proceeded to shave off the bark with a drawknife and then bore holes for the legs with a hand auger. I eyeballed the first hole and then used a sliding bevel gauge to roughly match the angle of the next one. I selected material for the legs from my stockpile of small diameter black locust and chestnut off cuts and shaped the tenons with my shavinghorse and drawknife. Once the first two legs were driven in I experimented with a forked branch to find a height that seemed fitting and used it to determine placement for for the last hole and its angle. I moved the forked limb to the side to make room for the auger to start the hole, afterwards I laid the horse on its side to finish boring and it turned out that the angle of the last leg was pretty much vertical in that orientation or square to the plane of the other legs. The third leg was then prepared and driven in. Testing its stability at this point it felt very solid and clearly can handle much more than my body weight. I sawed down in the center and then used my hatchet to make a saddle notch on the top. Seems like a useful thing to have on hand, I will likely use it for raising logs for peeling and maybe milling similarly to the person in the video. I do think if the third leg was made removable it would be easier to put away somewhere, as is with the wide splay it kind of takes up some space. The distance between the bottom of the paired legs is over 4 feet.
These comfy pants are even more comfy now that they can be worn with suspenders instead of a belt. Simple to do, just sew on 6 buttons. I used another pair of pants that were made with suspender buttons as a template to transfer position for the new buttons instead of measuring.
1 week ago
Just removing the buttons from what's left of an old army jacket and adding them to the cache.
1 week ago
Unless I missed it I didn't see harvesting appropriate barks for natural medicines, or as a tannin source for leather tanning, or as a natural dye. Harvesting bast fibers for cordage. Destructive distillation could yield wood vinegar or things like birch tar. Make spiles for tapping sap. Make whimmydiddles and whistles. Build primitive traps, like the figure four or Paiute deadfall. Wanna go for 201?  
2 weeks ago
First time making these, glad to have been spurred on by this BB. As you can see I enjoy the results and have made more than two. Most of these are from the branches of a wild cherry I recently cut down and am trying to utilize in it's entirety. Looking for these is about the same as looking for wood for spoons, but these hooks can use the pieces too small to carve spoons with. I also played around with splitting off the bend on larger branches (just like with spoons) to yield a different style hook. After splitting along the pith to roughly flatten the back I'd put them in the vise on my bench and plane them if necessary. Some I sanded flat after drying. To dry flat I would clamp them to a piece of scrap, wrap the whole affair in packing paper and leave in a cardboard box to dry slowly. I'd leave the little branch hook with extra length until after drying since it was more likely to crack as it still has its heart. I'm going to keep making these and see how they do at market, lots of styles and finishing touches to experiment with. I've installed two around here so far, one just inside my pole barn and one on the side of the woodshed. A handy improvement that is, I always have to shed layers when splitting or stacking firewood no matter how cold it is. Now I'm not just throwing my coat on the ground or wherever.