|

|
|
|
|

|

|

|

|

|


Jami McBride wrote:
Wow, super Len what a great job of ingenuity
I've always hated the size of my bread pans, so I love your idea - wonderful.
Brice Moss wrote:
I'm sure this is s dumb question. What keeps the bread loaves from sticking to the towel?

Jami McBride wrote:
Boy, this would make a great youtube video
Also, even though I have been careful to follow standard code practices in rewiring our stove... it hasn't gone through the CSA bake it till it breaks testing either. It is 25 years old... the next thing up is to re-insulate it... just got some Roxul to do that (and the heat riser in my RMH). I am not using the stove as it was intended to be used 
Jami McBride wrote:
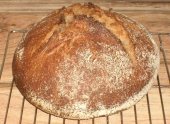
Maybe you could explain your 'natural yeast' is that typical sourdough starter?


|
This tiny ad dresses like this just to get attention:
Gardening and natural building at a delightful pace
https://wheaton-labs.com/bootcamp
|