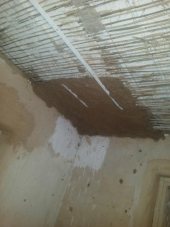
I can't tell much from your photo show, but
- What substrate is the lime plaster falling off of? If you are plastering directly onto uncoated earthbags or straw-bales, an intermediate layer, or some lathing, might be important. A straw-rich earthen layer or rough plaster with a little bit of lime or lime-water in it might give you a firmer substrate, if done right, for a lime-plaster finish coat.
- If your substrate is crumbly or soft (soil-clay plasters or cob with silt in the mix), painting with lime-water or another runny binder might help the substrate take on the stiffness necessary for a successful bond with the lime plaster. The goal is not to seal the substrate, but to let a compatible binder soak deeply into it, priming it for good bonding with lime.
- If the substrate is sealed, glossy, or very soft, then it can be hard to get any plaster to stick to the substrate better than to itself. The same problems will cause cracking and peeling in paints if applied without sanding or primer.
- If the substrate is not rough enough, the plaster doesn't have anything to 'key' to. Scratching 1/4" gouges into the underlying substrate is the plaster equivalent of sanding before painting. If you are having success with clay plasters generally, but not lime, this is not likely the problem.
- More aggregate: It looks from your website like you've figured out that clay plasters need more sand than you've been using in the lime plaster. If the lime plaster is cracking off in big, hard chunks, especially if those chunks are slightly curved like peeling paint, then it might be shrinkage or distortion from too-rich binder. I would suggest a bit more sand in the lime plaster, and/or fiber, if shrinkage cracking seems to be part of the problem.
Other things to consider:
- Fiber - helps immensely with cracking in general, especially if you have to do "fill" coats where it's rough or uneven. I have heard you can use dung or chopped straw fiber in lime plaster, but animal hair is better if you can get it (lasts longer). Pet groomers might be a decent source if you are willing to work with them about any trash regulations they have to follow. Human hair or horsehair works fine too. Shredded or chopped old rope works too, or shredded fibrous bark. They use nylon and rubber fibers in Portland cement, which has a similar chemistry to lime, so you could consider those too (can be bought in bulk from cement mix suppliers). But I assume natural is preferred (as described above)
- I agree about the layering and drying, from hearsay mostly. I have only worked with thin layers, and haven't had problems (but that may just be inexperience, not perfection

- Quality of lime used: If it's crumbling as it falls off, not cracking into hard chunks, you might have run into a bad (stale) batch of Type S lime.
If you can get quicklime and soak it (careful - it's very caustic, causes the water to boil, and has been used historically to dissolve human corpses as well as other noxious flesh) you can make a much smoother, more reliable lime putty for the plaster. Must keep it covered in water until use - once slaked (as type S lime is before it's dried and bagged for distribution) it can start curing with exposure to damp and air. So get some big bins / plastic barrels, fill with water, slake the quicklime while wearing goggles and long nitrile gloves, and then let it soak for months if possible. Keep the water topped up (you can scoop off some lime-water for use in other projects and replace it with fresh as needed). Very fine plasters are made with lime putty that's soaked for 6 months or more; but if you want to buy it in buckets, it costs a pretty penny. Quicklime is much cheaper, and while it's caustic before slaking, it doesn't entail any more embodied energy than type-S lime (which is made by the same process, just processed further before release to the public). Quicklime comes in big round pellets, to reduce surface area in contact with (reacting with) air. Type-S is used as a softener in certain kinds of concrete work; gives more flexibility to mortars. It is powdered for ease of use; but this gives it much less protection from elements if not used extremely fresh.
Garden-variety "lime" is the chalky end-stage of this process; if you are trying to use agricultural lime in plasters it would explain almost any degree of structural failure from crumbling to complete non-performance.
- Prolonged damp-cure time gives good plasters strength. As I understand it, the calcium starts out as CaO (quicklime), then goes to CaOH, then eventually to CaCO3 hydrates by absorbing carbon from the air. It forms a crystalline bond as it changes chemistry, and this process only continues as long as some water is present.
This can happen in the bag if type S lime is stored in a damp place. Sometimes 'stale' Type S has a rougher crumb structure, hardened spots; sometimes it's not detectable except by the crappy quality of the resulting plasters. I don't know if you can get manufacture dates from the supplier; might be possible in some regions. Partially-cured lime has that much less capacity to bond once applied as plaster, in extreme cases it may be almost completely cured into a chalky powder that just won't do anything structurally (chalk is used as 'whiting' or filler in pigments and paints, but doesn't have any binding or bonding capacity itself).
This aging process also gives clues as to why a certain length of wet-curing time may be needed for optimal plaster performance. Most builders I've known to work on fancy plaster interiors give it damp sacking for several days or up to a week, depending on conditions; in very wet climates it's not as critical, but in dry, windy, or hot conditions it can mean the difference between success and failure. In those conditions, clay-based plasters do extremely well.
- It sounds like you are having better success with clay plasters, from your website. You might consider just getting some very good-quality white clay, to go with your white sand, and making white plasters that way. Whitewashing with lime-water or a lime-milk mixture can brighten things further; thin whitewash does fine over clay plasters, soaking in enough to prevent the two materials from peeling apart.
I also second the advice of getting someone in who has experience with lime plasters. A local expert might be able to share supplier tips too - but even a distant expert could help you test out the available local supplies and figure out the best ones. For long-distance free advice on plaster detailing and repairs, in copious detail, I like Mike Wye's site in the UK:
http://www.mikewye.co.uk/faqs.htm
Hope that helps!
In the interests of full disclosure, I have done a lot more reading about lime plasters than working with them.
Keep an eye out for less-wordy but more pointed advice from experienced trades folks.
Yours,
-Erica W


 4
4