• Post Reply Bookmark Topic Watch Topic
  • New Topic
permaculture forums growies critters building homesteading energy monies kitchen purity ungarbage community wilderness fiber arts art permaculture artisans regional education skip experiences global resources cider press projects digital market permies.com pie forums private forums all forums
this forum made possible by our volunteer staff, including ...
master stewards:
  • r ranson
  • Nancy Reading
  • Carla Burke
  • John F Dean
  • Jay Angler
  • paul wheaton
stewards:
  • Nicole Alderman
  • Pearl Sutton
  • Anne Miller
master gardeners:
  • Christopher Weeks
  • Timothy Norton
gardeners:
  • Nina Surya
  • Matt McSpadden
  • thomas rubino

Going out on a limb here...

 
Posts: 1274
Location: Central Wyoming -zone 4
47
hugelkultur monies dog chicken building sheep
  • Mark post as helpful
  • send pies
    Number of slices to send:
    Optional 'thank-you' note:
  • Quote
  • Report post to moderator
i THINK that if you were to get a longer exhaust it may create a strong enough draft for you and you may not have to build it with a taller exhaust, so long as it exhausts a couple inches higher than the intake
i think holes may not leak but rather just let in excess intakes and ruin the draftness of it but at 4ft long i think your main thing is just that you need a longer exhaust

and i sorta hear ya there, it seems like every build ive followed the builder finds out its much more difficult than the little bit of knowledge they could find online before building, best of luck with everything though i know how frustrating projects can be when they dont go at all like planned
 
pollinator
Posts: 480
Location: South West France
180
goat forest garden fungi chicken food preservation fiber arts solar sheep rocket stoves homestead
  • Mark post as helpful
  • send pies
    Number of slices to send:
    Optional 'thank-you' note:
  • Quote
  • Report post to moderator
Jamie,

I'm no expert but I've built a heater and it works fine.

I see your exhaust hole in the barrel is the same size as the tube. Everything I've read and believed says that you need a bigger hole in the barrel than you think to get the heat and smoke out of the exhaust. Have a look on the 'net for the actual size.

I used a chimney pot as an exhaust chamber because it was lying around and it seemed to be about the right size. Have a look at the layout in this short video : https://picasaweb.google.com/101842447547367164524/FilmsAndSeriesOfPhotos#5713155398613403762

Irene
 
Posts: 61
  • Likes 1
  • Mark post as helpful
  • send pies
    Number of slices to send:
    Optional 'thank-you' note:
  • Quote
  • Report post to moderator

Devon Olsen wrote:i THINK that if you were to get a longer exhaust it may create a strong enough draft for you and you may not have to build it with a taller exhaust, so long as it exhausts a couple inches higher than the intake
i think holes may not leak but rather just let in excess intakes and ruin the draftness of it but at 4ft long i think your main thing is just that you need a longer exhaust

and i sorta hear ya there, it seems like every build ive followed the builder finds out its much more difficult than the little bit of knowledge they could find online before building, best of luck with everything though i know how frustrating projects can be when they dont go at all like planned


Devon,

Your thoughts have been helpful - more than you know. I checked out the link in your signature too. Wow. All I can say for us is...."someday soon" lol. Looks awesome!
 
Jamie Corne
Posts: 61
  • Mark post as helpful
  • send pies
    Number of slices to send:
    Optional 'thank-you' note:
  • Quote
  • Report post to moderator

Irene Kightley wrote:Jamie,

I'm no expert but I've built a heater and it works fine.

I see your exhaust hole in the barrel is the same size as the tube. Everything I've read and believed says that you need a bigger hole in the barrel than you think to get the heat and smoke out of the exhaust. Have a look on the 'net for the actual size.

I used a chimney pot as an exhaust chamber because it was lying around and it seemed to be about the right size. Have a look at the layout in this short video : https://picasaweb.google.com/101842447547367164524/FilmsAndSeriesOfPhotos#5713155398613403762

Irene


Irene,

That...might be something to try. I'll post back here in a few to let you know how it goes. Might not be able to get on till later tonight...depending on if I can find a manifold as you described or not in the snow banks outside. Your link didn't open for me, unfortunately.

Be back soon and Thank you!!
 
Irene Kightley
pollinator
Posts: 480
Location: South West France
180
goat forest garden fungi chicken food preservation fiber arts solar sheep rocket stoves homestead
  • Mark post as helpful
  • send pies
    Number of slices to send:
    Optional 'thank-you' note:
  • Quote
  • Report post to moderator
Here's a screen shot from the video


chimney-pot-with-cleaning-hole-to-be-cobbed-in.JPG
[Thumbnail for chimney-pot-with-cleaning-hole-to-be-cobbed-in.JPG]
Exhaust
 
Jamie Corne
Posts: 61
  • Mark post as helpful
  • send pies
    Number of slices to send:
    Optional 'thank-you' note:
  • Quote
  • Report post to moderator

Irene Kightley wrote:Here's a screen shot from the video


Irene, thank you for the image. I was hoping that what I was imagining in my mind....was correct. I had actually drawn something on paint a min ago trying to put that description into a physical object for me to see.

 
Devon Olsen
Posts: 1274
Location: Central Wyoming -zone 4
47
hugelkultur monies dog chicken building sheep
  • Mark post as helpful
  • send pies
    Number of slices to send:
    Optional 'thank-you' note:
  • Quote
  • Report post to moderator
i was confused as to what the hole on the top was for as the barrel seemed to connect at the cutout?
 
Jamie Corne
Posts: 61
  • Mark post as helpful
  • send pies
    Number of slices to send:
    Optional 'thank-you' note:
  • Quote
  • Report post to moderator

Devon Olsen wrote:i was confused as to what the hole on the top was for as the barrel seemed to connect at the cutout?


I was too at first but then read the faint text on the picture which shows it to be a clean out.
 
Jamie Corne
Posts: 61
  • Mark post as helpful
  • send pies
    Number of slices to send:
    Optional 'thank-you' note:
  • Quote
  • Report post to moderator
I think what I'm going to do when this is all said and done...is to make a few different "models" that snap together from the side view with each part on it..and then make a video - and take the models around for demonstration around this area.

You know - kinda like the human heart or ear models you find in a doctor's office that come a part so you can see the inner workings?
 
Devon Olsen
Posts: 1274
Location: Central Wyoming -zone 4
47
hugelkultur monies dog chicken building sheep
  • Mark post as helpful
  • send pies
    Number of slices to send:
    Optional 'thank-you' note:
  • Quote
  • Report post to moderator
right... might help if i read a little bit lol
 
Posts: 2
  • Mark post as helpful
  • send pies
    Number of slices to send:
    Optional 'thank-you' note:
  • Quote
  • Report post to moderator

Devon Olsen wrote:i see nothing non-RMH about an elevated "chimney" after all the mass
the main reason i would say it is not getting draft would be taht it has no rise at the other end, for GOOD drafting to occur the exhaust has to exit higher than the feed comes in
i would first try simply making sure that the exhaust is higher than the barrel before making it higher than the whole house
the warmed air rising out of the exhaust creates a vacuum of sorts and pulls air through the rest of the setup, if the exhaust isnt higher than the barrel (theoretically the highest point in the design) than the vacuum is weak and doesn't have enough power to really pull it through and create that rocketty goodness

in a cherokee fire pit (im calling it cherokee because i forgot the name of the tribe that did this and it sounds right to me) is basically two holes close to each other and connected at the bottom, burning your fire at the bottom of the lower hole created a draft and sucked the fire up through the second hole, which was higher up, creating less smoke and concentrating heat for cooking, also saving fuel, the fire pit doesn not work very well, if at all, if the exhaust pit is not higher than the burn pit
and i think thats your main problem here, the heat goes to the highest point, working against the draft and slowing it down, also preventing burning past that point because any oxygen that does manage to get drafted in gets smothered with CO2 due to this


the idea of a rmh-if i understand correctly-is the heat riser generates thrust, or draft. should i need to add a vertical run to improve draft, i have constructed something wrong. the pursuit of excellence i as a libertarian aspires to, would be sacrificed for delusion and convenience. i would be glossing over a technological problem with a "gimmick", rather than solve the problem. knowledge is not gained by cheating.

your input is appreciated. many ways to explore a problem, and many solutions. this is the value of open sourcing.
 
Jamie Corne
Posts: 61
  • Mark post as helpful
  • send pies
    Number of slices to send:
    Optional 'thank-you' note:
  • Quote
  • Report post to moderator

Devon Olsen wrote:right... might help if i read a little bit lol


lol don't worry. I'm feeling like a major fool at the moment. I have been known my entire life..to look at something and just build it.

Why I cannot do that with this thing...I'll never know.

I can look at a motor and build you a high performance engine with modifications without looking at a single diagram...but I cannot seem to build myself a rocket stove that works efficiently to save my life.

I'm willing to bet that after this one is built and working...I will be able to do the second one with ease.
 
Posts: 57
Location: Eastern edge of the Blue Ridge Mnts. Virginia
2
  • Mark post as helpful
  • send pies
    Number of slices to send:
    Optional 'thank-you' note:
  • Quote
  • Report post to moderator
Since you brought up an internal combustion engine, think about how it works. You need just the right amount of input air to get optimum burn and you also need the right size exhaust. The RMH is not using draft, it is using thrust. If you stop intake air you stop the motor, if you stop the exhaust you stop the motor. A 4 cylinder motor uses a different size intake and exhaust than an 8 cylinder. So for every home built RMH you will have to consider these effects for your personal build. This is the reason most threads talk about CSA (Cross Sectional Area). A motor will run without exhaust, but if you make the exhaust to small it will become sluggish do to back pressure. If you have to much exhaust and intake you can also blow out your fire. I think in your case you might need to increase your exhaust size.
 
Posts: 24
Location: 45.7187 N, -97.4436 W (where it is really cold)
3
  • Mark post as helpful
  • send pies
    Number of slices to send:
    Optional 'thank-you' note:
  • Quote
  • Report post to moderator
G'day Jamie,
At the risk of sticking my foot in my mouth I am going to offer some information that may or may not assist you with the "problem".
Before I started building a rocket stove, I spent quite a while trying to find out if there was a specific proportion to the rocket stove components. After "kissing a lot of frogs" I finally found a site from M.I.T. which described the specific proportions required. I will start by saying that my original piece of equipment was a 30" piece of exhaust pipe steel 5" in diameter. The steel was cut into two pieces on the 45 with the short peice being 10" and the longer piece being 20". This was welded together and actually made a reasonably credible rocket stove in that simple configuration. I did take a piece of 4" flat bar and weld that to the inside of the combustion chamber to provide a shelf for the fuel as it entered the stove. As I said, it worked pretty good but not great. It still seemed a bit "smokey" and I wanted to know what I had done wrong.

I found this website and on it was the equation necessary to have a very successful rocket stove. The entire stove depends on the area of the opening into the combustion chamber which in my situation was 5" x Pi. (3.1416) In the equation from M.I.T. the important feature was the diameter of the fire box, such that the diameter of the opening to the fire box is considered algebraically as "X" The horizontal portion where the combustion chamber is situated will now be considereed 2x and the total height of the riser should be x + (1.5 or 2 x) + 5 cm. So in my case the horizontal combustion chamber which was 12" long had to be cut down by 2" and the vertical stack had to be cut down to about 17 ". This gave a much more satisfactory burn and allowed the wood to keep burning as long as I tended it and added more fuel periodically.

Therefore, when looking at the opening in your RMH where the first thing is the rocket stove, it would seem to me that the proportions of the stove opening and the length of the exhaust stack might be mis calculated yielding a goodly amount of smoke.
As I said, I am NO engineer as may be a few of the gentlemen here but in either case, you may want to play some tricks with the math and see if your design meets with important principles needed to fix the problem.

I certainly hope this computes and adquately relays the thought process somehat more clearly.
I hope this helps in your quest to find a good resolution of your rocket stove difficulties.

 
Jamie Corne
Posts: 61
  • Mark post as helpful
  • send pies
    Number of slices to send:
    Optional 'thank-you' note:
  • Quote
  • Report post to moderator

Gerald O'Hara wrote:G'day Jamie,
At the risk of sticking my foot in my mouth I am going to offer some information that may or may not assist you with the "problem".
Before I started building a rocket stove, I spent quite a while trying to find out if there was a specific proportion to the rocket stove components. After "kissing a lot of frogs" I finally found a site from M.I.T. which described the specific proportions required. I will start by saying that my original piece of equipment was a 30" piece of exhaust pipe steel 5" in diameter. The steel was cut into two pieces on the 45 with the short peice being 10" and the longer piece being 20". This was welded together and actually made a reasonably credible rocket stove in that simple configuration. I did take a piece of 4" flat bar and weld that to the inside of the combustion chamber to provide a shelf for the fuel as it entered the stove. As I said, it worked pretty good but not great. It still seemed a bit "smokey" and I wanted to know what I had done wrong.

I found this website and on it was the equation necessary to have a very successful rocket stove. The entire stove depends on the area of the opening into the combustion chamber which in my situation was 5" x Pi. (3.1416) In the equation from M.I.T. the important feature was the diameter of the fire box, such that the diameter of the opening to the fire box is considered algebraically as "X" The horizontal portion where the combustion chamber is situated will now be considereed 2x and the total height of the riser should be x + (1.5 or 2 x) + 5 cm. So in my case the horizontal combustion chamber which was 12" long had to be cut down by 2" and the vertical stack had to be cut down to about 17 ". This gave a much more satisfactory burn and allowed the wood to keep burning as long as I tended it and added more fuel periodically.

Therefore, when looking at the opening in your RMH where the first thing is the rocket stove, it would seem to me that the proportions of the stove opening and the length of the exhaust stack might be mis calculated yielding a goodly amount of smoke.
As I said, I am NO engineer as may be a few of the gentlemen here but in either case, you may want to play some tricks with the math and see if your design meets with important principles needed to fix the problem.

I certainly hope this computes and adquately relays the thought process somehat more clearly.
I hope this helps in your quest to find a good resolution of your rocket stove difficulties.


Gerald Thank you so much for the clarification. I had (only yesterday evening/today in the early morning) looked through the MIT website in depth...

I know I said I was not going to post here again - but my email notifications are on and I saw that you'd made a response. I am not so disrespectful as to nod you off because you've been nothing but respectful and kind to me - not to mention helpful and encouraging.

At first it was over whelming. But once I looked at it and sat back and thought about it - it wasn't so "gibberish" anymore.

I think my problem was that although I knew the configuration had to be right - we were trying to use the little "fire brick" that we had...to the maximum that we could without altering the configuration. Again - the money issue comes in where we have to drive to Sioux Falls (20.00 to and from). While 20.00 doesn't sound like a lot of money...it is during the winter for us. That sounds terrible, but it's true. If we can escape having to drive that far so often for a deal on bricks...well you know. That 20.00 goes a long way in our house hold for now...anyway. I couldn't imagine having to drive 4 hours...everytime I needed bricks or clay...to Sioux Falls or Fargo. You have my respect...only recently have our gas prices begun dropping - and we're still in the 3.50'ish range the last time we checked in town and the news said it's supposed to reach over 4.00 a gallon again by early summer.

So, what we decided to do was disassemble the entire thing (and Donkey had suggested this as well), cut the floor out and just drop it onto the soil beneath the once-trailer floor two feet below. We'll be extending the riser of course, to meet the drop. It's going to be a bit of a "personalized" stove then. We are re-doing our Sketchup CAD figure as well. It's going to have to be 2 rocket stoves in 1 since we're putting it into the ground. One side will heat that side of the house (we're going to build a conclave around it and make it look like an architectual detail) and then with a reverse conclave on the other side (the two conclaves will form that portion of the wall) will be the other rocket stove that will fuel the "kitchen" area including range and will connect to yet another one that will serve as the "kiln/oven."

We've decided that with our current roof and how it's going to be - that we're going to build our own chimney that all the pipes from all three rocket stoves will connect to (after they get through the thermal mass in some instances) it and then go up vertically - per Peter's suggestion.

The confusion around the problem and our balking against the vertical chimney...was that we were only doing our "test" burn without the thermal mass...and thought he wanted us to put a vertical exhaust on it "before" the thermal mass and were not understanding how that would work. Miscommunication.

I'm thinking that by the time we're done, it will be late spring (maybe early spring in March or April) - and then we can begin doing the "aesthetics" to it. It will look like this - only with a conclave wall behind it, mirrored on the other side (only on the other side - it will simply be one giant bench that extends around the corner in the other room - which will be our dining room)


It's going to take some time - there's no question about that. It's gonna take some mistakes - that's for sure (and welcomed). But it's gonna be well worth it in the end. There's a lot of people over here who want to see ours when it's done and who are contemplating doing the same. While we don't really have time to go into "business" nor do we have the experience...we'd be more than happy to get people started and direct them at people who are willing to help out.

I really appreciate your input here. There are so many "cross section" designs out there on the internet - that it was difficult for us to determine which one would work for our stove..without us having to spend a trillion dollars redoing our stove just to see which one works. We're also going to have to get pretty "well experienced" in the problems of building one of these because we plan on taking the skill with us to the disaster sites on our disaster projects. For more information on that - you can go to this topic: http://donkey32.proboards.com/index.cgi?action=display&board=tester&thread=689&page=1

That is - if our stakeholders will agree to it.

Anyway - thanks so much for the advice and tid bits of measurements. We'll probably be restarting the project tomorrow morning (today is my 32nd birthday, so we took the day off to enjoy and relax...and read lol)

"You have to be the change that you want in the world." Gandhi

Lord knows I'm tryin lol.
 
author and steward
Posts: 53492
Location: missoula, montana (zone 4)
hugelkultur trees chicken wofati bee woodworking
  • Likes 1
  • Mark post as helpful
  • send pies
    Number of slices to send:
    Optional 'thank-you' note:
  • Quote
  • Report post to moderator
I have deleted a lot of stuff from here. folks might want to take a moment to look at my publishing standards:

https://permies.com/t/17422/tnk/permies-publishing-standards

I want to make it clear that when you post to the forums, nobody is obligated to answer you. Further, if you ask somebody privately for help, it is possible that you can get that help for free, but I don't think you should expect it. If you were in washington DC, would you ask the president to explain his foreign policy to you, in person?

And sometimes the answer from an extremely advanced person might not make sense to you, but another person will be able to bridge the information gap - the beauty of forums.

I think some folks are probably willing to give private help for free. And some are not. Some are willing to give public help for free. And some are not. Please, let's not shame or punish those that are following a path that is different from that which is most helpful/free to you.

And now I wish to speak for a moment about my good friend Ernie: if you are new, i suggest that you ask Erica. She makes an excellent buffer between Ernie's bulldozer innovations and the people that might find themselves accidentally standing in front of the bulldozer. Ernie is wired to power through. Erica is a master of patient communication.

So somebody decided to email ernie and found themselves in the bulldozer's path .... and then a lot of that found its way here. Which I removed.

So, in a feeble attempt to bring this thread back on track I'm putting in the highlights that seem on topic.

Ernie would like to empahsize that the book is available to anybody to see for free at the library; Ernie and Erica will sometimes have the time to answer questions in the forums, which, of course, are free. However, for those that wish to contact them privately, they are glad to facilitate, but they do charge for this service.

In an attempt to help, Ernie presents a standard response:

it sounds like you got some proportion off.
what is the height of the heat riser from the bast to the top?
what is the gap between the riser and the barrel?
how much space do you have in the manifold?
how much space around the rat riser between the barrel and the riser?
how high is the cob around the barrel?
how new is the construction?
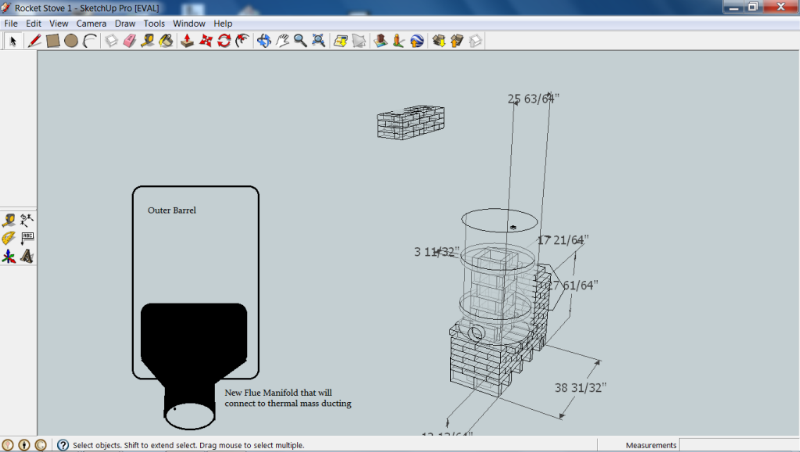
How long is the exhaust run?
do you have a vertical or horizontal exhaust?
is the exhaust inside or stuck through the wall?
if stuck through the wall is it insulated?
how sealed up is the burn tunnel, heat riser, and barrel assembly?


and later:

I suggest the book
because it can give you an over view of the process and make sure you
have all the parts you need. I to learn hands on but i dont like to
reinvent the wheel unless i have to and thats what the book is for.
our plans are for folks who just want a stove.

here goes
1. the heat riser should be around 48 inches tall.
2. from the front of the burn tunnel and fuel feed to the back of the
heat riser inside face of bricks should be 24 inches.
3. a 2 inch gap between heat riser and barrel.


Later, Ernie conveys that he recommends that people read Ianto's book, and that he receives no income from the book (even though ernie did contribute to it).

There is a lot that I have not put back here that does seem rather innocent for the most part. I'll leave it up to those folks to see if they want to try again.

If folks want to talk about my style of management of these forums, i encourage you to bring that up in the tinkering forum rather than in this thread or this forum. These forums currently serve about 700,000 people, and to pull this off we have adapted a few policies which work better for some folks than for others. no solution is perfect for all people. But this path seems to work pretty good for us.


pollinator
Posts: 490
Location: Englehart, Ontario, Canada
3
  • Mark post as helpful
  • send pies
    Number of slices to send:
    Optional 'thank-you' note:
  • Quote
  • Report post to moderator
Jamie, Isn't the drum, which will get hot, just a little close to that wall?
 
Tongue wrestling. It's not what you think. And here, take this tiny ad. You'll need it.
Free Seed Starting ebook!
https://permies.com/t/274152/Orta-Guide-Seed-Starting-Free
reply
    Bookmark Topic Watch Topic
  • New Topic