• Post Reply Bookmark Topic Watch Topic
  • New Topic
permaculture forums growies critters building homesteading energy monies kitchen purity ungarbage community wilderness fiber arts art permaculture artisans regional education skip experiences global resources cider press projects digital market permies.com pie forums private forums all forums
this forum made possible by our volunteer staff, including ...
master stewards:
  • r ranson
  • Nancy Reading
  • Carla Burke
  • John F Dean
  • Jay Angler
  • paul wheaton
stewards:
  • Nicole Alderman
  • Pearl Sutton
  • Anne Miller
master gardeners:
  • Christopher Weeks
  • Timothy Norton
gardeners:
  • Nina Surya
  • Matt McSpadden
  • thomas rubino

1st time build, first burn in house, not drafting like i think it should

 
Posts: 14
  • Mark post as helpful
  • send pies
    Number of slices to send:
    Optional 'thank-you' note:
  • Quote
  • Report post to moderator
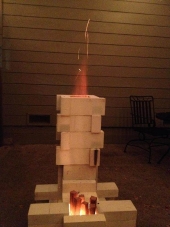
built my stove out of 8" x 3/16" pipe
took a 55 gal drum and shrunk it down to a 19" o.d.
took another 55 gal drum and places it with a 3" clearance at the top with 1-1/2" clearance on the sides
venting with 8" pipe
doesn't seem to have a good "rocket" effect right now, and when i open and shut a door to the
outside of the house it pulls a lot of smoke into the house
this is new, first time fired, one thing i thought may be effecting it is the up pipe insulation i used cob, had too much sand and was pretty wet
have a lot of steam coming out of it
so, could the cool temp on the up pipe cause poor rise?
should i have a window part open so it can have better air?
or is there a design problem?


IMG_0950.JPG
[Thumbnail for IMG_0950.JPG]
IMG_0974.JPG
[Thumbnail for IMG_0974.JPG]
inner barrel
IMG_0976.JPG
[Thumbnail for IMG_0976.JPG]
with outer barrel
 
Ron Mills
Posts: 14
  • Mark post as helpful
  • send pies
    Number of slices to send:
    Optional 'thank-you' note:
  • Quote
  • Report post to moderator
sorry, here is a pic with it cobed in
was short 1 cap for clean out, so it only has
1 pipe hooked up at the moment
IMG_0981.JPG
[Thumbnail for IMG_0981.JPG]
IMG_0982.JPG
[Thumbnail for IMG_0982.JPG]
 
pollinator
Posts: 4154
Location: Northern New York Zone4-5 the OUTER 'RONDACs percip 36''
67
hugelkultur fungi books wofati solar woodworking
  • Mark post as helpful
  • send pies
    Number of slices to send:
    Optional 'thank-you' note:
  • Quote
  • Report post to moderator
Ron Mills : Welcome to Permies.com / Richsoil.com, and a Big Welcome to the Rocket And Wood Heater Forum/Threads, & the Cob Forum !

To a Man with a hammer all problems are nails, I once had a neighbor with a dump truck who believed all drainage problems could be solved by
'trucking in more Fill'.

With mad welding skills like you have, I can understand Your natural bent to attempt to create a Rocket Mass Heater RMH out of metal pipe.
Also I am sure that you probably have been exposed to a Few Frankin-stoves on U-Tube !

I am afraid that I have little but bad news for you here ! A iron/steel RMH will quickly Fail due to the Freaky High Temperatures of its normal
operation and a Condition Called High Temperature Hydrogen Attack, Creating Hydrogen embrittlement!

The Rocket Stove which does not have the Heat pump effect of the RMHs well crafted Heat Riser, burns at lower, less efficient Temperatures
and the presence of both trace Carbon Monoxide and Carbon soot particles also helps preserve the metal from Hydrogen embrittlement but not
the day to day loses due to the metals increased affinity for Oxidation (rust) at its elevated temps!

RMHs with Combustion cores made out of metal are doomed, Rocket stoves much less so, they can even be made out of the larger sized soup
cans and last a few Weeks, but they too will fail!

So you have successfully proved that a Rocket Mass Heater does work, we just need to find out why yours is not doing better !

Most of Your fellow members responding in these threads are not far removed from where you are right now ! We found that 'reading from the
same book' was our best way to save Time and frustration in communicating with each other, as now most of us are beyond that hurdle we
often just assume you have "The Book'' !

Please, consider going to Rocketstoves.com to download your PDF Copy of the Brand New 3rd Edition of Rocket Mass Heaters !

With 100,000 + Rocket Mass Heaters Built World Wide- This is ''The Book''! Most RMHs have been built from the pages of this Book and 95 %
of all the 1st time builds (that worked) were built after an understanding of the core ideas allowed other builders to gather- Knowing that
they were using the same words to describe the RMHs Parts, their sizes, shapes, materials, and the orientation of its parts both to each other,
and to the Whole !

Again,Today Permies is the largest Permaculture Group in the world with the most active site for RMH exploration, When a new member comes
here most of your fellow members will assume you have read "The Book"! This one step will greatly improve communication and save time,
frustration, and money from understanding what are the right parts and where to 'source' them !

With as simple a horizontal run as you have shown in the last picture a well built vertical chimney should provide all the draft that you need !
A very common area for problems often seen is in the transitional area where the rapidly falling exhaust gases are swept into the Horizontal pipe
of the thermal mass, this 90º bend needs to be very generous, located above a deep Ash pit, and all the curves sweeping gently and gradually
into the 8" opening of the horizontal piping! A hand mirror and a flashlight will let you do a quick check for the internal condition of your chimney,
If there is an Outdoor Clean out at the base of the chimney make shut that it is in good condition and air tight !

For the Good of the Craft Big All
 
Posts: 2413
48
  • Mark post as helpful
  • send pies
    Number of slices to send:
    Optional 'thank-you' note:
  • Quote
  • Report post to moderator
Thanks for posting this and please keep us informed with how long it lasts. As many have said before...especially in this type of combustion furnace...metal parts are doomed to failure, if not sooner they will later (usually within a year or two.) It will be interesting to see how long the exposed metal lasts in your design of this type of heating unit.

Why did you choose metal over refractory stone species or clay?

Has any oxidation and break down of the metal been noted yet?

Is there "clean out" access for the riser and flue system?

Regards, and Again, thanks for sharing your progress and outcomes,

j
 
gardener
Posts: 3471
Location: Southern alps, on the French side of the french /italian border 5000ft elevation
194
  • Mark post as helpful
  • send pies
    Number of slices to send:
    Optional 'thank-you' note:
  • Quote
  • Report post to moderator
Ron, metal is doomed!

Nice welds tho!

So, what is your chimney and where is it?
 
Ron Mills
Posts: 14
  • Mark post as helpful
  • send pies
    Number of slices to send:
    Optional 'thank-you' note:
  • Quote
  • Report post to moderator
i went with steel because i could build for the same price as fire brick.
didnt know about the failure of the steel... oops that sucks lol
also i know how to work with steel, not so much with stone.

i was just going to run pipe out of the wall with a 90 on the end
so i would need a vertical chimney as well?


the transition into the pipe is pretty gradual, it is mostly cob
here is a picture that may show transition better
IMG_0977.JPG
[Thumbnail for IMG_0977.JPG]
 
Ron Mills
Posts: 14
  • Mark post as helpful
  • send pies
    Number of slices to send:
    Optional 'thank-you' note:
  • Quote
  • Report post to moderator
i guess my next question is, what happens when it fails? what do i need to look for?
it is surround with cob and brick. but i only have a single layer of bricks under it?
bricks are sitting on particle board.
how long does the barrel last?
 
Satamax Antone
gardener
Posts: 3471
Location: Southern alps, on the French side of the french /italian border 5000ft elevation
194
  • Mark post as helpful
  • send pies
    Number of slices to send:
    Optional 'thank-you' note:
  • Quote
  • Report post to moderator
Ron, so, barrel lasts, it's not in the oxydizing area anymore. There's some which may be 40 years old.

If you gave put clay all around your metal burn unit. It shouldn't be too much of a problem. Just remove the spalling bits as they apear. And check often. Look also for cracks in the clay when metal is all gone. Insulate that clay well, so the burn unit is efficient.

A good transition area is important, that's for sure.

But a chimney even more! http://en.wikipedia.org/wiki/Stack_effect

Hth.

 
Jay C. White Cloud
Posts: 2413
48
  • Mark post as helpful
  • send pies
    Number of slices to send:
    Optional 'thank-you' note:
  • Quote
  • Report post to moderator
I hate saying it Ron...but this is one to "do over" and follow the standard builds on. Perhaps really do some deep research and reading on the subject hear at Permies. We have articles on all manner of information and related article links, from RMH to Korean Ondol etc.

Sorry,

j
 
Ron Mills
Posts: 14
  • Mark post as helpful
  • send pies
    Number of slices to send:
    Optional 'thank-you' note:
  • Quote
  • Report post to moderator
ok, i was on the understanding that the up pipe in the heater acted as the chimney
and the push from that went through the vent so there was no need for a up pipe
so, if i add an up pipe out side that will help?
do you think this will work for this winter?

 
allen lumley
pollinator
Posts: 4154
Location: Northern New York Zone4-5 the OUTER 'RONDACs percip 36''
67
hugelkultur fungi books wofati solar woodworking
  • Mark post as helpful
  • send pies
    Number of slices to send:
    Optional 'thank-you' note:
  • Quote
  • Report post to moderator
Ron Mills : During the Outdoor build phase as soon as the Barrel goes over the Heat Riser, you must place a tall vertical chimney !

When Ianto Evans created the Rocket Mass Heater RMH, he looked for a home that became the community of Cobville, Here near the west coast
he found a reagon with a very stable climate with a mild heating season and winds out of a constant direction nearly year round, on top of that
his buildings that were built around their RMHs were mostly one story, and shaped like a button mushroom, Here In this favored location he was
able to vent his RMH to the outside on the Lee side of the Building in almost every structure !

You on the other hand are retro-fitting your RMH into an existing structure ! The plan for your Final Vertical chimney should be for it to be on
the lee side or downwind side of your house and may need to extend 4-5 feet over the peak of your roof with a storm hood, only time will tell !

Do a Google search for High Temperature Hydrogen attack, Hydrogen embrittlement, and steam embrittlement ! Actually you wanted to surround
the entire combustion core with insulation not pure cob, this will raise the Internal temperatures making for a cleaner burn, and causing the
metal to fail sooner !

The crystalline structure of the hottest sections of your build will fail first, and you will start to clean out little cubed shaped pieces of metal, just
about like the way the pieces of broken Glass from a cars side windows look ! at that point there will also be some buckling of the metal and
possibly blister formations

A requirements for the type of metal to form Barrels is very similar to the type of metal used to form the heat exchanger portion of a Fossil Fuel
fired Forced-air Furnace, ( The barrels metal is a heavier gage ) Most of these F.F.F.F.-air Furnaces guarantee their heat exchanger 20,25,30 years
I have not heard of a single barrel being retired because of its failure, though they have been built since the 70s

So Now I will send you off to a site on You-tube ( Please be aware that there are a lot of builds on u-tube that are very Crappy Flaming units of
Death, Beware! !!!) Here you will see some good building techniques in the work to protect the floor and the wall exposures ! GoTO :::-->

http//www.youtube.co/user/villagevideoorg/ Hint highlite the BOLD part and right click to open in the Web Address Window or as a
Google Search.

On that page hover the mouses Icon overRocket Mass Heater Scenes, and click on [PLAY>] sit back and watch the
whole thing, this is what you need to have done !

How have you beefed up your floor to take the increased weight load ! ! For the Craft ! Big AL !
 
Ron Mills
Posts: 14
  • Mark post as helpful
  • send pies
    Number of slices to send:
    Optional 'thank-you' note:
  • Quote
  • Report post to moderator
at this point i need to know if you think anything is salvageable?
my wife is going to kill me, lol
 
Ron Mills
Posts: 14
  • Mark post as helpful
  • send pies
    Number of slices to send:
    Optional 'thank-you' note:
  • Quote
  • Report post to moderator
if i pull this apart and cast refractory cement around it, would that work?
 
Ron Mills
Posts: 14
  • Mark post as helpful
  • send pies
    Number of slices to send:
    Optional 'thank-you' note:
  • Quote
  • Report post to moderator
other than the chimney and the steel, lol.... everything else should be fine. right??
i know those are the main parts, but i need to get this working.
 
Satamax Antone
gardener
Posts: 3471
Location: Southern alps, on the French side of the french /italian border 5000ft elevation
194
  • Mark post as helpful
  • send pies
    Number of slices to send:
    Optional 'thank-you' note:
  • Quote
  • Report post to moderator

Ron Mills wrote:at this point i need to know if you think anything is salvageable?
my wife is going to kill me, lol


Ron, build with it, put a 2 good inch layer of cob around the core, everywhere. Do that if possible when running, so the pipe will be hot and expanded, which will limit cracks in the future cob core you'll have after all metal have spalled. Then suround that with sheet metal, and packed insulation. Leave a suficient gap between insulation around the heat riser and the barrel side. I like it in the range of 2.5 inches to 4 inches.

Your metal core will die, but the rest will remain.


14 burns, the steel of the elbow was a 1/4 inch thick hydraulic pipe, used to do the water and compressed air network of snow canons, at the chairlift company i work for.

It had spalled soo much at the black part, that the tube was reduced by a quater or a third. It was like puff pastry inside. Brown part is the feed tube, elbow and tube going to the gas bottle is the burn tunel. The gas bottle was used as a kind of expansion chamber, before the heat riser which was above.

Here you can see the screws the heat riser was attached to


The metal got soo hot that it colapsed under it's own weight!
 
allen lumley
pollinator
Posts: 4154
Location: Northern New York Zone4-5 the OUTER 'RONDACs percip 36''
67
hugelkultur fungi books wofati solar woodworking
  • Mark post as helpful
  • send pies
    Number of slices to send:
    Optional 'thank-you' note:
  • Quote
  • Report post to moderator
Ron Mills : I Think that trying to use a Refractory cement in order to save your build would require a very thick coat of the Refractory cement.
This would be very $pendy As an alternate choice, I can direct you to a youtube.com video channel that will give you another option GoTo :::--->

http://www.youtube.com/user/broaudio/videos highlight the BOLD part and right click to open in the Address window or a Google Search

Next, find and click on the video labeled Rocket Mass Heater Cast Core Build This is a much more durable construction thick enough and strong
to provide a backup combustion core followed by that part being wrapped in more insulation to promote the freaky hot temperatures necessary to
provide the Clean burn, and highly efficient heat energy production !

Please tell me that you have ordered your Rocket Mass Heaters 3rd edition, for the good of the craft !Big AL

 
Ron Mills
Posts: 14
  • Mark post as helpful
  • send pies
    Number of slices to send:
    Optional 'thank-you' note:
  • Quote
  • Report post to moderator
Thank you for all your responses
I have tore my heater apart
I have watched all the videos recommend
And will be ordering the book tomorrow
One more question for now.
Is it better to get actual book.
Could the downloaded book be viewed on iPhone ok?
 
Rocket Scientist
Posts: 4587
Location: Upstate NY, zone 5
600
5
  • Mark post as helpful
  • send pies
    Number of slices to send:
    Optional 'thank-you' note:
  • Quote
  • Report post to moderator
"it is surround with cob and brick. but i only have a single layer of bricks under it?
bricks are sitting on particle board. "

You have just one layer of bricks between the burn tunnel and the particle board on the floor? This is guaranteed to heat up the wood materials to combustion temperature after a long burn or two at proper RMH operating temperature.

You need to take this out and add another layer of brick or the like, plus a good 2" air space between the masonry and the wood. Anything less and it is only a matter of time until you burn your house down.

Note - I see you are already proceeding to start over. Good luck!
 
Ron Mills
Posts: 14
  • Mark post as helpful
  • send pies
    Number of slices to send:
    Optional 'thank-you' note:
  • Quote
  • Report post to moderator
Ok, I lied. Lol. Another question
And thank you again for your responses

The cast burn tunnels don't have clean outs for the burn tunnel.
Does that make them more difficult to clean?
Can you put in a clean out Or not really necessary?
 
Glenn Herbert
Rocket Scientist
Posts: 4587
Location: Upstate NY, zone 5
600
5
  • Mark post as helpful
  • send pies
    Number of slices to send:
    Optional 'thank-you' note:
  • Quote
  • Report post to moderator
The point of the insulated refractory core is to get so hot that you have complete combustion, i.e. no coals left over. If built right, you can have as little as a gallon of ask built up over a couple of months. A cleanout is discouraged as it gives a path for air leakage and lower efficiency. Early versions of the RMH did include an ash pit, but that has been found to be generally unnecessary.
 
Ron Mills
Posts: 14
  • Mark post as helpful
  • send pies
    Number of slices to send:
    Optional 'thank-you' note:
  • Quote
  • Report post to moderator
Awesome. Thanks.
One other thing. The book I read was older.
But they specified to have a 3" air gap at the top
And 1-1/2 on the sides.
Is the 1-1/2" not necessary?
I see the ones you all have pointed me to are not making that a big deal
 
allen lumley
pollinator
Posts: 4154
Location: Northern New York Zone4-5 the OUTER 'RONDACs percip 36''
67
hugelkultur fungi books wofati solar woodworking
  • Mark post as helpful
  • send pies
    Number of slices to send:
    Optional 'thank-you' note:
  • Quote
  • Report post to moderator
Ron : I like to see a 2'' gap, it makes the Feed through flow of air easier to accomplish within a marginal Transitional area ! For the Craft! Big AL
 
Ron Mills
Posts: 14
  • Mark post as helpful
  • send pies
    Number of slices to send:
    Optional 'thank-you' note:
  • Quote
  • Report post to moderator
The cast heat chamber video you recommended
He built on with a 14" od barrel
And the other videos they just wrap the firebrick with refractory wool. Is that dimension not so important.
I know, I havnt read the book yet. But since I can't read that tonight, and not building mine anymore. Lol
Might as well ask. Right?
Top clearance is important for draft. Right?
Does side clearance matter?
More clearance make side of the barrel cooler?
 
allen lumley
pollinator
Posts: 4154
Location: Northern New York Zone4-5 the OUTER 'RONDACs percip 36''
67
hugelkultur fungi books wofati solar woodworking
  • Mark post as helpful
  • send pies
    Number of slices to send:
    Optional 'thank-you' note:
  • Quote
  • Report post to moderator
Ron : The Deference between the High Temperatures Found in the Interior of the Heat Riser and the Temperatures outside of the Heat Riser causes the
push me pull you magic that allows the Hot exhaust gases to flow 50' horizontally through the Thermal Mass.,The use of a super insulated Heat Riser, or
insulation wrapped around the Firebrick Heat Riser is there to keep the two temperature streams from equalizing and stalling out the flow!

A generous 2'' gap between the Heat Riser's outer wrap of insulation and the inside of the barrel helps ensure that the Feed through flow of Hot exhaust
gases easier to accomplish within a Marginal Transitional area. Rather than it being 'not a big deal' think of that gap as the minimum clearance that is
universally adhered too and never questioned ! Hope this helps and is timely, for the Craft Big AL
 
Satamax Antone
gardener
Posts: 3471
Location: Southern alps, on the French side of the french /italian border 5000ft elevation
194
  • Mark post as helpful
  • send pies
    Number of slices to send:
    Optional 'thank-you' note:
  • Quote
  • Report post to moderator
Ron, for floor protection, a good 8 inches of air entrained concrete blocks (here in France we have Ytong) should do the trick. With refractory bricks on top.

What al is trying to explain is laminar flow.

Look at the little pic at the left.

http://en.wikipedia.org/wiki/Laminar_flow#Examples

The boundary layer is stuck by friction to whatever material the stream is touching, and each layer further away from that goes a little faster. IIRC, a 3cm gap between two walls nearly stalls all the convection movements in the gases. due to a lot a friction.

If you think, that 3cm figure is real close to 1"1/2 That's why i say 2"1/2 3" is good in my opinion. The ring or circumference projection in the gap on top of the barrel has to be bigger too, than 2 inches, because of the friction added by turbulence of a flow which is changing direction.

Al, do you remember where i explained ring projection?

Hth.
 
allen lumley
pollinator
Posts: 4154
Location: Northern New York Zone4-5 the OUTER 'RONDACs percip 36''
67
hugelkultur fungi books wofati solar woodworking
  • Mark post as helpful
  • send pies
    Number of slices to send:
    Optional 'thank-you' note:
  • Quote
  • Report post to moderator
"Max'' : More and more I have been turning ''apples' into 'flags'' and then using the flags as a second bookmark for things I hope to be able to retrieve that way .

https://permies.com/t/39824/rocket-stoves/Couple-quick-Noob-questions-design Highlite the BOLD part, right click to open in Address Window

or as a Google Search !

Search Oct 20th where we hashed the whole thing out ! Big AL
 
Satamax Antone
gardener
Posts: 3471
Location: Southern alps, on the French side of the french /italian border 5000ft elevation
194
  • Mark post as helpful
  • send pies
    Number of slices to send:
    Optional 'thank-you' note:
  • Quote
  • Report post to moderator
So, here's the explanation of ring or perimeter projection!

https://permies.com/forums/posts/list/39824#315671
 
Ron Mills
Posts: 14
  • Mark post as helpful
  • send pies
    Number of slices to send:
    Optional 'thank-you' note:
  • Quote
  • Report post to moderator
wow..... i guess that's a bit over my head.
i understand that there is a formula and air flow is important, and the right amount of air flow is also important
at this time, the math isn't clicking with me. but that's ok, so the builds i was referencing, fire bricks wrapped in refractory wool. that is not the finished product,
they will be adding more to that to get the correct outer diameter?
i am getting the book, and trust you guys, your the experts, saved me from burning my house down lol
thanks guys.
i am more of a visual learner, so pics, videos, and drawings help a lot.

i think i am leaning more toward the poured refractory burn tube. liked the video you shared with me.
i am also re-figuring the base to keep heat from the floor....... well, i am removing everything i did, and starting from scratch.
so any links to good units i can look at would be appreciated.
also, this is being built in a single wide mobile home. i supported the floor with 4x4's length and up support with concrete under that.
after hearing some of the weights they were talking on the videos i am reconsidering this. i was thinking 1-1/2 tons i have a king size water bed with no support that weighs 2000 pounds
suggestions ? do you have a estimated formula for figuring weight ?
i really appreciate all your help. thanks guys
 
Satamax Antone
gardener
Posts: 3471
Location: Southern alps, on the French side of the french /italian border 5000ft elevation
194
  • Mark post as helpful
  • send pies
    Number of slices to send:
    Optional 'thank-you' note:
  • Quote
  • Report post to moderator
http://www.engineeringtoolbox.com/density-materials-d_1652.html

And if you like visual: http://donkey32.proboards.com/post/11503/thread
 
Jay C. White Cloud
Posts: 2413
48
  • Likes 1
  • Mark post as helpful
  • send pies
    Number of slices to send:
    Optional 'thank-you' note:
  • Quote
  • Report post to moderator

Glenn Herbert wrote:... A cleanout is discouraged as it gives a path for air leakage and lower efficiency...


Hi Glenn,

You may want to expand on this a bit...as "clean out ports" are required by Code in many areas and in most standards for any combustion wood/fuel burning furnace. I will admit most of my background is in ceramic kilns, masonry heaters, wood fired ovens, and Asian under floor masonry heaters..all of which the RMH is just a version of with very similar (exact?) characteristics of. Ash and soot ports are in all the better versions...

Ron,

I think you will be much happier with a rebuild carried out to more of the "known standards" for RMH. You are getting outstanding advice, in general, on many points hear. Ernie and Ericas videos are excellent "overviews" of building one of these units, and I woulds stress that even in their video they mention bringing in professionals and PE (Professional Engineers) into projects. They have learned much over the years of building these, yet still own what is beyond their capacity. I would point out in the 19 video synopsis of RMH that "aluminum foil" barriered in the cobb mix IS NOT working as any form of reflective or radiant barrier...it just can't...which boils down to physics not worth getting into. The aluminum is working as separator, but not as a radiant one. To be effective, the reflective surface must face an air space. Dust accumulation on the reflective surface will reduce its reflective capability, as well any contact with a "masking agent."

Think of it this way...if you have a sheet of glass mirror it is highly reflective...paint it black, and it no longer has any reflective qualities and only acts as a piece of glass...buried radiant barriers are worthless as they are the same as the piece of painted glass...

Some terms to look up and understand should you want to delve deeper into this subject:

Radiant barrier
Reflectivity
Light Reflectance Value
Form factor (radiative transfer)
Emissivity
Transmittance
Bidirectional reflectance distribution function
Light Reflectance Value
Albedo
Stefan–Boltzmann law
Sakuma–Hattori equation
Lambert's cosine law
 
Glenn Herbert
Rocket Scientist
Posts: 4587
Location: Upstate NY, zone 5
600
5
  • Mark post as helpful
  • send pies
    Number of slices to send:
    Optional 'thank-you' note:
  • Quote
  • Report post to moderator
I was referring solely to the cleanout at the base of the feed tube which I often see included in builds on youtube. Clarifying that point is a good idea so people stumbling on that post out of context do not take it as a blanket recommendation.

A J-tube built to standard dimensions will allow enough space to reach in through the feed tube and clean out any ash buildup, which will be minimal in a properly functioning RMH.
 
Ron Mills
Posts: 14
  • Mark post as helpful
  • send pies
    Number of slices to send:
    Optional 'thank-you' note:
  • Quote
  • Report post to moderator
Yea, I was kinda wondering about the tin foil. Hahaha
So, if I cast the J tube. That is 4" thick. What would you recommend under it? I am going over a lamanent wood floor, I had carpet padding with particle board over that.
Then brick? How much heat is going down?
 
Glenn Herbert
Rocket Scientist
Posts: 4587
Location: Upstate NY, zone 5
600
5
  • Mark post as helpful
  • send pies
    Number of slices to send:
    Optional 'thank-you' note:
  • Quote
  • Report post to moderator
Under the burn tunnel and heat riser, you have up to 2000 degrees inside. If you have solid material of whatever sort (no air circulation spaces), all of that heat will eventually find its way down through the base masonry into the wood floor which is a decent insulator. Given especially that continued exposure to heat above 150-200 degrees (not sure of the exact threshold) will eventually (months - years) pyrolize the wood, driving out volatile gases and making its combustion temperature lower, a solid base that is not extremely thick will eventually cause a fire in the floor. You need some air spaces as well as insulating refractory and plain masonry thickness if building against wood.

By the way, a cast refractory J-tube doesn't need to be as much as 4" thick (the stuff is expensive!) Usually, 2" should be enough, backed up with added lower-capacity insulating material like clay-perlite. If you are making a 6" system, 1 1/2" thick ought to be fine.
 
And tomorrow is the circus! We can go to the circus! I love the circus! We can take this tiny ad:
Research Study: Simple Living and Work ($10 WWF Donation)
https://permies.com/t/277789/Research-Study-Simple-Living-Work
reply
    Bookmark Topic Watch Topic
  • New Topic