Casey Williams

+ Follow
since Mar 21, 2016
Merit badge: bb list bbv list
For More
Apples and Likes
Apples
Total received
In last 30 days
0
Forums and Threads

Recent posts by Casey Williams

Thanks for the response.

I didn't intend to get into the weeds with the kiln specific stuff because of the forum topic area not fitting. But yes, it is fun to play around with different designs. I have been working with biochar a lot the past year. I've tried many small scale kiln styles/designs. I've also chatted with Kobus about the Black Ripple Kiln and about my previous kiln design. The previous design was two carbon steel sheets with ceramic fiber blanket insulation in-between as the kiln walls. The barrel would go inside and I used wood chips to stuff between the walls and the barrel and then be top lit to heat the barrel and start pyrolysis. It worked really well and I could make biochar out of 8" diameter logs, all the way down to twigs. I have ideas for burning wood chips, nut shells, etc as well but haven't tried in this retort. The last kiln design burned out the inner metal wall rather quickly so now I'm moving on to something similar but with SS outer wall, ceramic fiber inner wall (not sandwiched between another sheet of metal), and (ideally) rocket core to heat. I'd love to have a discussion about design privately or in a different forum thread! I don't get to chat about this much with others...haha.

Anyway, back on topic, I was thinking last night that I'm pretty sure that my idea will work for two reasons.

1) I at first built a small portable core and covered it in aluminum sheet. What I'm thinking of now is similar...between what Kobus suggests and what I built before. The core "worked" but I didn't get enough heat to start pyrolysis after an hour (I think my core was too small). I got the burn going by other means and the heat/flames (I let the gases come out of the bottom of the barrel for a more complete burn) melted the aluminum covering on the kiln half...dumb of me to have tried the core that way with those intense temps. I'll get around to fixing the portable core and use it for a rocket stove.

2) Later, with the old design I had a 6" diameter black stove pipe, 2' in length with a 90 degrees elbow on either end, buried under the kiln in a similar fashion as the portable rocket core. This was for increased airflow at the bottom of the kiln. Once things got warm the draw from the pipe was awesome. Eventually, I would have to cap the outside elbow because the burns were so intense that they would start pushing gasses out of the pipe. But overall it worked great and I assume that a buried firebrick core would work similarly.

Here is what I'm going to try for the buried firebrick core. The top of the vertical sections from the feed area and the tiny heat riser will be level with the ground.

7 months ago
I have a kiln design that I am working on. The outer wall will be several panels of stainless steel that are bolted together. There will be ceramic fiber blanket on the inner wall. There will be a 55 gallon drum inside of the SS cylinder that will hold the wood to be pyrolized.

I've seen similar designs with the kiln walls made out of masonry of differing kinds where they have the barrel on bricks and then build a fire through the walls of the kiln (and under the barrel). I built something similar to this last year but this is a new design for me and I really want to utilize a rocket core for more efficient heating fuel.

**I'm not asking for any design help on the kiln build...just wondering if I can build a rocket core as described below and have it function properly.**

I want to bury firebrick (I have access to both full and split sized) in the ground to make a "J tube" of sorts. I want the burn tunnel to be buried so that the top of the burn tunnel is level with the ground and the fuel feed sticks up just a touch (or however much it needs to). However, in order to have the kiln walls on the level ground as well, there would not be a heat riser. I am wondering if the SS kiln wall in and of itself could effectively act as the heat riser. This would mean that the rocket core would have fire brick for the burn tunnel and the fuel feed and then just have an opening at the top of the burn tunnel on the kiln side to release heat into the kiln. Would something like this work? Thoughts? See my basic Sketchup images for an idea of what I am envisioning. Let me know if my description is not clear enough and I'll try to better explain.

7 months ago
There are the mushroom bottles that they use a lot in Asia. They generally require hundreds of thousands of dollars of equipment to make it labor/cost efficient in the long run. https://keolamagazine.com/land/mushroom-in-a-bottle/

Additionally, I have been playing around with using high-temperature resistant restaurant containers (Cambro or Rubbermaid) with holes drilled in the top as opposed to one use poly bags. They can be pressure sterilized or steamed at high temp. for long periods of time. I am only trying to grow out the mycelium (not going into the fruiting stage) to use for compost piles, but I am thinking that the resulting blocks could be used to fruit mushrooms in a similar way to the poly bags. I've just started experimenting with these, so I don't know if it will work in the end and/or be efficient enough. It is a promising start for me, though!
6 years ago
Alas, I still haven't gotten the book! I ordered it from two different vendors and had to have my money refunded both times, because they did not have/deliver the book.

How can a book be so hard to track down!?

I found it from two other vendors, but for double the price. If/when I decide that I can afford it, I'll let you know how it is. Please let me know if you find it frown another source in the meantime.

Best of luck with your tropical fungi endeavours!

7 years ago
Myceliated cardboard to woodchip is certainly doable and there are some great references out there that can help you along the way to growing mushrooms with that method.

The focus of this thread, however, is using wood chips in 5 gallon buckets.

Best of luck to you with all your growing (ad)ventures!
7 years ago
In my opinion a good option is logs, stumps, or wood chips. These options take a bit more time to fruit.

On a shorter time scale, though, you can do the 5 gallon bucket method with pasteurized or "cold fermented" straw. I got lots of food grade buckets from local stores (Wal-Mart bakery icing buckets) and restaurants. Just call around and ask. Many times they are just throwing them out, anyway.

15-20 holes are drilled per bucket. I think 1/2" diameter, but can't remember off the top of my head...I'd have to look it up. And you drill 5, 1/8" holes in the bottom for drainage.

I have been using this method and it is (comparably) fast, very easy,  and has very low energy input.

****You usually inoculate the straw with myceliated grain spawn (or maybe cardboard spawn?) when using this method****

I don't think you would get enough production from fruiting only out of jars to make it worth your while. But I'm not sure on that front...just what I think based on my experience.
7 years ago
I just ordered this book! It was a bit hard to find, but I finally got it from biblio.com. Still waiting on its arrival, so I can't comment on its contents.

"Technical guidelines for mushroom growing in the tropics- Quimio, Chang, Royse"


I live in deep south Texas and have had trouble growing mushrooms outdoors except for in Fall and Winter. Just built a semi-climate controlled environment (insulated tin building with window unit A/C and a fog humidifier) and got some mushrooms fruiting now.

7 years ago
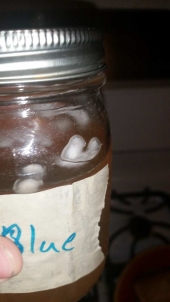
It was more than likely the mycelium that you were seeing. Mycelium suspended in liquid looks quite different than mycelium growing on an object. As previously mentioned, it is never a good idea to open your LC jars unless you have a glove box or flow hood. I pretty much never open my jars unless I am emptying the contents.

One other thing you can do in the future to check for contaminants is to just let the jar sit for several days without stirring. The mycelium may come to the top for air, but if any other organisms are present, they will also come up for air. You'll see (usually) green or black contaminants on colonizing the top of the liquid if they are present.
8 years ago
Cybil, I currently live in Corpus Christi, TX. It is often very hot and very humid here.

I am currently constructing a small mushroom growing building and hope to attempt some outdoor, more "natural" installations in the future as well.

The fermented straw method requires no pictures, as they would be pointless. You literally just shake some straw into a container (trying to make sure there are no large clumps) and cover it with water (with no chlorine or chloramine....you can use ascorbic acid to remove the chloramine). When it gets smelly (one to two weeks, depending on the outdoor temp.)--yes, it can get quite smelly, because you are relying on anaerobic bacterias to colonize the straw--then it is ready to use. Drain the water off and innoculate.

I am generally on the Paul Wheaton side of "if it smells, then you are doing it wrong" these days (though I personally think that there can be exceptions to that rule), so it's not my favorite method. BUT it is very easy and has a very low energy input.
8 years ago
I will eat sardines on top of most any veg....roasted, steamed, sautéed. But I REALLY enjoy them mixed into a really good salad. Just make whatever salad you like (I like a dressing of olive oil, lime/lemon juice, and smashed avocado mixed and tossed with the salad) and make sure that the sardines are mixed thoroughly through the salad. You get the flavor of the sardines, but it is not overpowering.
8 years ago