James victor

+ Follow
since May 23, 2016
Merit badge: bb list bbv list
For More
Apples and Likes
Apples
Total received
In last 30 days
0
Forums and Threads

Recent posts by James victor

Pearl Sutton wrote:I was interested in the picture James Victor posted, it was hard to read... Too much caffeine on an off day, I redid the text to make it legible. Can someone look at it and see what the bits of red text are? I'm uncertain of those... some E looking things that look like a specialized symbol (edge to edge maybe?) and 6 inch butyl tape? I see no such thing on line for sale, not sure I have that right.
As far as the drawing itself, wow. That dude has a much higher budget for butyl tape than I do. And uses a LOT of the stuff. Not sure about a lot of it for my own use, but it is an interesting reference diagram.


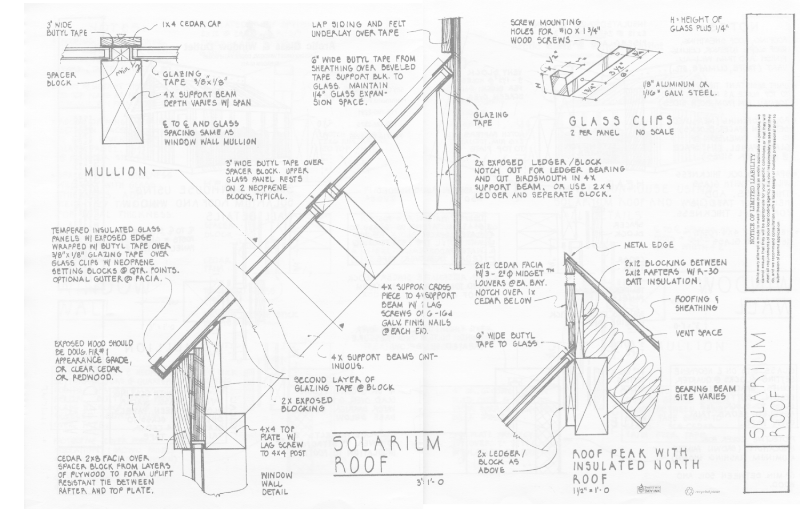

Butyl tape is expensive , and I would be be using butyl rubber cartridges.

This tape is good , and about the cheapest.

GSSI Tape
7 years ago


Best to keep it simple as possible I think IMHO.

I would add small hardwood blocks to keep the wind from lifting the glass.

I have built green houses out of hardwood that lasted decades.

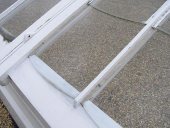
Just as a point of interest , the curved glass edge  is designed to guide the water away from the wooden frame.

Some detailed drawings that may inspire :

7 years ago


Framing around the drop box is in place.


Checking ceiling plate for fit.


Bottom of the drop box is flush with the ceiling.

The rain stopped any more work ( on the roof) today , so thats it until next weekend.
8 years ago
Hello everyone.

I installed the flue liner / drop box today during a break in the rainy weather.

Look there is a big hole in the roof ............


I fitted metal screen over the vent slots ,the thought is to prevent mosquitos and those hairy Huntsman spiders from making their way down the heat shield / liner and into the cabin.

In case you are not familiar with Australian Huntsman spiders , here is one from last summer when I was fitting some of the ceiling panels to the cabin interior :
Large hairy spiders , but actually quite harmless , unless you really tease and aggravate them , then they can bite.
Best to not invite them in.


I had trouble photographing the vent slots I cut into the housing because of the black painted surfaces and black mesh,
but they are long slots as marked in the photo.


Once the rain cap is screwed down the mesh is not seen at all.
The flue will come out at the centre.

It should be relatively easy to give the screen a quick scrub with an old toothbrush at the end of each season.

The flue itself is quite well sealed at the stove , so I don`t anticipate any problems there.


I now need to frame around the liner to install the ceiling panels.

8 years ago
The good news is that my flue was delivered on Friday.

So I heat set the paint today.


This little stove draws almost as good as rocket stove !


The lower heat shield barely got warm.


Sliding damper .


I also managed to fit a tri - stay to my cooking pot cowling today.


To make cleaning the flue a little easier , the cowling is just a tight push - on fit.

Not much to show for a weekend of messing about really , but its another step in the right direction I guess.

Next week end , weather permitting , I will attempt to cut a hole in the roof to fit the drop box to the boat.


8 years ago
Thank you for your interest Glenn.

I have been working on making more parts for the installation of the wood burning stove .

The cowling is a recycled cast alloy cooking pot:


The cowl will look something like this.

These are ADD or Anti Down Draft cowls , they are really simple in design , but they do work well.

The wind / air moves over the circular cowling which creates a slight pressure difference inside ( low pressure ) which causes additional draft to clear any hot exhausts or smoke away.

There are more small items to add to get the thing assembled , but this gives an idea of what this will look like.

The ceiling plate was fashioned from a recycled stainless steel BBQ drip tray.


To reduce buckling the edge of the flue hole was reinforced with a piece of split ( slotted ) 3/8 inch copper pipe.

I also made the bottom heat shield for the wood burner today.

I made the heat shield below the ash box from left over C- Channel sections bolted together.


The ash box bottom piece is cast iron , I inserted 50mm ( two inch ) steel angle spacers to cool the bottom.


There is another heat shield that will be riveted under the primary heat shield.


No further shielding should be required , the heater is ready to be mounted .

Paint is next.


8 years ago

Kari Gunnlaugsson wrote: When i hear you say 'shanty boat' i'm imagining a barge or maybe a scow hull, is that right? Sheltered waters, not much moving around? Towed or under power, but not sailing? I guess my main concern would be that what the boat needs to function as a boat comes first, and if a stove can fit within those parameters then carry on. It seems like it would be hard to get the weight very low in the hull as the heater is going to need a certain amount of vertical height to function and if you want it as a bench it's already above the sole..........


Excellent post Kari !!!

Love the Pelican boat too !
8 years ago
Lovely work.

Beautiful building.
I just found this thread ,

all I can say is impressive guys !
8 years ago
I " found " some time today to work on the river boat.

Not a lot to show , but its all progress I guess.

To install the wood burner stove , I need to insulate the 100 mm ( four inch ) flue from the surrounding combustible ceiling panels and roof framing.

As I am waiting for the stainless flue order to arrive , in the mean time , this is a start at making the drop box that will penetrate the ceiling and hopefully prevent the house from burning down.

This is the first skin liner that will surround the flue as it passes through the ceiling.

It is recycled sheet metal from an old washing machine casing.Its nice thick sheet metal that can take some hammering .
The bends and folds were just shaped over some scrap 50 mm steel angle , and the two haves riveted together with pop rivets and sealer.


There is another second skin that is spaced about 25mm away from the inner liner .

The four inch flue will be placed inside these.


I fashioned a cone shaped piece that fits over the outer shield ( left ).

Holes will be cut or drilled along the very top edge to allow the hot air to vent out.


The piece on the right is where the flue will exit in the centre.

The narrow skirt that can be seen around the outside is a shield to prevent rain water from entering the vent holes.

I will cut and seal the circular hole for a watertight fit when I have the flue.


Next is making the ceiling plate and witches or chinaman`s hat ( cowl ).

Thanks for looking.

8 years ago