A quick thanks to all who have participated so far on this thread. Sharing ideas, questions and concerns is what makes a public forum valuable.
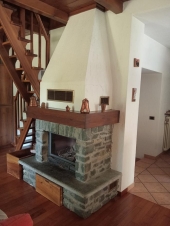
It appears that the single biggest reason that contributors have mentioned as to the reason for not building an RMH is the concern for uninsurability of their home. For a new home build this becomes more of an issue when a building permit is closed and the local county creates the home profile for real estate tax purposes indicating that the primary heat source for the home is a wood stove. If this is the case for concern, when planning the build, having another source of heat that can be viewed by the local authorities and insurance companies as the primary heat source would get around this. It also provides a means of keeping the pipes from freezing if you will be away from home for multiple days. For existing construction with a different primary heat source, this is much less of an issue. I’ve never experienced an insurance company demanding to walk-through my home to see what is going on inside. So, this really becomes personal choice whether or not to allow a potential concern to drive your decision-making of what you do in your home. I can tell you that going on my 3rd heating season with my batch box design RMH (assuming the person follows the build design that many of us have adopted for a double-skin RHM with the guidance provided for a “proven design” as Peter van den Berg would say) a batch box RMH is safer than any metal box stove and as safe if not safer than any standard method of heating a home. Of course, this decision is one for each person to make, I’m not trying to tell you what to do.
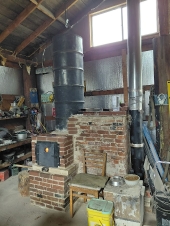
It would appear that the next biggest reason is perhaps confusion over the various designs and their benefits/challenges in being able to compare them, leading to avoidance to proceed. My observation over the past few years of researching then building my own batch box is that you have to really invest time to read Permies Donkeys (Proboards) forum and any other resource you can find, and most importantly, ask lots of questions there are lots of great people ready to help you get started. Unfortunately, there is no single, easily accessible source that fully walks a newbie through the technology options, general nomenclature used, the benefits and use-cases of each and a general guide to building. So, the profile of a successful RMH builder is someone who is unafraid to tackle a somewhat complex project and construction skills that they may not currently possess.
Other reasons were also mentioned, including the existing home structure being insufficient to support the weight of a RMH and no reasonable alternate place to locate, like a basement. My goal with this thread is simply to get people talking to perhaps spark interest and ideas to incorporate this wonderful old world means of wood heat but doing so in a much more efficient manner. Keep the conversation going!