At first blush it might seem like a waste of time to make a tin can stove perform optimally. Same at second and third blush, but somewhere around seventh blush some benefits may start to appear. This was more an exercise in optimization using available waste materials than anything else, and it presents a good opportunity to talk about optimization in general.
Optimization is not usually the same thing as improvement. In almost all things we deal with in the modern world, there is little room for objective improvement but there is almost always space for optimization to the specific situation. A simpler way to say this would be: almost all improvements require trade-offs. The more complex a system is, the harder it is to foresee all of the trade-offs, which is why so many large scale interventions have disastrous side effects.
Fortunately a tin can stove is a pretty simple system so I am not too worried about collateral damage. So lets do a quick top-level run through of how and why to design and optimize something:
1. Identify a need:
- Here I needed a stove that could be continuously fed fuel for extended cooking compared to my small gasifier camp stove.
2. Lay out design goals (in rough order of importance):
A. An efficient low-smoke burn
B. Continuous fuel feed
C. Minimal cuts and easy assembly to make it reproduceable by others
D. Minimal tool requirements
3. Initial designs and prototypes:
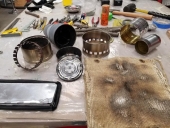
- First I tried the rocket-y type design with a miniature J-tube and two cans. This turned out to be too complex to cut and assemble and reverse-chimneyed too easily, it also had a clunky flame spreader at the top. The extra can used for the flame spreader made the whole thing less stable as well, and I realized a primary design goal should have been "Stable base that can support a heavy cast iron pan".
- I used a larger diameter tin can for the upper chimney and it became more stable, but the connection points to the heat riser were pretty thin. Tin cans are actually steel cans with a thin plating of tin, so they tend to corrode quickly at high temperatures. This made me realize another design goal: "As durable as possible for a tin can (reduce small joints)".
- I tried to make another J-tube type from scratch using another pair of cans directly nested together, but it simply didn't function well at all.
4. Iteratively assess design goals:
- New priority list after initial prototypes (changed order of importance):
A. A stable cooking surface that could handle the weight of a large cast iron pan
B. An efficient low-smoke burn
C. Continuous fuel feed
D. Reasonable durability within the constraint of still using a tin can
E. Minimal cuts and easy assembly to make it reproduceable by others
F. Minimal tool requirements
5. New prototypes with updated design goals:
- Switching back to a single can seemed the best way to satisfy design goals A, D, and E, so I went that route. The classic tin can stove with a door cut in one face seemed like a good starting point.
- Initially I used a triangular punch-type can opener to make a bunch of exhaust holes near the top of the can. This was still not enough cross-sectional area for the exhaust flow though, and I could tell that by how much smoke would appear when a pot of water was set on top of the stove.
- In order to figure out how much additional area was needed, I held the pot of water over a clean-burning flame and lowered it closer and closer to the stove until smoke started appearing. After trying this a few times, it seemed that at least 25cm² of additional cross section were required.
- What ended up being the final prototype used three large triangular cuts at the top (leaving the upper rim intact to maintain hoop strength) that were folded in toward the center, and an air and fuel-feed door cut in the front near the bottom. The large tabs folded in seemed to deflect quite a bit of heat from the cooking pot though (and made it hard to load fuel from the top), so I ended up curling them over and upward to create a slightly elevated 3-point top surface above the upper rim, adding a bit more exhaust cross-section in the process.
6. Final product (at least for now):
- Starting with a 24oz tin can, though other sizes should work as well, six cuts with knife are performed to create three inverted triangular tabs just below the top rim (roughly 6cm wide and 4cm tall). These tabs are rolled inward and then up above the rim so they make a top cooking surface about 1 cm above the rim. A door of about 6cm square is then made on the side of the can near the bottom using three cuts, such that it folds outward about its bottom edge.
- Checking it against design requirements:
A. The single can with a complete upper hoop and three point-mounting is very stable
B. With dry wood, the stove produces almost no smoke while operating with a pot of water on top
C. Stick fuel can be fed in the front continuously, and an initial charge of larger fuel can be loaded from the top as well
D. Sections of thin metal cross-section have been minimized so durability should be pretty good, but this should still be tested and perhaps improved if possible
E. Nine total cuts and four folds are required for the whole thing
F. A reasonably sharp pocket knife is the only tool required
Persistence is maybe the most important part of this process, most things are failures for the first few iterations. "Never do anything for the first time, it will be so much faster and smoother on the second or third" - was a favorite saying of an engineer I used to work with.
So hopefully you and I can both make great tin can stoves in the future if the situation ever calls for it, and maybe some of the optimization process outlined here can help out on other projects as well. One thing I found interesting about the stove problem specifically is that the exhaust area needs to be considerably larger than the air intake area when a heat sink (like a pot of water) is added to the top of the stack. This one ended up with about 20cm² of air intake when sticks are loaded and roughly 40cm² of exhaust area; so 2:1 to get a smokeless burn.
This is part of the
MoPID series of permaculture innovations that I am working on during my time at Wheaton Labs. Check out the thread if you'd like to follow along.


