Cade Johnson

+ Follow
since Dec 21, 2023
Merit badge: bb list bbv list
Biography
I am a retired chemical/environmental engineer, former sailor, and gentleman farmer in Puerto Rico. I am interested in permaculture, off-grid living, sustainability, and carbon dioxide removal.
For More
Apples and Likes
Apples
Total received
In last 30 days
1
Forums and Threads

Recent posts by Cade Johnson

when I had a contractor building a house in the Dominican Republic, I was surprised they did not butter the end of the blocks when laying the walls. You could see right through! The contractor said "of course not!" They rely on that gap to help anchor the stucco - known in most of latin america as Panneta. The panneta is made from sifted sand so pretty fine like pool filter sand, and portland cement - about 2 sand per 1 cement. They start with some that is too wet and sling that onto the wall with a cup. This moistens the wall and also supposedly gives the blocks more "teeth" to hold onto the panneta later when it is troweled on. After the panneta has had a couple of hours in place, they finish it by circular wiping with a large damp sponge to expose some sand and smooth out trowel marks. The finished thickness is about 1/2-inch.
4 days ago
not for a structure wall, but I have used dry-stacked block on several occasions for sloped retention wall with very good results. I start at the base of the wall with a line of 6-inch blocks laid on level undisturbed soil end-to-end. Then I backfill on the up-slope side to the top of the first block line and compact the soil. Next, I place block perpendicular to the first line on top of each joint where two blocks of the first line meet. I can then place another line of blocks over the perpendicular blocks but set back (up-slope) from the first line by ten inches. After backfilling to the top of this line of blocks, the process repeats. As a result, the retaining wall has an average slope of rise = 24 inches /  run = 10 inches => 67 degrees (23 degrees from vertical). If the backfill soil is not well compacted, the blocks will tend to sag into the slope. But since they are dry-laid it is a simple matter to restack the wall  after a few years - much faster than the original construction. And although the slope is steep, the wall can be scaled on foot with care. This design uses the exact same amount of block as would be used for a flat vertical wall construction, but no footer and no drain holes required - every other row where the blocks are perpendicular to the wall face is an 8-inch tall x 10-inch wide exposed soil slope which is an excellent place to plant ground cover that can soon cover the exposed blocks and improve soil retention.

Soil compaction is a bit of an art. Elements of compaction to consider: 1) compacted soil must be free of organic matter (otherwise the organics will decompose and the soil won't be compacted anymore - it will settle) 2) compaction should be in "lifts" of no more than 12 inches - even a heavy duty mechanical compactor can't "reach" deep into the ground 3) soil should be slightly moist but no more than about 5% - certainly not muddy 4) if you want "instant" compaction, use clean gravel instead of soil and tamp it into place. 5) very clayey soils compact well and block water flow well, but once they become saturated they can flow. Don't use high clay soils for a critical retention wall design like I have described because softened clay can easily be extruded between the perpendicular-laid blocks in the lower part of the wall.
5 days ago
if you cover grass with a tarp or black plastic sheeting, it will die fairly quickly. Even used cardboard works pretty well. We have done weed control with old pizza boxes (which seem to accumulate at an alarming rate!). Of course the sun-block does not get rid of seed load, but then neither does a spraying of herbicide. Once the grass under the cover is dead and you remove the cover, new grass will sprout and you can then repeat the treatment. After seeds have germinated and been killed by cover, you are relatively safe to plant a chosen cover crop. Try to go native with your planting for optimal results: natives can thrive in the local climate without added watering and can support local insects which in turn support healthy soil and surrounding ecosystem.

To minimize use of plastic, you can do small areas of several square feet at a time. It takes longer, but allows many more uses of a single bit of plastic before you are inclined to discard it. Cardboard is generally only good for one reuse before it disintegrates.
5 days ago

Nancy Reading wrote:. . . If you are intending the pile to mainly deal with garden waste on an infrequent basis, then that is not too much a problem, but if you want to empty a kitchen caddy in there each day, or frequently, then it may be worth placing the heap where you walk everyday anyway . . . Think about where the waste is coming from, and where you want to use the compost in future, and you might be surprised how much transportation you can save yourself!


This is so true; daily trips really add up. We were fortunate to have a bit of vertical relief available and mounted a three-inch PVC pipe from just outside the kitchen door straight down into a 55-gallon compost barrel. If you can devise such an arrangement, the pipe should be very close to vertical, and even then the inside of the pipe may accumulate a layer of black goo over time (an annual swabbing by poking a hot soapy mop head down the pipe would clean it - we should try that perhaps instead of letting roaches and lizards manage it! ). Anyway, the stuff in the barrel is not properly composting - just rotting; so it has to be dug out and put into the compost heap fairly regularly. For a couple of people, a 55-gallon barrel is WAY overkill for this use; even a five-gallon bucket would suffice (though you might have to deal with it during inclimate weather sometime because it fills up at a bad time).

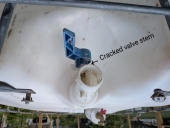
Because of the accumulation of rotting food waste, an intermediate container will tend to attract rodents. Making a rodent-proof repository that is still reasonably easy to open, for removing the accumulation, is not simple. We used a plastic barrel but armored it with galvanized sheetmetal. That has slowed them down quite a bit, but sometimes one finds a way to set up camp and we have to revisit the design again. We're in the tropics where they NEVER give up and they are abundant in the surroundings because of year-round fruit fall of various sorts - mango, banana, breadfruits, and various plums and berries. A metal drum would be more secure against rodents, but due to the moisture of rotting materials it would corrode fairly quickly.
5 days ago
They say a compost heap needs to be about a meter across to have a core area big enough for composting (so a half-meter of thickness all around to insulate and keep in the heat). A round footprint is good because you get that half-meter of thickness all around  - harder to generate heat in the corners of a square heap. The corollary is that it also needs to be a meter tall or more - and that would be a LOT of kitchen scraps; perhaps more than I have made in my whole short 65 years (considering that they are perishable). To make a working heap, you kinda have to start with a big pile of organic like yard waste and add in your kitchen scraps on the fly.

A heap needs turning, because of the differential composting action between the center and the edge, but you don't want to move the whole pile! I have found that making it work like a silo is somewhat effective. You need a tunnel into the center at the bottom and a long-handle shovel - you can excavate it into the heap but that can be tough digging based on my prior experience; if I started again, I would make a bridge so I could dig from the center without the heap collapsing on the near side; maybe made from some scrap plywood set into an A-shape so I could get the shovel to the center and the pile could settle centerward. Then it is possible to dig out some finished compost and use it as cover over the newest kitchen waste - and also keep adding yard waste as it becomes available. Whenever you dig from the bottom, you should be getting finished material for whatever uses required. But sometimes I have dug out a whole rotten onion or broccoli stem or such; have to sift that out and put it back on top to try again.
1 week ago
I think IBC totes are made from HDPE, so glue is not going to stick. You will want to have a mechanical connection (threaded). I would try to cut the leaky valve away leaving as much plastic at the valve base where the tank connection is, as possible. Then I would tap the hole into the tank to take a suitable pipe nipple. You can make a reasonably effective pipe thread cutter by purchasing a galvanized pipe nipple of the desired size and cutting four slots perpendicular to the threads with a side-grinder and wafer disc. Then bend the four resulting tabs inward toward the centerline of the pipe nipple a little bit by hammering with a rubber mallet or block of wood. The cut edge from the grinder disc cut is sharp and will cut thread into the plastic; advance your homemade tap a little at a time and back out to make clean thread cuts. Once the tap will go all the way in, remove it and put in a proper nipple with some teflon tape on the threads, and your valve.
3 months ago
My wife and I are restless retirees; we have been retired quite many years but just now reaching "retirement age"! We went sailing, had a farm for a decade, and now have a smaller sort-of-a-farm in Puerto Rico. But we want to see more of the world - not stay stagnant - and although we do not want to start again from scratch with a homesteading project, we know some of the skills and would be interested to pitch in. We have never been to the US west coast, but have concluded that western Oregon might be a good place for us based on climate and what we can see from afar about the local vibe.

Although this is not a forum for WWOOFer placement as such, and we have never been WWOOFers before - that sounds like the sort of thing that might suit us. Four hours per day of labor from both of us should be worth at least $80 most days; well over $1000 per month anyway - so that level of working in exchange for lodgings seems like a fair trade; maybe even lodging and a meal or two! It sounds like most WWOOFers only stay a relatively short time - so the balance between teaching time to get a new person up to speed, and getting some useful work out of them before they depart must be a win-some, lose-some kind of thing - but it seems like having a couple interested in a relatively long-term situation would be attractive - more chance to gain.

So, does anyone here know of WWOOF-like opportunities in and around the Willamette Valley region starting in about spring of 2026? Do many older folks do the WWOOFing thing or things like that? On the one hand, we are old dogs and maybe averse to learning new tricks - but on the other hand, we are complete noobs when it comes to the ecosystem details of the Pacific NW, so immersion on a farm seems like a really great way to learn a lot and fast.
3 months ago
OP says there may have been inlet and outlet piping from the cistern, but locations are unknown. Since the cistern has always had water, they have probably not inspected the bottom for an outlet.

A bottom outlet is a nice thing, but may not have been a feature in an older cistern (when pumps were new-fangled gadgets). If there IS an outlet, it could be where the water goes - i.e. not a leak in the cistern wall as such. The outlet could be plugged and the cistern level could be monitored further. Maybe find a local scuba diver?

Having two cisterns is nice. You can empty one and do maintenance while still having a water supply in the other cistern. If you will depend on cistern water, two is almost essential.
6 months ago
It appears that Morus rotundiloba is now known as Morus indica. There is a wikipedia article on Morus indica which talks about characteristics for identification. The fruit of some Morus species start white or pale pink and then turn bright red before turning dark purple and black. So the fruit color may be not the best criterion to judge.
9 months ago
Someone gave us a black mulberry start years ago in the Dominican Republic and we wanted to take a start with us when we moved to Puerto Rico. But one cannot take live plants through the airport. So, we cut some woody stems (bark covered, rather than green stem), and packed them in our moving luggage with the chopsticks and bamboo cooking implements, where they passed muster as sufficiently dead-looking. A few days later, we stabbed them into moist dirt and kept them watered for a while (a month or so, as I recall) until they sprouted. They have each survived three years in poor soil and begun to bear fruit.

Mulberry, as far as I can tell, do not produce seeds (though my experience is limited to Morus nigra). So they are not the sort of plant that agricultural agencies need be worried about invading a non-native habitat. They are very robust - in north america they are found from the tropics to the latitude of Vancouver, though not in the northern Rockies so much. In europe they prosper from southern Spain to Denmark. In asia they live north to northern Japan and China. In the southern hemisphere, they are found south to Argentian, South Africa, Tasmania, and southern New Zealand. I guess in a sense, they have invaded quite well . . .
9 months ago