posted 6 years ago
There are older threads covering aspects of this topic. None of the ones I visited, had links to these other threads, just instructions on how to search. Hopefully this doesn't almost copy a similar thread heading.
Lots of us have gravel driveways. If you have a high disposable income; sure you can hire a professional to grade your driveway. You may occasionally have to splurge to hire a professional occasionally, if you get to the point where you need to add new gravel to your existing driveway.
I think the last time my Mom had the driveway professionally regraded; it was a friend who had a construction company who did the work, and the cost was a little over $2000. More than 4 years ago.
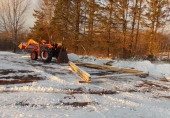
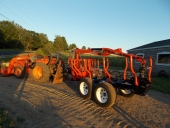
Just recently, I got a used 52hp tractor with some new implements: box blade, tilt/angle blade and subsoiler. The tilt/angle blade is what is used here.
---
I have no training in civil construction, and almost no education in civil engineering. I do have 2 engineering degrees (materials science and engineering). As civil engineers build their projects out of materials; I have some knowledge of that. But they have developed their own jargon; which makes learning from them harder than it should be. Which has nothing to do with grading roads.
Being in materials science and engineering; I am also a physicist and a chemist. And solid state physics has a lot to do with symmetry. Which is my background to grading roads; other than occasionally seeing the county grader working on the county roads.
---
The last time the road was professionally graded, was 6 (more?) years ago. At that time, it was just a wide expanse of gravel transitioning to weed filled ditches. My driveway was built to the same standards as county roads; which is not typical.
Up until a couple of weeks ago, my driveway had 2 bare patches straddling the centre; and then varying densities of plant material growing; with densities near the edges being very high. The centre often had something growing.
The reason for things growing at the edges is somewhat obvious; it is next to the ditch which has stuff growing in it. The centre of the road is close to flat in at least one direction; and so it will tend to have more moisture. This makes it a better place for seeds to germinate and grow, than similar locations nearby. Also, there is a tendency for people to drive in the tire tracks.
---
If you have a blade that is midway between the axles, like a professional grader; you will probably be able to grade better. If the front axle(s) encounter a bump; they will lift the blade up less than the height of the bump. When the rear axles encounter the bump; they will lift the blade up less than the height of the bump.
If you have a rear (3 point hitch?) mounted blade, when the front axle(s) encounter a bump; they want to cause the rear blade to dig in. Long before the bump. When the rear axle(s) encounter the bump; they want to lift up the blade before it reaches the bump. Consequently; one bump turns into 2 bumps and 1 hole. And there is no guarantee that either new bump or hole is significantly less in magnitude than the one which caused this.
If the vegetation growing in your driveway is substantial, it is likely that the blade will not dig into gravel to any useful extent. You may have to "mow" your driveway to reduce this vegetation effect, or you may have to start from some location (the tire tracks) which does allow the blade to dig in a little, and slowly work your way out.
My blade is 232 pounds and is 7 feet wide (84 inches). The 3 point hitch arms contribute some weight as well. So, we'll assume the bearing load of the blade is 3 pounds per inch of width, when set parallel to the "road". If we adjust the tilt of the blade with the 3 point hitch arms, we may get to the point where only 1 foot (at the edge) may be in contact with the ground. The bearing load will increase to 21 pounds (1/7th of the width, so 7 times the load per inch) per inch.
In using a 3 point grader blade, you are limited in how much ground bearing load you can apply. You might put ballast on the 3 point hitch (don't put too much on).
It is relatively easy to get a good job on the steady state portion of your driveway. My gravel driveway is 1100 feet long, so I get good results over probably 1000 feet or more. But the ends require a lot more attention to detail (which I haven't yet mastered).
Your driveway is a limited traffic zone and is probably private property, so you should be able to traverse your driveway however you want to. County graders on county roads may have rules they have to follow.
I think that a person approaches the grading as doing it clockwise one time, and then counter-clockwise the next. The first passes have the angle of the blade set so that the blade digs at the "edge" of the road and directs the spoils towards the centre. The tilt should be adjusted, so that it is only the outer bit of blade that is doing much digging. The first passes are as far to the outside of the road as you can get (vegetation permitting). If you don't have vegetation problems, you probably don't want to be trying to reach into the ditch to drag out soil in the hopes of recovering the odd rock which ends up in the ditch.
So we go down on one outside edge, and come back on the other outside edge. Our subsequent passes move in a foot or so, but we really don't want the "inner tires" riding on the spoil windrow. And we keep moving in, until we have a single windrow close to the middle (it will likely be offset by a couple of feet).
We then adjust the blade tilt to 0, and set the blade angle to 0 (perpendicular to tractor direction). We make a single pass straddling the centre of the road, having the blade low enough that it is scraping the vegetation in the crown area. We are likely to have a fair "pile" of gravel in front of the blade as we approach the far end, and we need to raise the blade up to feather away this excessive lot of gravel. It is likely there is a better way, I haven't found it yet.
We then set the blade angle back to what it was before, and leave the tilt at 0. We now make passes in the opposite direction, starting from the centre. We are trying to push the gravel we gathered to the centre, almost uniformly over the road, except that we need to have some spoil windrow going to the outside as well. So the first passes near the crown of the road will not be leaving much extra gravel there, and as we make passes to the outside, we start to raise the blade a little so that our spoil windorw decreases to near zero once we reach the "outside edge" (where we were first digging on this attempt to grade the road).
Once the bulk of the driveway is done, a person probably wants to go to the two ends, and try to improve how the ends were done.
I have now done my driveway once as counter-clockwise and once as clockwise. Every time I do it, I should try to scrape the gravel/vegetation a little further to the outside, and in that way try to recover some of the road over time. The vegetation is quite strong at the edge, and this process should be hard on the vegetation at the outside edge that was scraped. This process is relatively gentle on the vegetation near the crown of the road.
My tractor is 52hp, and this process is not using much of that horsepower. Hence, it shouldn't be using a lot of fuel.
There doesn't appear to be any formal place to hang ballast on the blade. A person could probably rig something up. But it is likely that any ballasting of the blade, will cause it to wear or fail earlier.
I do have a box blade, which is almost double the weight of the tilt/angle blade. And it has 5 or 6 "scarifier"s (vaguely like a chisel on a chisel plow). If there are 6 scarifiers, then the ground load will be about 75 pounds per inch on each scarifier (assuming each scarifiers is 1 inch wide), which is significantly higher than the load we could put on the end with the tilt mechanism. It is probably easier to add ballast to a box blade, and it appears to be built more strongly.
The above writeup assumes your vegetation is grass, alfalfa or something similar. If the vegetation you are dealing with is trees, none of this applies.
I will guess that recovering a driveway from trees starts with cutting the trees down. Find a mushroom variety which grows in your area that is efficient at turning wood of the same species into humus. Put fresh wood chips over the stumps (and possibly along the road) and innoculate them with this mushroom mycellium. And hopefully in a few years, the mushrooms will have reduced your stumps to nothing. They may also attack sprouts coming from the roots underground. If the tree species in question is a colony plant like aspen; you are going to be fighting the root system for a long time.

 3
3


 1
1


 Which might not be a bad idea. If a person was to have a not quite so simple "grader blade", it might be nice if a person could "lengthen" the blade to (partially) make up for the cosine(theta) affect. It may be that just the "moldboard" (?) needs to be extended, not the blade itself? Another thing I have seen mentioned, is the ability to offset the blade to either side.


