• Post Reply Bookmark Topic Watch Topic
  • New Topic
permaculture forums growies critters building homesteading energy monies kitchen purity ungarbage community wilderness fiber arts art permaculture artisans regional education skip experiences global resources cider press projects digital market permies.com pie forums private forums all forums
this forum made possible by our volunteer staff, including ...
master stewards:
  • Nancy Reading
  • Carla Burke
  • r ranson
  • John F Dean
  • paul wheaton
  • Pearl Sutton
stewards:
  • Jay Angler
  • Liv Smith
  • Leigh Tate
master gardeners:
  • Christopher Weeks
  • Timothy Norton
gardeners:
  • thomas rubino
  • Jeremy VanGelder
  • Maieshe Ljin

Urban Community Cob Oven


Posts: 5
Location: Bay Area
  • Mark post as helpful
  • send pies
    Number of slices to send:
    Optional 'thank-you' note:
  • Quote
  • Report post to moderator
I have been hooked on Cob ever since I picked up Kiko Denzer's book on building Earth Ovens. I currently live in the Bay Area in CA, and so I always felt it was a pipe dream to actually build with Cob one day. Until chance came along and changed everything. Order of events that allowed for this creation that I am about to chroniclize:

  • [li]Friend at a local industrial arts center was giving away firebrick[/li]
    [li]Another friend knew of a local Coffee shop that has a 1 acre yard for community events/garden, that has been dreaming of having a wood fired pizza oven[/li]
    [li]Coffee shop has a huge pile of old brick from who-knows-what that can be used for this project[/li]
    [li]1 girlfriend and 3 friends are on board to volunteer their time[/li]
    [li]We apply, and win, a community grant to pay for the cost of additional materials needed[/li]
    [li]Sounds pretty awesome, right!? l[/li]


  • Bear in mind, that the most Cob experience that the group of us have had has been from reading and watching videos about it, or from demolishing old cob ovens that were abandoned (tear).

    I am reaching out to you guys, not only because your awesome and wonderful, but I would love to get some opinions on where we messed up

    So, that is the short version of the background.. now, here is how we did it!

    Day 1 - Planning and trenching


    We found the most level area in this beautifully large adult playground of a back yard, luckily it just so happened to be near the building so that shuffling pizzas from inside to outside won't be a long haul. We dug up the earth with some heavy maddocks and other big heavy pieces of metal attached to long sticks. Made a nice trench, roughly 2 inches wider than a brick, filled said trench with 2-3 inches of moist drain rock, and proceeded to tamp the heck out of the trench with our homemade tampers (chunks of 4x4).


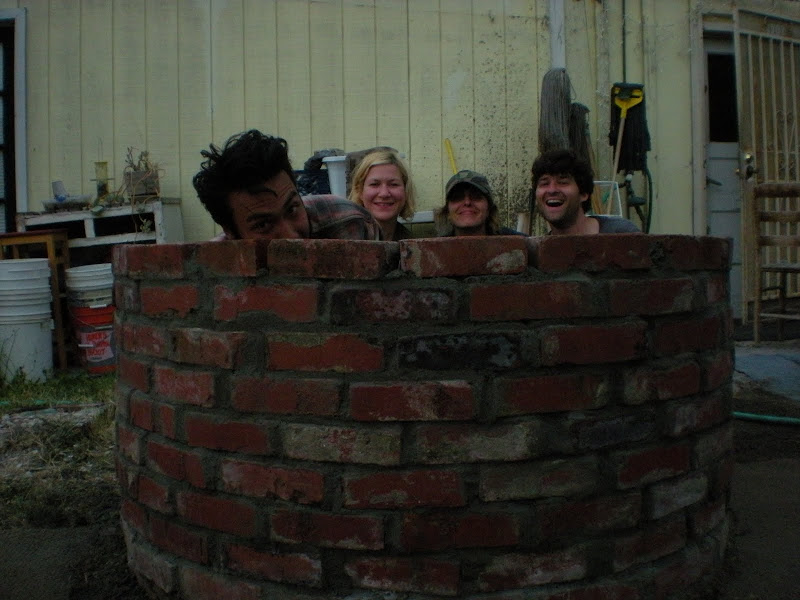
    Here we are holding tools and pretending to work.


    It was fairly ambitious. We started the day thinking that the 4 of us were going to build 10-11 courses of brick in one day. We ended up only laying 3 courses that afternoon. Oh well, good thing no one is expecting this to be done anytime soon. This is also a good time to mention that only 1 of us has any experience whatsoever with laying brick. I Love learning useful stuff. We really did want to use earth mortar for this portion, but we didn't have access to any clay/sand yet, so we just went with your standard HD mortar.


    Here is a layout of the first few courses of brick, with the rough intention of the final hearth brick layout. The final interior diameter is something like 50 inches. I hesitate to use the word diameter because our circle never started out circular. whoops.


    Our method of 'leveling' each course. We got to the point where we felt that it was OK if the bubble wasn't between the lines as much as we wanted it to be. It's still going to hold weight even if it's not level, right?


    Now we are getting somewhere!


    Chugga Chugga!  Here comes the Cob train! This is the day that we finally dreamed about. We spent many a weekends on building the darn base for this sucker, and now we get to actually play with mud!! YAY!


    OK, time to take a step back and explain, so that I can get some feedback. Inside the 'tunnel' we threw in some urbanite, funky bricks, love letters from high school, bad childhood photos, and a bunch of wet dirt. We tamped the heck out of this mixture until we thought it was compacted enough. Again using the 4x4's and this time we had a huge breaker bar for some nice bicep workouts. After we got to our planned height, we stopped and threw down a 2.5 inch layer of concrete with some chicken wire in the middle. Once the concrete dried, we threw down a 1/2 layer of sand, and then put down all of the 'soft brick' that we had. Honestly, I am not sure how the insulating properties compare to a perlite/clay/bottle mixture, but these softbricks were free and fun to work with, so we figured we would give them a shot! Hopefully they will be a good insulating layer...


    And so we are finally here! the SAND FORM ! We piled a bunch of bricks in the middle of the pile so we didn't have to use a lot of sand. You can't see it, but there is a 16" high stick at the max height of the oven mold. We then compressed the sand all around, pretending we were 12 years old again playing on a warm sandy beach, without a care in the world.

    And here is where I leave you until the next update.

    Feel free to let us know if we have FUBAR'ed this project by doing something absolutely backwards, or if you think we are still good to lay on the actual oven layer  (which we have actually done already, but I can only post so much in one post )


    Posts: 5
    Location: Bay Area
    • Mark post as helpful
    • send pies
      Number of slices to send:
      Optional 'thank-you' note:
    • Quote
    • Report post to moderator
    Back for the Next phase of updates -

    Dense Oven layer -


    So, we did the ball test, and felt that it was good enough (balled up a wad of our oven mud material and dropped it from shoulder height to see how it smooshed). I didn't realize how important this step was. We were all so excited that we were finally building the oven layer that we pretty much winged the entire thing. We could have been more serious about the mold release layer (plastic bag with duct tape), and could have made sure that our  final Cob mix was actually the right consistency.


    Here we are trying to figure out what to do with the rest of the oven layer, and how to proceed. We didn't really connect the dots with the fact that the layer kept on slumping and the amount of moisture in the actual mix.  It got to the point where we would try almost anything


    You can see here that we tried to use a short piece of 2x4 to push up the slumping mud. Boy did that work well.... Not.
    So we just kept on going thinking that it would be fine. In the end, certain portions of the oven mud layer are probably 6-8 inches thick, where it was planned to be 4 inches. Again, here is one of the areas where we messed up and could have used marked sticks to measure the thickness of the layer as we built. Still we kept on building because it was so much fun!


    We finished!! literally we had about 2 gallons of oven mud mix left, and that last bit of it was definitely heavy on the clay because we ran out of our sand additive. We definitely used way too much material due to the slumping. oh well


    Here is a closeup of our door handle design. The door itself is just 2 1x10 that are screwed together and then cut out at an angle using a jigsaw.


    GASP ! One day goes by, with crossed fingers and bated breath, we arrived the next day to warm weather and clear skies. Yipee!
    But wait, there seems to be a fair amount of cracking that is occurring. We decided not to worry about them too much and finish cleaning out the inside of the oven.


    So we decided to mix up a slurry from our leftover oven mud mix, and try to fill in the cracks. This worked OK except we didn't have a screen handy to screen the mix in order to remove the larger pebbles. And if you noticed, those longer vertical cracks are not from the drying of the oven; that was because I thought it would be interesting to have a pattern in this oven layer - Another mistake.


    YAY for fire!! first firing went great! We probably burned a small armful of kindling and 2x4 scraps. The outside of the oven didn't dry completely, but we had a decent fire going for about 40 minutes. We gave each other High 5's and took a beer break to sit and be happy with the fact that all our hard work paid off and finally had a fire burning inside our oven.


    Here is a pic of the inside of the oven after the first burn, and after we cleaned it out.

    Building this oven has been a lot of fun, and the group has learned a lot about cob. We are all a little busy now, and may not to do more work on this baby for another 3 weeks or so, but we hope to return and add an insulating and/or more artistic exterior finish. I don't think that we are going to build a shelter for the oven, so we are going to play around with Lime Plasters and see how it goes.

    Has anyone tried using lava rock in their insulating layer ? We have access to some free 1/4 lava rock that we are trying to come up with a use for.

    Thanks again!


    Posts: 20
    Location: north georgia
    • Mark post as helpful
    • send pies
      Number of slices to send:
      Optional 'thank-you' note:
    • Quote
    • Report post to moderator
    Nice Work!  Projects that have the  parts "just come together" are the best.  and PBR is a great karma focuser.
     
    Posts: 37
    Location: Asheville, NC
    • Mark post as helpful
    • send pies
      Number of slices to send:
      Optional 'thank-you' note:
    • Quote
    • Report post to moderator
    Rock and Roll EP. Looks great.

    Why do you think the cracks formed? Was your initial moisture content to high?

    Also, now that it's done are you sealing the outside with anything?

    Keep on building friend!
     
                    
    Posts: 5
    Location: Bay Area
    • Mark post as helpful
    • send pies
      Number of slices to send:
      Optional 'thank-you' note:
    • Quote
    • Report post to moderator
    From what I have read, cracks form due to not enough sand in your mixture. The clay will shrink as the moisture leaves the mixture, but if the sand/clay ratio is high enough, the sand will fill the voids that the clay leaves behind when the entire layer shrinks (in theory). Also adding a matrix material, such as straw, is a fantastic way to prevent cracking, but you can't use straw in this layer because it will burn out due to the high temps, and then you have an insulating layer opposed to a heat-retention oven layer.

    I read a lot about the difficulty in determining whether or not your clay is actually clay or silt. We didn't spend any time whosoever in figuring out if it was clay or silt, we just went with it and assumed for the best  I think that this also might have something to do with our cracking (if we had more silt than clay?)

    In terms of sealing the oven, we are probably still going to add another sculptural layer for beautification and artistic freedom. This first layer was just so that the cooking area would be solid and hold heat. Of course if a downstorm comes anytime soon, we are screwed - but luckily Oakland, CA won't get any large rainstorms until Sept. (if history is any indication)

    We plan on making a lime plaster out of a clay slurry and some other ingredients that I need to learn about in order to weather-proof this oven. Of course this layer cannot be weather proof because the oven needs to be able to breathe, or else the trapped moisture inside the oven will cause crumbling of the interior layers. so this exterior finish layer is supposedly going to act as a water repellent, but over the course of many rainstorms the oven will start to deteriorate.

    I think during long periods of un-use, we will probably cover the oven with a tarp - especially during the winter.

    Hopefully within the month we will have our first pizza (once we all get back from summer vacations and whatnot).

    Thanks for the questions and comments, keep em coming
     
    Posts: 79
    Location: Maine, USA
    • Mark post as helpful
    • send pies
      Number of slices to send:
      Optional 'thank-you' note:
    • Quote
    • Report post to moderator
    K00L
     
    Posts: 40
    Location: St. Paul, MN, USA
    1
    • Mark post as helpful
    • send pies
      Number of slices to send:
      Optional 'thank-you' note:
    • Quote
    • Report post to moderator
    Nice work! Looks like such a fun project. 

    Does the cob oven get very hot to the touch (on the outside)? Any less so if you put the decorative outer layer on it? Have never seen one of these in person but admire the look compared to the big ostentatious brick ovens you see in suburban 'outdoor kitchens'.

    Liked the idea of one but we don't have any source of fire wood (urban lot) so not sure it would be that worthwhile here, compared to making a solar oven (as an eco alternative to fossil fueled ovens, but obviously not a good substitute for pizza/bread high-heat oven cooking).

    Also, we may just try this for wood fire pizza and bread: http://charlesandhudson.com/archives/2011/02/do-it-yourself_wood_fired_pizza_oven.htm I saw a guy online selling a kit to retrofit that same kind of setup onto a kettle grill... maybe a good option for low income or physically limited folks who couldn't source the materials (or handle the labor) to build anything from scratch. More fun to build one though.
     
                    
    Posts: 5
    Location: Bay Area
    • Mark post as helpful
    • send pies
      Number of slices to send:
      Optional 'thank-you' note:
    • Quote
    • Report post to moderator
    After the oven has had a fire going for an hour or 2, the outside of the oven will definitely be warm, even hot in some areas.

    If we put on an insulating layer (sawdust/perlite/vermiculate and clay slip) and then put our decorative layer on top of that, I imagine that we will never have to worry about anyone hurting themselves by touching the outside of the oven.

    The link that you provided is pretty cool, I really like the use of the Webers - that so often get unused and forgotten about in back yards.

    To address your point for not having access to wood because you are on an urban lot - If you search out any woodworking shops in your area (cabinets, furniture, etc) I guarantee that you will find a few that literally throw away perfectly good pieces of wood that aren't big enough for their uses anymore. This makes incredibly great wood for ovens because it is dry and usually pretty small in size. Just make sure that you don't put anything in your oven that you wouldn't want to put in your mouth (paint, glue, stain, finish, etc).


    Always respect your superiors. If you have any. - Mark Twain / tiny ad
    Switching from electric heat to a rocket mass heater reduces your carbon footprint as much as parking 7 cars
    http://woodheat.net
    reply
      Bookmark Topic Watch Topic
    • New Topic