Rob Compsen

+ Follow
since Dec 24, 2012
Merit badge: bb list bbv list
For More
Apples and Likes
Apples
Total received
In last 30 days
0
Forums and Threads

Recent posts by Rob Compsen

Currently, we have about 20-24 goldfish running this system. It was running on about 12 goldfish up until about 2 weeks ago, then I added about 12 more and the greens got greener. I think the plants enjoyed the nitrate boost.
9 years ago
This aquaponic system uses a 20 watt 396gph water pump. The fish tank is a standard 55 gallon drum under a frame made from 2"x3"s and some 1"x2"sand the gravel bed is a $12 water basin from Lowes.

It's a flood and drain using a Bell Siphon.

I built this last year and used it until mid fall and left it outside over inter and turned it back on after it was fully thawed this spring and it turned on without any problems.

We've been growing many types of lettuce, mustard greens and arugula in it. It's also being used as a cloning station for Thyme, Rosemary and Tomato plants. Last year we grew several tomato plants, a cucumber and a fist sized watermelon.


9 years ago
These are Blue Oyster Mushrooms (Pleurotus ostreatus var. columbinus) Fruiting out of 2 & 5 Gallon Buckets. Barley & Wheat Straw was used as a substrate.

The straw was pasteurized by soaking in Lukewarm Water + Pickling Lime (CaOH) + Potash (Ashes from our fireplace) for 6-24 hours. The straw was then packed into the buckets and layered with colonized Wild Bird Seed as an inoculate.

The 2 Gallon buckets take about 3-4 weeks to colonize and the 5 Gallons take about 4-6 weeks.

I built a fruiting chamber out of some pvc pipes for frames and plastic drop cloth to keep the humidity high.


4 lbs. of Blue Oyster Mushroom:

One of our White Oysters:


Oystership Enterprise

Main photo for my website: Carmella Gardens . net

9 years ago
Aquaponic system update 2/14/14

It's now a 44 watt system. I added two 17 watt grow lights and built a frame to hold the lights. I also added a Zebra print curtain with a reflective mylar backing. The plants and Tilapia are doing very well.


10 years ago
Here's the AP system I recently built.

It's a 25" diameter 7" deep gravel bed. (Bought from Lowe's garden dept. for $12). A 1/2" diameter drain pipe and 1" bell siphon. The pump is an Eco 185 gallon per hour pump, which uses 10 watts per hour. It uses much less as it is on a timer. 30 minutes every 3 hours.) I'm surprised how little water flow is needed because the gravel takes up so much space. I have a small clamp on the plastic tube from the water pump to slow its flow rate, so a lower wattage or solar pump could be used) The gravel was collected from a local stream with a plastic collander, by hand . The wooden frame is constructed out of 2"x3"s, with zebra print burlap and purple ribbon stapled to the outside. The frame houses the 55 gallon drum which I got from a friend who's a cheese maker. The drum contained acetic acid, so I had to add some lime to raise the pH a bit, regardless the tilapia have adjusted well to the drum and love all the room. There are 5 mixed sex Blue Tilapia.

Growing in the gravel bed is thyme, oregano, rosemary, spinach (sprout), romaine lettuce (sprout), Yugoslavian red lettuce (sprout), and cayenne pepper (sprout). And just outside of the gravel bed are oyster mushrooms.

I added a fan to strengthen the stalks of the plants, but it's not absolutely necessary. I'm also adding mirrors to the wall to reflect sunlight. (My stems are too long and leaves too small; they need more light!) I also plan to add a simple lid to hide the 55 gallon drum. (This seems slightly pointless as it's going to be open most of the time as I enjoy watching the fish.

This took about $75 and a weekend to build and it's a great source of herbs, mushrooms, veggies and fish (eventually) as well as entertainment.


11 years ago
Oyster mushrooms (Pleurotus Ostreatus) is an excellent beginner mushroom and they're excellent with chicken and pasta, etc...

They're also very inexpensive to grow and grow on numerous mediums: Straw, Maple, Oak, even Cardboard.

(My total investment has been about $20. $15 for the Oyster spawn and then $5 for 5 boxes of 1 gallon bags.

Here's some more explanation of how I grew some on cardboard:

Oyster mushrooms grown on shredded, sterilized cardboard (PHOTOS)
11 years ago
Not offensive or discouraging at all. I probably should have posted the back story and what I'm attempting to accomplish:

A few months ago, my girlfriend and I moved back to upstate New York from northern California and stayed with my parents for a while until we found an apartment. During that time, I started reading about Oyster mushrooms colonizing cardboard and decided to do something about the cardboard that seemed to pile in the garage on a weekly basis. Most of the articles and videos I read were about shredding the corrugated cardboard by hand and then pasteurizing it with hot water. It just so happened that there was a small paper shredder at the house, so not only was I shredding corrugated cardboard, I started shredding any paper product, I could find: kleenex boxes, beer boxes, food product boxes, some paper (not too much paper as it's bleached and tends to get overly soggy when wet.), paper and toilet paper rolls, etc.

I got a 23 quart pressure cooker (thanks Mom 
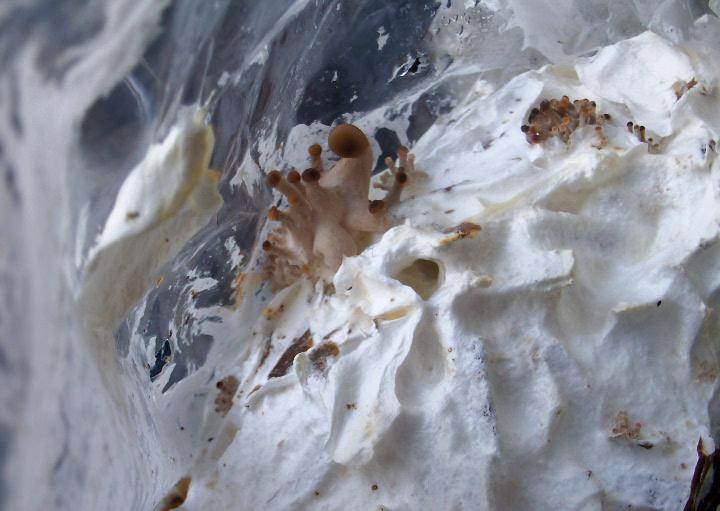
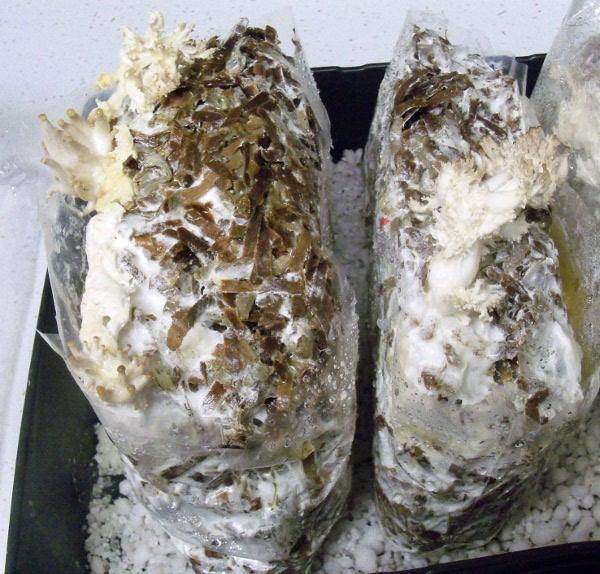
) for Christmas and started sterilizing the shredded cardboard, just to be on the safe side of non-contamination. When the bags I half filled had cooled, I'd add a few spoon fulls of the colonized BRF cakes. (BTW, my first inoculation of the BRF cakes was with a King Oyster sawdust spawn I bought off of Ebay.) From there on, is in my above posts.

Basically, using the SSC (shredded sterilized cardboard) started as a way to find use out of the unused cardboard, short of having some recycling company take it to who knows where for whatever purpose.Breaking it down myself and letting nature take it over makes me much happier.

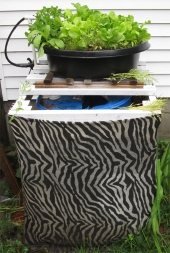
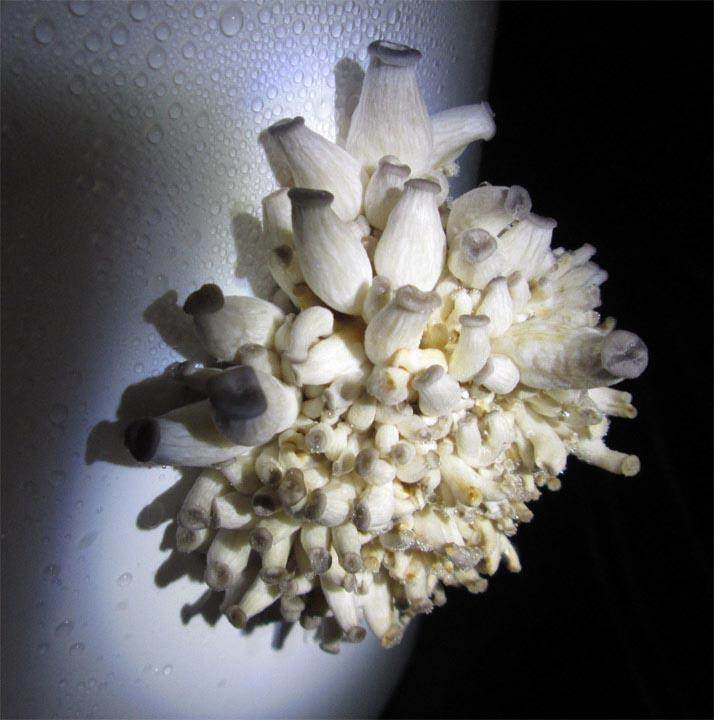
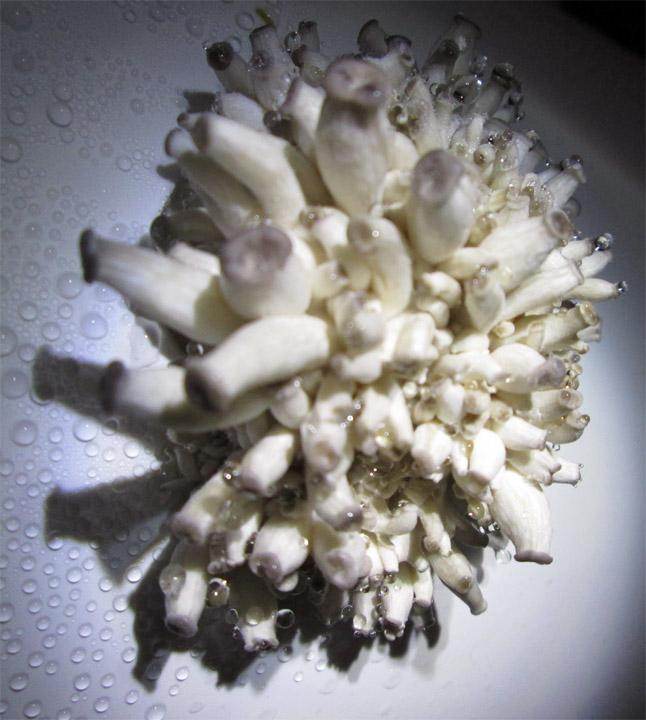
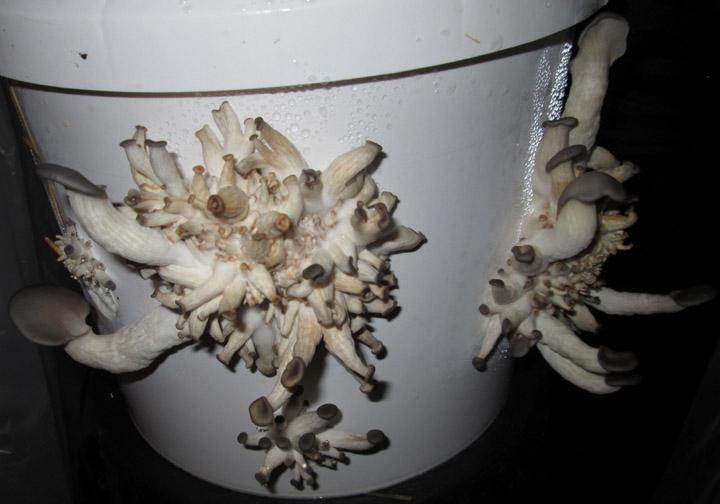
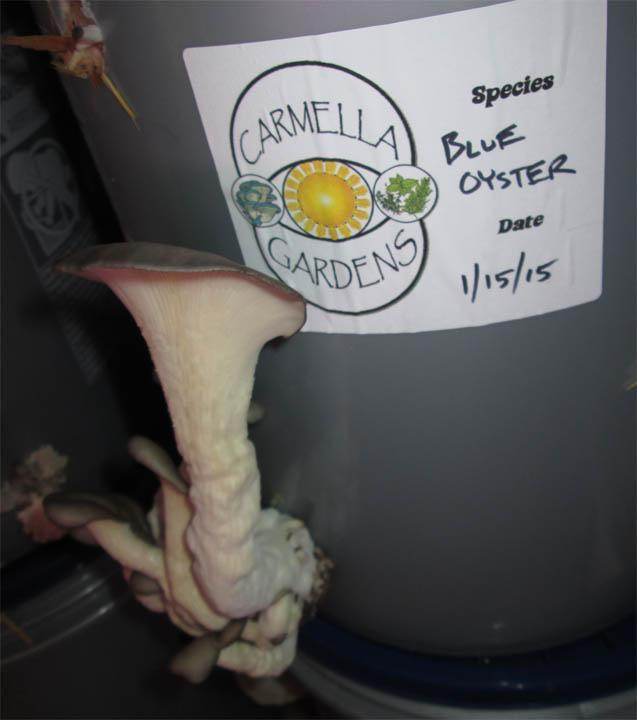
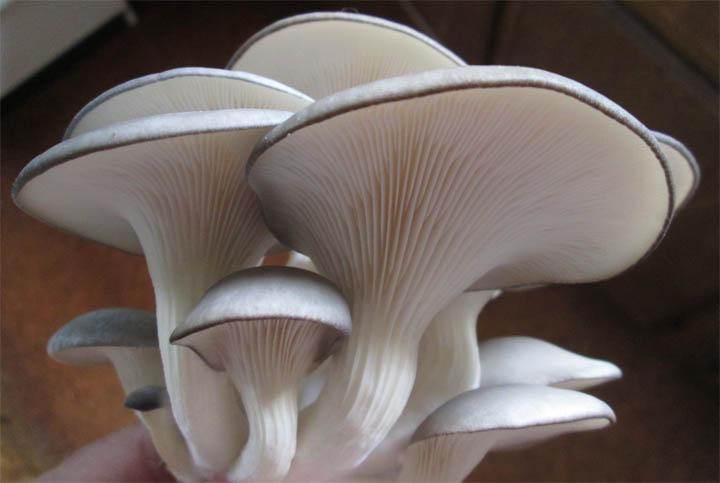
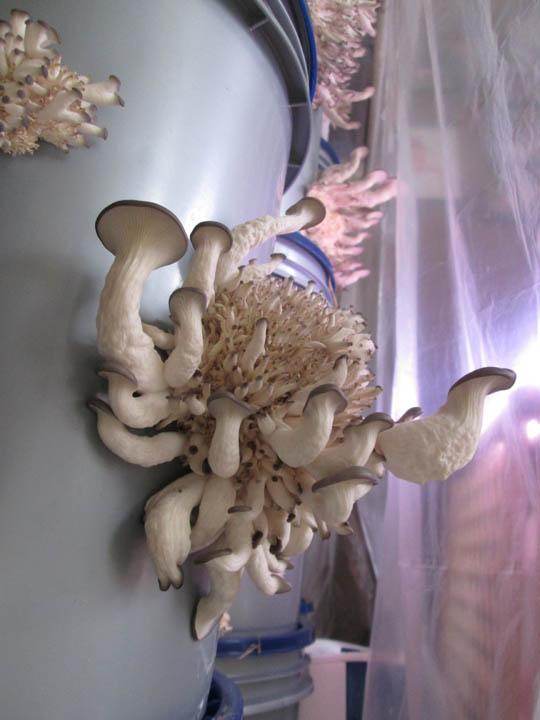
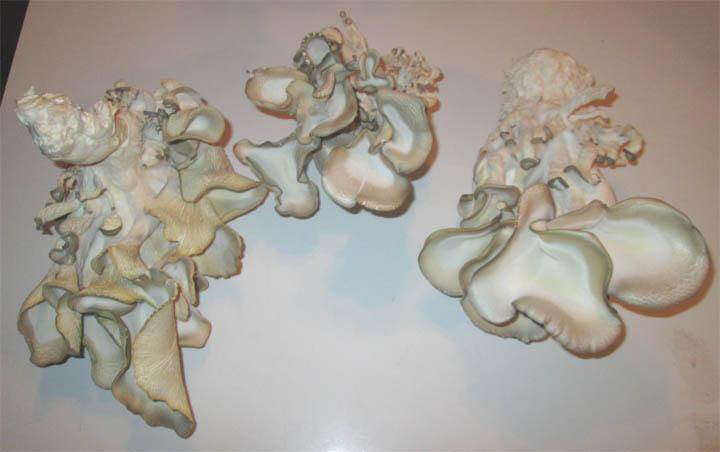
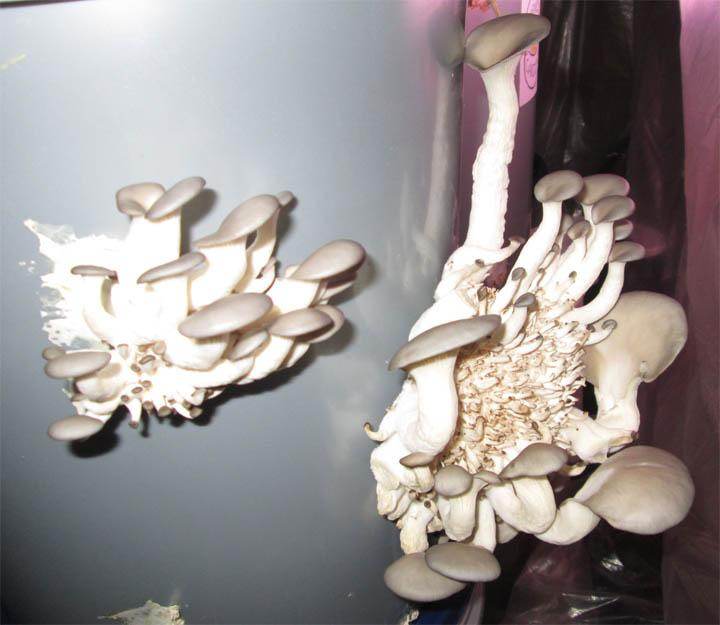
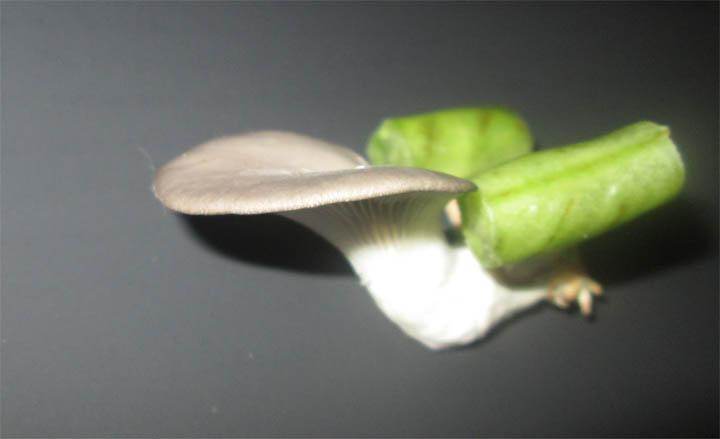
My first Oyster fruiting was on straw. I sterilized half of a 5 gallon buckets worth back in November, let it colonize until late December and it has been fruiting since. I spray it about every day, but that's about it. The fruits are definitely bigger in the straw and the continuous fruiting is very nice. Here are a few photos from that:


11 years ago
A little more information on this method with an update:


I've noticed that they don't seem too need too much oxygen while colonizing. I've been filling 1 gallon bags half full of SSC (shredded sterilized cardboard [for more surface area]) with about 1 inch of the zipper seal on the bags open to let the mycelium breathe. (My 23 quart pressure cooker mostly filled with shredded cardboard can 1/2 fill about 7-8 1 gallon bags.)

They'll usually start to fruit on their own when they're ready. (If they're too warm, drop the temp, by putting them in the fridge for the night, but I haven't needed to do this so far.)

The first batch I inoculated on 12/24/12, were beginning to fruit about a month later. I poked holes in the bag where the primordia (mushroom nodes) began to form and they sniffed out the oxygen and grew toward the holes. My fruiting chamber to begin with was a simple cooler that I sprayed each day. I then moved them to a plastic storage box from W-mart that I drilled holes in for ventilation and poured a 1" layer of perlite on the bottom to retain the water sprayed each day for moisture.

My most recent batch has been doing just fine in a plastic plant starter box with a 1/2" bottom layer of perlite. I poked several holes in the bottom of the planter box, because I figured CO2 which mushrooms "breathe" is heavier than air and would naturally flow out. The air vents on clear plastic top to the planter I leave open. I'm assuming as the CO2 vents out from the bottom and pulls fresh air in from the top. They also like indirect light when fruiting.

Also, the planter starter box is the perfect size for the gallon bags and I can fit about 6 bags in at a time. Cheap, simple and effective. Here're some photos to give an idea. Hope this helps


11 years ago
About the continued process:

I set one well colonized bag aside for inoculating more brown rice flour and vermiculite jars. I've tried using colonized cardboard to inoculate more sterilized cardboard, but it doesn't seem to work well. I'm guessing there isn't a decent enough nutrient base for the oyster's mycelium to spread.

However, a pinch full of colonized cardboard added to the sterilized BRF cakes works just fine. Within about 3-4 weeks, the new BRF cakes are ready to be transferred to more cardboard. I have not needed to purchase more spawn. Just the first one.

Here's an update on the fruiting of the first batch:


11 years ago
I've also recently started growing Oyster mushrooms and have had really good results with shredded sterilized cardboard and hope this thread helps a bit:

Oyster mushrooms grown on shredded, sterilized cardboard (PHOTOS)

How close are were they to the wood stove? Is sounds like they may have dried out a bit.
11 years ago