## Incubators & Equipment
- **Trust a second thermometer over the incubator's built-in one.** Built-ins drift over time and run a degree or two off — toss in a separate digital probe thermometer/hygrometer combo and calibrate both against each other for a day before you load eggs.
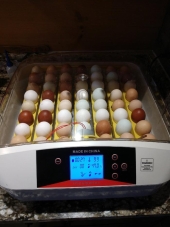
- **Forced-air units are more forgiving than still-air.** The fan evens out hot/cold spots, so if you're hatching for the first time or running a cheap styrofoam incubator, forced-air buys you margin for error.
- **Placement matters more than people think.** Keep the incubator away from windows, vents, and exterior walls — direct sun or an AC blast can swing internal temp by several degrees without the unit ever "knowing."
- **Auto-turners are worth it if you're hatching more than a dozen eggs.** Hand-turning 3x/day works, but it's the #1 thing people forget to do consistently, and missed turns are a real contributor to early-stage deaths.
- **Add water gradually, not all at once.** Humidity swings are harder to walk back than to build up — top off channels/reservoirs a little at a time and let the hygrometer settle before adjusting again.
## During Incubation
I’ll stand on this, but Chicken eggs specifically are more resilient than you think. My first time hatching I used a 20 year old still air incubator made completely of styrofoam. I bought a 3 inch computer fan from Amazon for 20 bucks used toggle bolts to mount it to the “ Roof “ of the incubator and still fluctuated 96.75 ‘ ish to 102.3, obviously you want as consistent a temperature as reasonably achievable, just ensure those dramatic temperature swings last no longer than a few minutes and you should be just fine.

lol 10 of 11 of those hatched btw.
- **Don't chase every needle-twitch on the hygrometer.** Some drift is normal — react to sustained trends over a few hours, not a single reading.
- **Candle at day 7, 14, and day 18 (lockdown).** Early candling catches clears/infertiles so they're not rotting and fouling the air for the rest of the batch; late candling confirms movement before you stop turning.
- **Lockdown = stop turning, raise humidity, stop opening the lid.** Every lid-open during the final 3 days drops humidity fast and can shrink-wrap a chick to its membrane — resist the urge to peek.
- **Leave pipped eggs alone.** The instinct to "help" a slow pip is almost always wrong — a chick that pips and rests for 12-24 hours before zipping is normal, not stuck.
- **Log temp/humidity swings, not just the target number.** A cheap regime that averages the "right" number but swings widely does worse than one that holds steady a degree off — consistency beats precision.
## Post-Hatch / Brooder Care
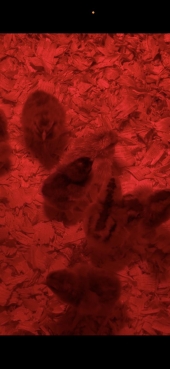
- **Leave hatchlings in the incubator until they're dry and fluffed**, even if that means waiting with wet siblings still pipping — opening the lid too early tanks humidity for everyone else.
- **Brooder temp starts at ~95°F at chick height and drops ~5°F per week.** Watch behavior, not just the thermometer: piled up and peeping = too cold, spread to the edges panting = too hot, evenly scattered and quiet = just right.
- **Chicks don't need food/water for the first 24-48 hours** — they're still absorbing the yolk sac — but have both ready the moment they're moved, since some will want it sooner.
- **Add marbles or clean pebbles to the water dish for the first few days.** Newly hatched chicks are clumsy and will happily drown themselves in an open dish.
- **Watch for pasty butt in the first week.** Dried droppings sealing the vent can be fatal if untreated — a warm damp cloth to gently clean it, checked daily, prevents most cases.
- **Electrolyte/vitamin supplement in the water for the first 3-5 days** helps rough hatches (long shipping, difficult pip) bounce back faster.
- **Don't mix hatch dates in one brooder without a plan.** Chicks even a week apart in age will bully smaller ones — stagger by size/age or add a divider until they're closer in size.