For green onions, we have the best luck with perennial walking onions. They make fat juicy leaves, seem immune to heat, and have a complex, onion/garlic flavor we love.
For fresh vegetables, I concentrate on leaves rather than flower buds or stems (e.i., kale or collards instead of broccoli) both for ease of growing and for high, continuous yields. Leaves are also higher in many nutrients than other parts of the plant. Perpetual Spinach (a type of perennial chard)
https://www.quailseeds.com/store/p9/Perpetual_Spinach_%28Leafbeet%29_Chard.html gives us more meals over the course of the year than pretty much any other greens we've found. It's more heat-tolerant than kale, and very drought-tolerant for a vegetable. During the winter when it is dormant, collards
https://www.quailseeds.com/store/p337/Old-Timey_Blue_Collards.html and turnip greens
https://www.quailseeds.com/store/p503/Seven_Top_Turnip_Greens_%28Cima_di_Rapa%29.html give us greens all winter and luscious budding stalks in spring.
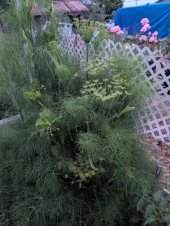
In spring and fall, nothing grows faster and is more versatile than Asian greens. I like Mizuna and Bekana for spring salads, and Tatsoi all winter. Nappa cabbage is easy in fall, and made into kim-chee, it's a staple for us. Korean peppers mature early and have the perfect amount of heat for kim-chee. Both are easier for us to grow seasonally than the long-season European sauerkraut cabbages would be.
Of course, greens are not high in either calories (energy) or protein. That lack is easily filled by growing beans, peas, or other legumes. In our hot-summer climate, dry beans are an easy win. We especially like the King City Pink Bean, a California heirloom bean that is adapted to both short season and high temperatures.
https://www.quailseeds.com/store/p483/KIng_City_Pink_Bean.html The flavor and texture are just superb. It feels like a real bonus that our favorite dry bean for flavor is also so easy to grow.
Corn has been adopted by subsistence farmers all over the world because it gives a lot of easily-processed food without the need for elaborate soil prep, harvesting, or threshing. For rock-solid dependability, we like Carol Deppe's short-season polenta corn
https://www.quailseeds.com/store/p111/Cascade_Ruby-Gold_Flint_Corn.html For bigger yields, or for three-sisters planting, we've found an open-pollinated corn bred by a farmer who saw in the 1970's that corporate hybrids were taking over. He pooled many surviving o-p dent corns and came up with a superb variety he called Wapsie Valley Dent
https://www.quailseeds.com/store/p396/Wapsie_Valley_Dent_Corn.html It seems more vigorous than most of the surviving heirloom corns.
To round out the staples, we grow winter squash. It takes a lot of space, but not all that space needs to be garden soil. We grow it at the edge of the garden and let it romp down a dry hillside. Our winter squash of choice is an heirloom from Idaho called Lower Salmon River, a very sweet, very long-storing squash
https://www.quailseeds.com/store/p34/Lower_Salmon_River_Squash.html that is again easy to grow and adapted to short seasons.
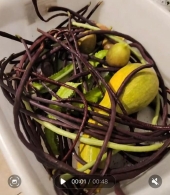
As far as root crops, we grow beets and carrots. For flavor, size, and keeping qualities, we like Lutz, a beet that is no longer easy to find because it's appearance isn't up to supermarket standard.
https://www.quailseeds.com/store/p258/Lutz_Green_Leaf_Beet%2C_Winter_Keeper%2C_Longkeeper.html But until we are able to provide a bed with metal screening on the bottom and sides, the risk of losing the crop to gophers is high. When we grow potatoes, we put them in tubs for that reason. Peppers do best for us in tubs as well, and can be moved under cover in fall to keep ripening.