• Post Reply Bookmark Topic Watch Topic
  • New Topic
permaculture forums growies critters building homesteading energy monies kitchen purity ungarbage community wilderness fiber arts art permaculture artisans regional education skip experiences global resources cider press projects digital market permies.com pie forums private forums all forums
this forum made possible by our volunteer staff, including ...
master stewards:
  • Nancy Reading
  • Carla Burke
  • r ranson
  • John F Dean
  • paul wheaton
  • Pearl Sutton
stewards:
  • Jay Angler
  • Liv Smith
  • Leigh Tate
master gardeners:
  • Christopher Weeks
  • Timothy Norton
gardeners:
  • thomas rubino
  • Jeremy VanGelder
  • Maieshe Ljin

Creative watering techniques?


Posts: 34
Location: West Seattle, WA
  • Mark post as helpful
  • send pies
    Number of slices to send:
    Optional 'thank-you' note:
  • Quote
  • Report post to moderator
Found another creative irrigation technique this week.  We are planting our squash in hills with the center of the hill being a white bucket buried partially in the top of the hill.  There will be a hole in the bottom of the bucket as well as a few small holes (maybe four) around the sides of the bucket below the soil line.

We've been told by a rural farming friend of ours this keeps squash and other water-needy crops watered at the root level for several days at a time.  Freakin' brilliant!  We were planning on doing this with those 2-liter soda bottles we rescued from our neighbors.  We are turning them upside down in our pots we are planting this year.  Waters slowly and efficiently.

Any other creative ways to water?  We are here to learn!
 
pollinator
Posts: 4437
Location: North Central Michigan
43
  • Mark post as helpful
  • send pies
    Number of slices to send:
    Optional 'thank-you' note:
  • Quote
  • Report post to moderator
lots of people leave a milk carton with a couple small holes in the bottom next to a water thirsty plant to drain..

myself I prefer to use soaker hoses where i am able to get them to the plants..my garden being several acres that isn't always feasible..

But I also try to ONLY plant water needy things either right up by the house within 60 to 100 feet max out OR by the pond...or in swampy areas of the property.

I am not into haulin water..and I'm NOT into container gardening at all..as to me..it is just far too much work.
 
Posts: 182
Location: Missouri/Iowa border
3
2
  • Mark post as helpful
  • send pies
    Number of slices to send:
    Optional 'thank-you' note:
  • Quote
  • Report post to moderator
I prefer sheet mulching in such great quantity that I only have to water at all in August when it usually doesn't rain for a month here.

Ruth Stout used this method for years and got to the point that she just raked back enough mulch to plant, and rarely ever had to weed. (she usually just smothered weeds with more mulch).

Here in northern Missouri we get about 36" of precip. annually, and most of that falls between December and May. Of course the last 3 years we've gotten closer to 50" of rain so watering hasn't been as much of a concern as in years past.

At any rate, we rarely get much rain between July 4 and August 20 or so.

I typically put soaker hose along my rows and mulch over that.  So IF I need to water (which I haven't in a couple of years) it goes to the roots and soaks into the mulch to be used later instead of evaporating off the surface.

My mom used to dig little canals in her garden and plop a garden hose in the uphill side and just let it fill them all and soak in (kind of like in keyline). The only problem was that the plants up close got soaked and the plants further away were still pretty parched.
 
Brenda Groth
pollinator
Posts: 4437
Location: North Central Michigan
43
  • Mark post as helpful
  • send pies
    Number of slices to send:
    Optional 'thank-you' note:
  • Quote
  • Report post to moderator
i totally agree on the sheet composting..do it myself here..mulch is your best bet for saving water and healthy plants
 
Nicholas Covey
Posts: 182
Location: Missouri/Iowa border
3
2
  • Mark post as helpful
  • send pies
    Number of slices to send:
    Optional 'thank-you' note:
  • Quote
  • Report post to moderator
I managed to get my hands on an old copy of Ruth Stout's "No Work Gardening" book. I've passed it around the family a couple of times. Its a hard read because it's not really organized, but it covers a lot of different aspects of the abilities of sheet mulching. I'm on my third year, but unfortunately had to give up my old garden spot because I was moving. That initial layer is the absolute hardest work involved that I have found so far. After that, it's pretty easy and (surprisingly) not even really work.

Brenda, How long have you been able to practice this technique?
 
                            
Posts: 34
Location: West Seattle, WA
  • Mark post as helpful
  • send pies
    Number of slices to send:
    Optional 'thank-you' note:
  • Quote
  • Report post to moderator
I can appreciate the merits of drip hoses and drip tape in a larger space.  We're planning on using the drip tape in our larger plots and recommend it in our classes.  However, for a lot of our urban folks (including ourselves) container gardening is the only option we have.  We're basically looking for inventive ways to get water to those plants without wasting resources.
 
Nicholas Covey
Posts: 182
Location: Missouri/Iowa border
3
2
  • Mark post as helpful
  • send pies
    Number of slices to send:
    Optional 'thank-you' note:
  • Quote
  • Report post to moderator
What kind of containers are you growing in?
 
Brenda Groth
pollinator
Posts: 4437
Location: North Central Michigan
43
  • Mark post as helpful
  • send pies
    Number of slices to send:
    Optional 'thank-you' note:
  • Quote
  • Report post to moderator
Well we have been gardening this land for 38 years ..but with a house fire destroying ost of the land in 2002 and then losing a large bunch of it in 2006 to our son's house (we gave him a 100 x 200 area to put his house on our land and then MIL gave him 5 acres attached to it..

so we lost about 3/4 of the cultivated area of our property due to the house fire and about another 1/2 of that that was left to our son.

So we basically had to start over..in the larger cutivated new areas recently.

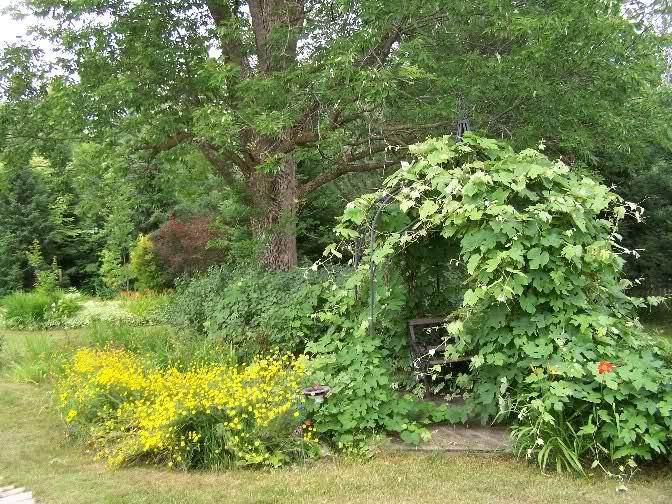
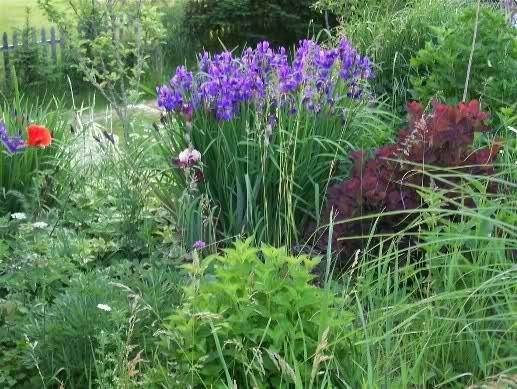
My front woodsy garden area, photo below, is original that we started working on shortly after we were married in 1971 (but FIL mowed down my trees for several years) This area all the leaves and needles and debris are raked UNDER the trees or in the beds each year..as well as stuff added like wood bark an chips, manure and sawdust..as often as possible..where the metal gazebo is with the 100 year old grapevines, that WAS a wooden gazebo when we had our housefire and it was destroyed, so we put up the metal one as a stop gap for the vines..the lawn to the left and the garden there were ruined by the fire..the house was about 13' left of the gazebo..garage is to the left of that and then our son's house is now on the other side of the garage where we had established raised bed gardens and a huge woods area..now all gone.
[/img]

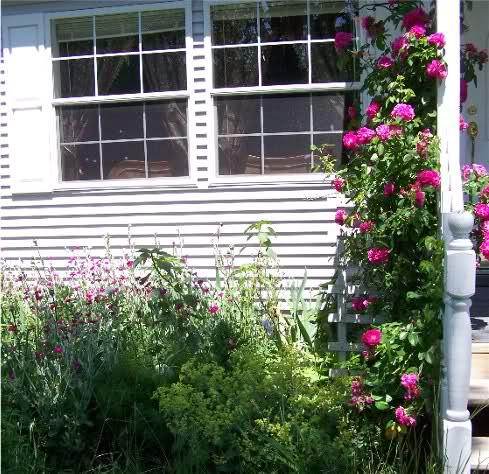
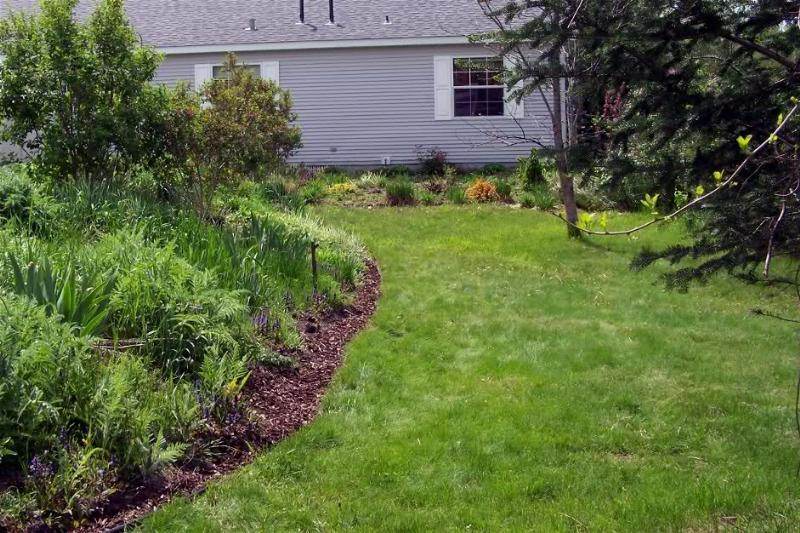
The gardens directly around the new house and around our drainfield are all just babies..less than 5 years old..and these photos are from 2 years ago..we have been building up the soil as well as we have been able..but we haven't had resources to do too much..this year i have already added about 8" of stuff to the soil..as well as dozens of fruit and nut trees, new shade trees, berry bushes and shrubs..

first picture front 2 years ago..about 2  year old garden at that point..
now there are 4 fruit trees in this garden as well.
[/img]

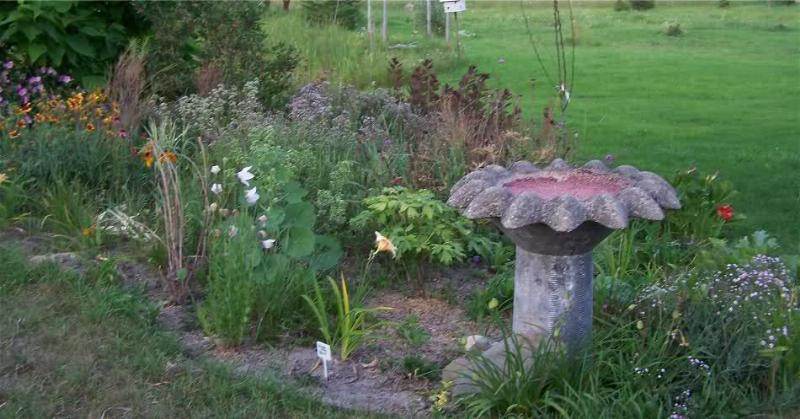
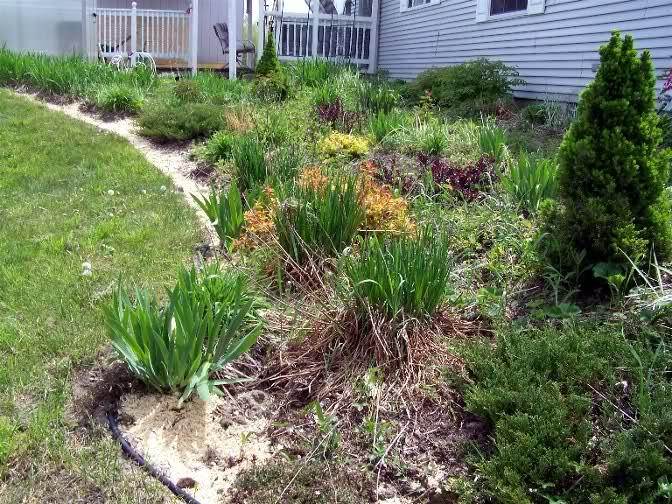
The next photos are of the gardens around the rear of the house and around the drainfield taken 2 years ago..also about 2 or 3 years old..when the photos were taken..there are now also added 7 more apple trees and 4 more cherry trees in this area as well as a lot of other plants...drainfield lawn left, bank down to field and pond right, baby garden in the middle.
[/img]
opposite side of the drainfield ..bank going down
[/img]
[/img]
these are photos of when we were building the gardens ..putting in the edging and a layer of mulch
[/img]
[/img]
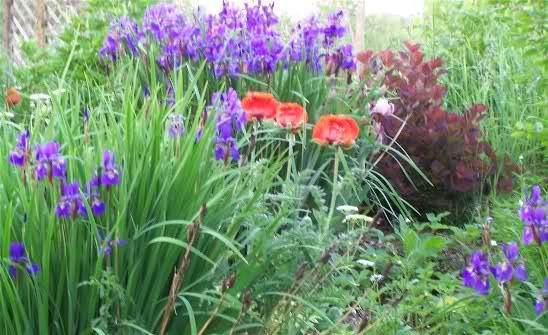
In these photos there was a layer of manure under a layer of pine chips...since we have built them up with vegetable scraps, eggshells, bark chips, more manure, hay, and lots of more plantings including strawberries and cherry trees, more shrubs..etc..

Can't wait to show you this years gardens..the ground is now thick and fll of worms, the mulch is now about 1 ' deep and varied ingredients in it..it is so lush and green and our leaves aren't even out on the trees yet here (well some are now)

 
steward
Posts: 2482
Location: FL
140
  • Mark post as helpful
  • send pies
    Number of slices to send:
    Optional 'thank-you' note:
  • Quote
  • Report post to moderator
Do a google search for PITCHER IRRIGATION.

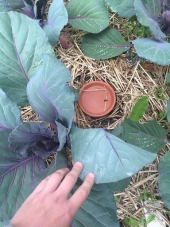
My first experiment was with a regular unglazed 8' terra cotta plant pot.  I buried it in the ground up to the rim, filled it with water, let mother nature do her thing.  Oh, and I stopped up the bottom hole with a cork.  I filled the pot when it was low.  It was in the middle of a bed of cauliflower plants, 10 feet in both directions.  Bed was 4' wide.

Results were dramatic in a month.  Plants within a foot of the pot were twice the size as plants at the far ends of the bed.  Within 2' of the pot the plants were not quite as big as the closest plants, but still impressive.  The shape of the canopy was a bell curve.

At harvest, the plants closest to the pots put out fine heads of cauliflower.  At the ends of the beds, they were buttoned. 

All the beds in my yard now have pots spaced at 3-4' intervals.  I run drip hose with ends in the pots.  A timer turns on the water, filling the pots automatically twice a week.  I cover the pots with ceramic floor tile, not because of mosquitoes, but because cats will trample the plants for a drink.  If it rains a great deal, the pots will fill from the excess water in the soil.  If it is dry, the pots will drain faster, I simply adjust the timer.  I had to use the drip fill system because I was having trouble finding the pots, even with the bright blue tile on top.  The growth was fantastic.

Water is offered to the soil at the root level.  My plants are transplanted with 6" deep roots, they can access the water.  Weeds starting from seeds don't have a chance.  The greater the need for water, the faster it moves out of the pot.  Its a beautiful thing. 
 
Posts: 343
3
  • Mark post as helpful
  • send pies
    Number of slices to send:
    Optional 'thank-you' note:
  • Quote
  • Report post to moderator
kpeavy, another good reason for covering your pots is evaporation. You could rig a pipe with a floating indicator to A: help locate pots, B: tell you when they need water, and C: provide a fill point without having to dig up your buried pots.
 
                              
Posts: 461
Location: Inland Central Florida, USA
  • Mark post as helpful
  • send pies
    Number of slices to send:
    Optional 'thank-you' note:
  • Quote
  • Report post to moderator
I like the terracotta pot idea.  Just gotta be sure no one is gonna step in one and get hurt.

I've tried the drink jug thing but my soil is too sandy and the jug or bucket would just drain way too quickly unless the hole was so small that the sand could clog it.

I've lately built an outdoor kitchen area so the sink and shower (yes, I put a shower in the outdoor kitchen) drain into a mulch filled trench that runs along one side of a garden bed.  That will be a good place to plant greedy plants.

I'm not too creative on the watering otherwise.  I just switched all the irrigation on my lot to drip irrigation so I can water small amounts often.  Being in a hot climate with sandy soil, I would rather not water too deep in my garden beds or I find myself washing away the nutrients and the plants start showing signs of deficiency.  Watering smaller amounts often in my soil/climate allows me to keep the moisture in the improved soil where the plants can get it.
 
pollinator
Posts: 1560
Location: Zone 6b
211
goat forest garden foraging chicken writing wood heat
  • Likes 2
  • Mark post as helpful
  • send pies
    Number of slices to send:
    Optional 'thank-you' note:
  • Quote
  • Report post to moderator

kpeavey wrote:
Do a google search for PITCHER IRRIGATION.

Weeds starting from seeds don't have a chance.  The greater the need for water, the faster it moves out of the pot.  Its a beautiful thing. 


I'm going to try this.  My biggest weed problem is bindweed, which is growing from roots so it won't be hindered, but we do have some other weeds that come up from seeds...hmm, but the bulk of those are also edible, such as the amaranth and purslane....Oh, well, I'm still going to try it.  It pretty much stops raining here by the middle of June and doesn't start again until at least the end of September, so we HAVE to water or we don't get anything.  Drip tape and soaker hoses will rapidly clog due to the excess of mineral in the water, so I've been using a sprinkler.  But that makes the ground so soft and mucky I can't get into the garden for hours after I've watered, and it's a pain having to move the hose around without damaging plants.  I can see uses for this in our flower bed in front, too. 

Thanks.

Kathleen
 
Ken Peavey
steward
Posts: 2482
Location: FL
140
  • Mark post as helpful
  • send pies
    Number of slices to send:
    Optional 'thank-you' note:
  • Quote
  • Report post to moderator
One 8" pot will serve a distance of a couple feet in all directions in sandy Florida soil.  This is why I came up with the 3-4' spacing.  Different soils would probably have different rates of water seepage and affected area.

Evaporation
Not a big issue even on hot days.  The plants around the pot tend to shade the pot and the surface area of the water is about 1/3 sqft.  If the pot is not buried to at least the lip, water will evaporate through the sides of the pot.  The biggest problem in Florida sand is keeping the moisture up.  Combined with mulch, this system works pretty well.

Rigging and Marking
I have about 50 pots in the beds, spaced mostly uniformly.  I know where to look for them if I need to.  Rigging a device with a floating indicator was thought about, but more complex than I needed.  The timer opens up the valve, closes it after 2 hours.  This is enough to fill every pot if they are empty.  Overflow is at the rate of the drip line so it gently drips over the edge of the pot. 

Fill Point
At first I took a hose directly to the pot.  As more pots went in, I tied a short section of hose to a stick so I could fill the pots faster by shoving one end of the stick into the pot and putting the hose to the other end in my hand-no repeated bending over and much faster.  Now the fill point is the water faucet and it is automatic.

Pot Size and problems
I chose 8" because I had a couple of them handy and they are only about 2 bucks each last time I bought any.  Different uses and needs would call for different pot sizes.  I get a frost a few times a year, maybe for a couple of weeks I'll get some hard freezes.  I have a couple of pots that have developed cracks.  While it is not a problem for me, if the pots are used in an area where the ground freezes, taking the pots out for the winter would be a good idea, lest they be destroyed.  I have city water.  They pour all kinds of junk into it to make it safe.  Its hard water to begin with.  I do get some mineral residue in the pots and since I started using them, the flow rate has slowed a little.  I've had them in the ground continuously with city water for 4 years.  I'll probably get a few more years out of them before I have to replace them due to clogging.  Cork tends to rot after a couple of years,  Rubber stoppers and synthetic cork works.  I have used foam to plug the holes, it does the job

Stepping in the pots
Anyone who has been in my yard knows by now NOT to step in the beds.  The bright floor tile cover can help to prevent tripping.  I am constantly replacing harvested crops with transplants so most of the pots can be seen most of the time.  It would be a simple matter to shove a tall stake in the ground next to a pot to warn people.

Sprinkler
Because the water is at the root level, there is no compaction of soil as is seen with sprinkler use.  The water use is minimal, 50 pots hold about 30 gallons, serves 750 sqft of beds, nothing else.  I let the drip head run for 2 hours so I go through about 100 gallons.  By comparison, a sprinkler with a flow rate of 2.5 GPM releases 150 gallons per hour and waters pathways, the side of the shed, the driveway, the clothesline, the lawn mower, the sidewalk and makes the hens nervous.  A sprinkler can lose 30% of the water directly to the atmosphere.  Sprinklers impact the soil surface causing compaction.  Water sits on top of the soil, promoting evaporation losses.  Sprinklers put the water on the leaves.  This promotes mildew on the leaves, especially on squash plants.  Most of you have seen how little watering depth a sprinkler offers, even when you let the thing run half the day.  The pots maintain soil moisture levels, with the water moving through the sides depending on the conditions of the soil. 

An advantage over just drip line is the ability of the pots to serve as a collector/drain in the event of too much water.  Even covered and with the timer turned off, the pots will fill up when it rains.

I have a splitter in the line so I can water half the beds on one day, half the beds the next day.  I can open up both lines if I wish to water all beds at the same time.  There is a 25 PSI pressure control valve inline just after the timer.  This will serve 250 drip points at a time.  Each drip tip ills a pot which serves a 4'x4' area.  A single drip line will serve 4000 sqft maximum area but since I run it only 2 hours, a single faucet would be able to serve up to 12 times that area, the best part of an acre. 

Pitcher irrigation was developed for regions where a water supply is limited, hard to reach, or can't be wasted.  Its like having tiny ponds all around the garden. 
 
                              
Posts: 461
Location: Inland Central Florida, USA
  • Mark post as helpful
  • send pies
    Number of slices to send:
    Optional 'thank-you' note:
  • Quote
  • Report post to moderator
with the terracotta pots, when the minerals build up to the point that they don't seep enough anymore, you might be able to revive them by soaking in vinegar.  Of course this might cost almost as much as simply getting new pots and require effort on your part to boot.

I'll definitely be looking into where such a system would best work around my yard.  I've got lots of drip lines already run but a single dripper running from a drip line only covers so much area.  The sunken pots covering a larger footprint can support more plants at once and has the benefit of being soil moisture regulated.   Will definitely be trying this out in garden beds that are not already well served by what I have going.
 
Ken Peavey
steward
Posts: 2482
Location: FL
140
  • Mark post as helpful
  • send pies
    Number of slices to send:
    Optional 'thank-you' note:
  • Quote
  • Report post to moderator
Good idea, I bet it would work.
Rather than put the vinegar to them, they can be used as originally intended...for potted plants.  They still have the big hole in the bottom for drainage with potted plants. 
 
                              
Posts: 461
Location: Inland Central Florida, USA
  • Mark post as helpful
  • send pies
    Number of slices to send:
    Optional 'thank-you' note:
  • Quote
  • Report post to moderator
And if you go back to using them as plant pots, there is plenty of calcium on the pot for the plant

I generally only use the terracotta for aloe though as they dry out too fast for most other things here.
 
Ken Peavey
steward
Posts: 2482
Location: FL
140
  • Mark post as helpful
  • send pies
    Number of slices to send:
    Optional 'thank-you' note:
  • Quote
  • Report post to moderator
f the pots are too clogged with mineral deposits to be useful in the beds, they could be of better use for potted plants if they hold the water better.  We could write a book on this one.

Time for me to get back to work.
 
Kathleen Sanderson
pollinator
Posts: 1560
Location: Zone 6b
211
goat forest garden foraging chicken writing wood heat
  • Mark post as helpful
  • send pies
    Number of slices to send:
    Optional 'thank-you' note:
  • Quote
  • Report post to moderator
Well, probably they would clog with mineral deposits eventually here, too -- very high mineral levels in our water.  But we have heavy clay soil, so I could use the wider spacing.  It's the best idea I've seen so far, at any rate, and I'm going to try it.

Thanks for mentioning this!

Kathleen
 
gardener
Posts: 965
Location: ZONE 5a Lindsay Ontario Canada
12
  • Likes 1
  • Mark post as helpful
  • send pies
    Number of slices to send:
    Optional 'thank-you' note:
  • Quote
  • Report post to moderator

LazyLocavores wrote:
Found another creative irrigation technique this week.  We are planting our squash in hills with the center of the hill being a white bucket buried partially in the top of the hill.  There will be a hole in the bottom of the bucket as well as a few small holes (maybe four) around the sides of the bucket below the soil line.


I'd be worried about the plastic leaching dioxins, bisphenol A, and other unwanted crap into the soil.
 
                              
Posts: 461
Location: Inland Central Florida, USA
  • Likes 1
  • Mark post as helpful
  • send pies
    Number of slices to send:
    Optional 'thank-you' note:
  • Quote
  • Report post to moderator
If using food grade buckets, the dangers of leaching are probably minimized (or at least equal to eating the food that had been in the buckets before their re-use as watering containers.)

Is it much worse than running the water through a hose, or an irrigation system, or carrying the water in a watering can?

There are possible dangers in just about every material we might use and also the damage the manufacturing can cause to the environment.  The trick is to weight what we can into the decisions we make and do the best we can.  Please don't let the idea that plastic "might" contain something bad, paralyze you out of doing action.  If you are really worried, do some research into the particular type of plastic you might be worried about so you can make more informed decisions.
 
Travis Philp
gardener
Posts: 965
Location: ZONE 5a Lindsay Ontario Canada
12
  • Mark post as helpful
  • send pies
    Number of slices to send:
    Optional 'thank-you' note:
  • Quote
  • Report post to moderator

TCLynx wrote:
If using food grade buckets, the dangers of leaching are probably minimized (or at least equal to eating the food that had been in the buckets before their re-use as watering containers.)


I have done some research into this and it tells me that when dealing with hard plastics its safer to assume that it does contain bisphenol A in it. I was just trying to bring this consideration into the conversation incase it hadn't occured to someone reading the thread.

TCLynx wrote:
Is it much worse than running the water through a hose, or an irrigation system, or carrying the water in a watering can?


In my opinion it would be worse to use a bucket in this manner because by cutting or burning holes in the plastic you would be weakening the strength and integrity of it, and if cutting it you'd probably end up with jagged edges that could flake off easily by the action of the water pressure. 

Yes there is possible danger with any irrigation system bu I think the probability of contamination in this particular method is greater than the benefit.


Posts: 250
Location: Marrakai Northern Territory Australia
  • Mark post as helpful
  • send pies
    Number of slices to send:
    Optional 'thank-you' note:
  • Quote
  • Report post to moderator
one more point to consider would be that food grade plastics would not be overly UV stabilized as they are not made for outdoors in general
 
pollinator
Posts: 2103
Location: Oakland, CA
21
  • Mark post as helpful
  • send pies
    Number of slices to send:
    Optional 'thank-you' note:
  • Quote
  • Report post to moderator
The New Alchemy Institute built a greenhouse in 1987, where much of the water & nitrogen was produced by the metabolism of large compost piles, and transported to the underside of the beds as vapor.

The condensation was also a major carrier of heat, and the fact that this was on the underside allowed soil bacteria enough space to digest all that ammonia into nitrate.

http://nature.my.cape.com/greencenter/q36/ghupdate.htm
 
Posts: 2134
18
  • Mark post as helpful
  • send pies
    Number of slices to send:
    Optional 'thank-you' note:
  • Quote
  • Report post to moderator
gosh brenda groth talk about luxuoriouose vegetation. rose macaskie.
 
steward
Posts: 3701
Location: woodland, washington
199
  • Mark post as helpful
  • send pies
    Number of slices to send:
    Optional 'thank-you' note:
  • Quote
  • Report post to moderator
I've used ollas (pitcher irrigation) successfully both in the ground and in containers.  got some little tiny terracotta pots to use in containers.  worked pretty well.  I've been hesitant to use them next to my trees, as I've heard that tree roots will quickly surround the pot and then crack it, but I've also heard of folks watering trees this way without any problems.

my first try was in too small a pot so it didn't work out, but I'm going to add azolla to my ollas instead of covering them up.  azolla is a little aquatic fern that fixes nitrogen.  by covering the surface of the water, azolla would prevent evaporation, but would also fertilize plants at the same time.  might add the additional step of cleaning decomposing azolla out occasionally, but that should be pretty easy.
 
Posts: 428
Location: Hartbeespoort, South Africa
4
  • Mark post as helpful
  • send pies
    Number of slices to send:
    Optional 'thank-you' note:
  • Quote
  • Report post to moderator

LazyLocavores wrote:
Any other creative ways to water?  We are here to learn!


I am building "reservoirs" under my pathways with a downpipe to get the water in. My final plan is to use water from the river pumped via a coil pump which is driven by the river flow... up into a tank... then ram pump it up to the Food Forest. I explain about it here on my blog... http://edenparadigm.blogspot.com/2009/11/first-thoughts-on-building-food-forest.html

It is effort intensive to make under the pathways useful this way but I believe I will benefit greatly later... just as Mr Phiri did. [on the blog too]. His set up gave me the idea.

Chelle

 
Travis Philp
gardener
Posts: 965
Location: ZONE 5a Lindsay Ontario Canada
12
  • Mark post as helpful
  • send pies
    Number of slices to send:
    Optional 'thank-you' note:
  • Quote
  • Report post to moderator
I've seen a water 'pump' that was actually just black water pipe above ground which was able to bring water uphill via the heat absorbed by the sun. Unfortunately at this time I can't find the pictures or info, and my search on google isn't effective as I can't find search words that don't bring up a whole bunch of other topics. I'll keep trying though.

Has anyone else heard of this? I think the Bullock Brothers have one of these at their farm.

Cyara, this might be an easier alternative to the spiral pump idea on your blog.
 
tel jetson
steward
Posts: 3701
Location: woodland, washington
199
  • Mark post as helpful
  • send pies
    Number of slices to send:
    Optional 'thank-you' note:
  • Quote
  • Report post to moderator

Has anyone else heard of this? I think the Bullock Brothers have one of these at their farm.


I'm going on record as extremely skeptical of this.  it was most likely a loop of black pipe with half of it covered by straw.  water would flow because of convection, but in a circle.  you could also be thinking of a solar hot water heater for a shower which was gravity fed from uphill.  alternately, maybe I don't understand physics like I think I do and you're exactly right about what you saw.
 
Travis Philp
gardener
Posts: 965
Location: ZONE 5a Lindsay Ontario Canada
12
  • Mark post as helpful
  • send pies
    Number of slices to send:
    Optional 'thank-you' note:
  • Quote
  • Report post to moderator
A friend of mine has pictures of the system, he says it works and he's never given me a reason not to believe him.
 
                              
Posts: 461
Location: Inland Central Florida, USA
  • Mark post as helpful
  • send pies
    Number of slices to send:
    Optional 'thank-you' note:
  • Quote
  • Report post to moderator
I've made a thermosiphon water heater work but it is effectively a closed loop with a tank at the top where cool water enters near the bottom of the tank and hot water can be drawn from the hot top the tank and the cool water will flow down to the bottom of the solar collector where the heating will push hot water up to the top of the collector and into the tank at a point above the cool water feed to the bottom of the collector.

I've never heard of a way to use the energy of the sun to make water flow up hill through a black pipe.  I would be interested to see some diagrams of how this works.  I have seen some solar/mechanical pumps but they were not terribly efficient.
 
Travis Philp
gardener
Posts: 965
Location: ZONE 5a Lindsay Ontario Canada
12
  • Mark post as helpful
  • send pies
    Number of slices to send:
    Optional 'thank-you' note:
  • Quote
  • Report post to moderator
I'll email my friend and ask her if she can send me a picture and/or explain how it worked.
 
Joel Hollingsworth
pollinator
Posts: 2103
Location: Oakland, CA
21
  • Mark post as helpful
  • send pies
    Number of slices to send:
    Optional 'thank-you' note:
  • Quote
  • Report post to moderator

Travis Philp wrote:
I've seen a water 'pump' that was actually just black water pipe above ground which was able to bring water uphill via the heat absorbed by the sun.


Oh! If it's what it sounds like, this isn't a thermosyphon at all.

Rather than using the buoyancy of thermally expanded water in a continuous cycle, it harnesses the same volume change over a day/night cycle. It has a one-way valve at either end: it takes in water as the volume decreases, and lets it out the other end as the volume increases. You would want the outlet to be very nearly ground-temperature water, for the sake of efficiency & durability. And the output valve would have to be very good at keeping out air.

I bet it works much better in the winter, than in the summer, but pumps at an opposite time of day.  At that point, it will put water out as freezing occurs, and take in more as that thaws. That would also push heat from the ground near the output pipe into the plants, which would probably be helpful.

I wonder if granules of cross-linked polyethylene glycol in the warming/cooling zone would help the efficiency. Their interaction with water changes substantially with temperature, but I'm not 100% certain if that means an overall volume change, or just a flow of water into or out of the polymer with no volume change.

In a pressurized container with a screened opening to the water and a rubber membrane between the pellets and the air, this stuff would be an interesting and much more effective variant on this sort of pump, but almost certainly not worth the complexity.
h-bond_pump.PNG
h-bond_pump
h-bond_pump
 
tel jetson
steward
Posts: 3701
Location: woodland, washington
199
  • Mark post as helpful
  • send pies
    Number of slices to send:
    Optional 'thank-you' note:
  • Quote
  • Report post to moderator
interesting.  seems like you would have to have a really large volume of water in your pipe to get much throughput.  clever, though.
 
Posts: 720
Location: Zone 5
11
  • Mark post as helpful
  • send pies
    Number of slices to send:
    Optional 'thank-you' note:
  • Quote
  • Report post to moderator
Good morning... mostly I have posted on the "I have too much water in my yard" threads.  But now on to the back % of the new place.  It is sloped and wooded...the woods are in bad shape. 

I have ordered many native tree seedlings.  I can not drag a hose out to the woods but know for the first year these baby trees will need extra care.  As they come in packs of 25 trees each...I have 100 seedlings ordered. 

Looks like I will be saving milk jugs and soda bottles to put out with the seedlings... also will cut bamnoo stakes to tie seedlings to but more importantly to mark.  I will paint or flag bamboo.

We freeze so I would have to pull pots and that is not going to happen...or I would sure go this way closer to the house.  I am instead going to try to talk hunny into several decorative ponds around the yard.  We get enough water year round to mostly keep them full...and I could top them off if needed with the well. 

I wil combine the pond(s) with drip irrigation...made to self drain so it does not need to be pulled for winter.

Also as I am only paying $.5o per seedling I can not justify spending $4 in pot, steak, etc. per tree.  Though they are mostly persimmon, paw paw, and dog woods, with a bundle of spruce for the north fence.  I plan to mix several things into the windbreak but have to study so.

My north fence is 21 feet norht of the house.  Cattle on other side of barbed wire fence.  Cows can and will put head thru fence to snack.  One of you book smart people help me out...change of topic

So if anyone can think of anythin to add to my plan (soda and milk jugs, tall marker stake) I need all the help I can get.  How deep should I bury the jugs?  Rocky ground here, so hard to dig.
 
                              
Posts: 461
Location: Inland Central Florida, USA
  • Mark post as helpful
  • send pies
    Number of slices to send:
    Optional 'thank-you' note:
  • Quote
  • Report post to moderator
I've tried to do the milk jug watering thing before but in my sandy soil, the jug tended to just drain and the plastic is so soft that even if it didn't get enough air back into the jug to let it drain easily, it tended to just collapse a bit.  The sturdier juice jugs seemed to work better for me this way but I still haven't found the best way to keep them from draining way too fast.

However, if you can't drag the hose out to all the new seedlings that you are placing jugs next to, how are you planning to fill all the jugs?  That is a lot of trips with a watering can each week.
 
Joel Hollingsworth
pollinator
Posts: 2103
Location: Oakland, CA
21
  • Mark post as helpful
  • send pies
    Number of slices to send:
    Optional 'thank-you' note:
  • Quote
  • Report post to moderator

TCLynx wrote:
I've tried to do the milk jug watering thing before but in my sandy soil...I still haven't found the best way to keep them from draining way too fast.


It might be worthwhile mixing something very mucilagenous into the few inches of soil nearest the jug. It would eventually rot away, but a paper found said it can last a year or more. Having a gel in between the sand particles would also allow the soil to block air, and might allow one of those inverted bottle waterers to work.

Psillium husk was the first option I read about, but ground fenugreek seed holds a lot of water, too. There might also be volunteer succulents on the property that can be pureed etc.
 
                            
Posts: 43
  • Mark post as helpful
  • send pies
    Number of slices to send:
    Optional 'thank-you' note:
  • Quote
  • Report post to moderator
I have the advantage of having the town drainage ditch run behind my property, i have taken advantage of this by pumping the water into barrels, sometimes several hundred gallans at a time, its been a great advantage.
 
author and steward
Posts: 52410
Location: missoula, montana (zone 4)
hugelkultur trees chicken wofati bee woodworking
  • Mark post as helpful
  • send pies
    Number of slices to send:
    Optional 'thank-you' note:
  • Quote
  • Report post to moderator
I've always wondered about burying old jars in the soil.  When it rains, they fill up.  When it gets dry, plants can have a drink.

I've never tried it.  I worry that the water would get funky and cause problems.


Posts: 461
Location: Inland Central Florida, USA
  • Mark post as helpful
  • send pies
    Number of slices to send:
    Optional 'thank-you' note:
  • Quote
  • Report post to moderator
Look up wicking beds.  I think the main method of keeping the over wet media in the bottom of a wicking bed from going "too funky" is to allow it some dry out time between re-filling it.

Now when you get to the point of taking about something as small as "jars" well the usefulness seems to me like it might not be enough to justify burying a bunch of stuff in the soil.  (of course when I think of jars I'm thinking of glass jars and the thought of a bunch of glass jars buried in the garden where I might accidentally find one with a shovel or a broken piece of one with a wet dirty hand while transplanting makes me think to avoid it.  I'm not very good at making myself wear gloves while digging in the soil.)

Anyway, a wicking bed can be as simple as a layer of something that will hold water buried below some mulch with dirt for planting on top.  There are many different versions of how to do it.  In some the plants are actually planted in the soil on top of the wicking bed while others have the wicking material buried beside plant rows.  Some have perforated pipes and a port for adding the water and others don't bother with it.  Some might just be temporary trenches partially lined with plastic to provide a row of trees with extra irrigation during establishment while others might be more permanent.

The truth is, any plant pot that does not have it's drainage holes right at the bottom of the pot, can essentially act as a wicking bed by holding some excess water in the bottom of the container and allowing it to slowly wick up into the soil above.

Now I don't personally have much experience with this technique other than the plant pots with the drainage holes in the sides rather than the bottom.  I have heard people with experience of it claim it is the best method of growing.
 
                    
Posts: 63
Location: N.W. Arkansas
  • Mark post as helpful
  • send pies
    Number of slices to send:
    Optional 'thank-you' note:
  • Quote
  • Report post to moderator
I am very fond of manure tea for my garden, but, I don't like walking around with a bucket of it, and dipping it out all the time.

I use alot of former gallon water jugs.  I remove the bottoms, use these for trays under plants, and even to start some seeds in.  I use the top part as a cloche.  I see references to these not lasting in the sunlight.  Gee at about 10 years old, mine aren't even brittle.
Okay, so maybe they won't last for 20 years.

Well, I decided to combine the two: my aversion to carrying compost tea around, and my love of using it on the garden.  I inverted my water jug cloches, and filled them up with partially aged manure.  Then I just watered into them... instant plant food in the form of manure tea.  I just replenished the manure as it was used up.

Great in theory, and it took hours to drain into the soil, without a lid on the jugs.

The plants loved it, grew like crazy.  Then suddenly, I noticed, no matter how much rain I got, my plants wilted if I didn't hand water them.  How odd!  I then decided to remove the jugs... the roots had grown into the jugs.  I honestly thought of that, and kept the jugs all about 6" away from the baby plants.  But the roots grew that 6" distance rapidly.  I then put the plants on rationing in the jugs and side dressed them to encourage more roots in other directions, because they were covering the jugs and it was getting difficult to get water into them.  It worked and I could quit filling the jugs.


I don't see any reference to the major problem that I ran into... training the roots to expect water from one major area.  You don't water shallowly, if you do the roots stay shallow and don't grow deep.  You also should be careful with a pot for manure tea or watering, again, the roots will follow the nourishment and water.  With a 5 gallon bucket or a jug system, your roots will grow towards it, and not down deep.

I am totally rethinking this whole idea.  I still don't want to carry buckets of smelly manure tea!
gift
 
The Humble Soapnut - A Guide to the Laundry Detergent that Grows on Trees ebook by Kathryn Ossing
will be released to subscribers in: soon!
reply
    Bookmark Topic Watch Topic
  • New Topic