• Post Reply Bookmark Topic Watch Topic
  • New Topic
permaculture forums growies critters building homesteading energy monies kitchen purity ungarbage community wilderness fiber arts art permaculture artisans regional education skip experiences global resources cider press projects digital market permies.com pie forums private forums all forums
this forum made possible by our volunteer staff, including ...
master stewards:
  • Nancy Reading
  • Carla Burke
  • r ranson
  • John F Dean
  • paul wheaton
  • Pearl Sutton
stewards:
  • Jay Angler
  • Liv Smith
  • Leigh Tate
master gardeners:
  • Christopher Weeks
  • Timothy Norton
gardeners:
  • thomas rubino
  • Jeremy VanGelder
  • Maieshe Ljin

Building my first mass rocket stove

 
Posts: 4
1
  • Mark post as helpful
  • send pies
    Number of slices to send:
    Optional 'thank-you' note:
  • Quote
  • Report post to moderator
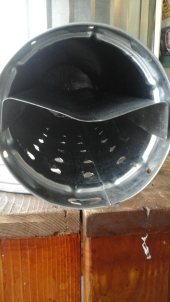
my first mass rocket stove here and it seems to work pretty good except for I can't quite understand why my bench don't heat up like I thought it would I mean it gets up to a hundred and ten degrees but if I build the mass any bigger cuz right now I only got one inch above my exhaust pipe if I put any more in there I don't get any heat out of it . I built the fire box out of metal which now I realize I probably should have went and did some firebrick but this is a new to me and I'm a metal guy so I tried metal.... learning curve. I used  an oxygen tank that it's 3/8 thick for my Riser tube on the inside 10 inch round ... Is that too big since I'm only using a 6in exhaust? I can insert  6in tube inside of that and then pack it with vermiculite to make it a six inch Riser tube and I'm wondering what a six inch Riser tube you better than the 10inch?  I have good draw  but all wood ignites and then fire starts  chugging like a train. About the mass the clay went in in layers and after it dried it seemed to insulate more then radiate.should I use Pete gravel ? Is straight clay not good ...it cracked really bad.not sure how to post pics took a while to figure how to post lol...    
 
Rocket Scientist
Posts: 1809
Location: Kaslo, BC
525
building solar woodworking rocket stoves wood heat greening the desert
  • Likes 1
  • Mark post as helpful
  • send pies
    Number of slices to send:
    Optional 'thank-you' note:
  • Quote
  • Report post to moderator
Welcome Ken!  

To post pictures, after you press the "Post reply" button, there is an "Attachments" tab. Click "upload a file" and go from there.

Building with metal can be a good way to get the basics of how a Rocket Mass Heater works, but long term insulated varieties mostly built and recommended on permies are prone to quick deterioration.

Generally, the (CSA Cross Sectional Area) is kept the same through the system which means a 10 inch riser on a 6 inch exhaust is too big. Insulation is particularly important in the riser as it is the main pump for the system to work effectively and burn cleanly. Metal is really prone to a short life here. Ceramic fibre and Perlite are two of the biggest go-to materials.

To keep clay from cracking (as much) in your mass, sand is added. How much depends on the clay content of your soil. A ratio of 3 sand to 1 clay soil works for me but experiment with yours until your happy with the results.
Pea gravel (with air gaps) is not as effective as a solid mass is for collecting and retaining heat, but then the pea gravel was originally recommended for speed and portability, not necessarily for being the best for all situations.

If you havn't read the book The Rocket Mass Heaters builders guide it is highly recommended.
 
Ken Gabehart
Posts: 4
1
  • Mark post as helpful
  • send pies
    Number of slices to send:
    Optional 'thank-you' note:
  • Quote
  • Report post to moderator
Thank you for the reply and info I attached a video of what I got going on. Well I guess not I hit the attachments button "add another file " and nothing happens.
 
pollinator
Posts: 637
Location: Wellington, New Zealand
15
  • Mark post as helpful
  • send pies
    Number of slices to send:
    Optional 'thank-you' note:
  • Quote
  • Report post to moderator
Ordinarily you would just link to your images using the Youtube/Vimeo buttons above.  Never fails for me.
But if the buttons fail, just surround the URL with tags like this [youtube]https://youtu.be/link/to/your/video&t=40s[/youtube]
 
Ken Gabehart
Posts: 4
1
  • Likes 1
  • Mark post as helpful
  • send pies
    Number of slices to send:
    Optional 'thank-you' note:
  • Quote
  • Report post to moderator
 so I did video and not sure if it worked.  i need to mix more sand In mix.  going to get fire brick from tractor  
supply and line inside of fire box and removing clay from around outside of fire box and using brick. I think my problem with the mass not heating up was I put clay in at two different times and first layer was hard when i put second layer down. I took second layer off there where air gaps between them.so not making full contact with mass.
 
Gerry Parent
Rocket Scientist
Posts: 1809
Location: Kaslo, BC
525
building solar woodworking rocket stoves wood heat greening the desert
  • Mark post as helpful
  • send pies
    Number of slices to send:
    Optional 'thank-you' note:
  • Quote
  • Report post to moderator

Ken Gabehart wrote:https://youtu.be/z4lfzKNiQcY so I did video and not sure if it worked.  i need to mix more sand In mix.  going to get fire brick from tractor  
supply and line inside of fire box and removing clay from around outside of fire box and using brick. I think my problem with the mass not heating up was I put clay in at two different times and first layer was hard when i put second layer down. I took second layer off there where air gaps between them.so not making full contact with mass.


OK, just watched your video Ken. From what I saw, the cracking of the clay appears to have occurred only around the metal which is a natural thing to happen as clay expands differently than steel. No matter how many times you try to fill it, its will keep coming back. Perhaps more sand is not needed and your soil (or are you using bagged clay?) already has the right amounts if cracking is not occurring anywhere else.

I think your right about the air gap insulating the next layer. May I suggest you put some more density into your mass like rocks, concrete chunks, whatever it will hold the heat longer. Use the clay as a mortar rather than the main ingredient... it will also save you time building it.

I would suspect that the weeping (to the degree that your getting) is a sign that condensation is forming in abundance from a hot chimney pipe in direct contact with a cold outside without being insulated. Is this correct?

After a 4 hour burn and the exhaust pipe only being 194F with a short (10 foot? horizontal run) is pretty low. Your mass certainly is not too large.

I can't tell what kind of lid you have over the wood feed. Is this to control the draft?
 
rocket scientist
Posts: 6320
Location: latitude 47 N.W. montana zone 6A
3191
cat pig rocket stoves
  • Likes 1
  • Mark post as helpful
  • send pies
    Number of slices to send:
    Optional 'thank-you' note:
  • Quote
  • Report post to moderator
Hi Ken; Welcome to Permies;

Sounds like Gerry has you headed in the right direction.  May I suggest taking some photos of your problem areas rather than a video... I feel a little sea sick after watching your video.

I second everything that Gerry recommended.  Using rock , lots of rock in your mass makes for much less cob needed.  Also it takes much longer than it seems it should to dry out your cob... every time you add another layer the process starts anew.  

Keep Cobbing and Keep burning !
 
Ken Gabehart
Posts: 4
1
  • Likes 1
  • Mark post as helpful
  • send pies
    Number of slices to send:
    Optional 'thank-you' note:
  • Quote
  • Report post to moderator
Thanks guys .... The weeping yes you are correct ...would insulating the pipe outside help that? It not a big issue. The lid over burn chamber is to control air flow and to keep heat in when fires out.cause of the large burn chamber and j tube so far all is working good. I was having a problem with the mass but found it to be the layers had air between and created a thermal barrier. I since removed clay and will take Gary's advise and use some rocks. I'm going to brick around fire box inside and out since clay can't handle it. Clay is locally harvested two different places second layer was different from first less sand.will post some pics when I get finished had to leave the homestead and go into the city for a few days for some work. I live way off grid
 
Gerry Parent
Rocket Scientist
Posts: 1809
Location: Kaslo, BC
525
building solar woodworking rocket stoves wood heat greening the desert
  • Likes 1
  • Mark post as helpful
  • send pies
    Number of slices to send:
    Optional 'thank-you' note:
  • Quote
  • Report post to moderator
Yup, insulating the exhaust pipe as soon as it leaves the building should help out a lot with the condensation forming. A DIY solution would be to wrap it with a layer of Rock wool and then cover it with a larger pipe, sheet metal or what-have-you. To code would be to install a class A chimney especially if it ever gets switched over to a regular wood stove.
Even if your not concerned about the dripping, it still would help a lot from your pipes rusting out prematurely.
If your going to use firebrick, the metal is really not needed anymore as the brick provides the shape of the J tube. A little clay slip mortar to seal it up the joints is all it takes.
Insulate around the firebrick to keep the heat in, cover with cob or regular brick and your all set.
Look forward to seeing pictures as you update your stove.
 
The two armies met. But instead of battle, they decided to eat some pie and contemplate this tiny ad:
Rocket Mass Heater Jamboree And Updates
https://permies.com/t/170234/Rocket-Mass-Heater-Jamboree-Updates
reply
    Bookmark Topic Watch Topic
  • New Topic