Austin Shackles

Apprentice Rocket Scientist
+ Follow
since Jul 26, 2012
Merit badge: bb list bbv list
Biography
Several sorts of engineer, driver, gamer, fairly crap musician 'cos I never practice enough.
For More
Portugal
Apples and Likes
Apples
Total received
In last 30 days
1
Forums and Threads

Recent posts by Austin Shackles

I kinda like that Tesla were deliberately not influenced by style in making the cybertruck.  

Have to admit I did wonder when the first hints about a new truck came out if someone was gonna donate a Rivian, which I'd have to admit given free choice I would get - I love that Rivian, a non-car-maker start-up could make something so good (based on the reviews I've seen) and in that way put a boot up the rear end of the major car makers to get their own battery trucks in production (such as the F150 Lightning for example)

It's kinda like Tesla itself was when they made the first Roadster - a non-car company made a genuinely good electric sports car and set a marker for the regular car makers to aim at.  And look where Tesla is now, I see quite a number of them here in rural Portugal even.

Here's to many years of no-smoking transport!

Burra Maluca wrote:

Connie Graham wrote:What I'm stuck on is connecting the tanks so I can gravity feed them for topping up ... As in the type of fittings that will allow me to connect pipes/hoses between them - I don't know what to look for or what kind of seals etc.


I just went up to the terrace above the house to take some photos in case they help.

If you need more technical info I'll have to twist Austin's arm to reply when he gets home but I'm hoping the photos will help you a bit.


Just a couple of points.  You can get a proper fitting for attaching the pipe to the tank, but I didn't have one handy so the ones with all the sealant are just a short stub of HDPE pipe pushed into a hole and sealed up with some "especial nautico" sealer - this one is made by Fischer but the key term is "MS polymer" and the particular thing about it is it can be used on wet surfaces.

The proper fitting has to be inserted from inside the tank which can be tricky, and has a big nut to hold it in place.  But it may overall be better/easier.  Those overflow pipes have no pressure on them, being overflows.  It wouldn't work with just sealer if there was any pressure on it.


For the curious: The complicated-looking device on the feed into the tanks is in fact a level control.  The water mine has a wall and fills up about 2ft/60cm deep with water and since it's supposedly about 30m long (think mine adit) into the hillside it holds quite a bit of water.  There's an outlet pipe from the mine which is about 8"/20cm above the floor inside so it's above the sediment level.   That runs to the tanks.  It splits part way and one leg goes to our house tank which is underground and fed through a float valve.  The other leg goes to the 2 IBCs.  The feed goes up above tank level and then back down into the tank - the level where it turns back down is the water level in the mine; by moving the whole thing up and down I can vary the level in the mine.  On top is a vent so it can't air lock, with a small filter so bugs can't go in.   The tanks sit in the sun but that's not an issue as there's a constant flow of water through them which keeps them cool.  

The pipes by the house:  one runs direct from the mine and is used for watering and other such uses, the upper one with the filter part way along is from the tank behind the house and goes inside.  There's also a pump to make the shower work and a cross connection (the blue in-line tap) which allows me to use the pump to reverse flow water from the tank back to the mine to flush the pipe if needed.  As the flow is quite slow from the mine especially in summer it can sometimes get sediment in the pipe which restricts the flow.  It also gets gas trapped in it by some means which defies logic as that should escape from the vent.  I've no idea where the gas is from, the whole pipe from the mine to the tank is below water level normally, it can't draw air in.  
4 days ago
It's not generally recommended to store grey water, but if you can render it clean so it doesn't become black water I guess you can.  (I have no knowledge of that part).  Rain water should be less prone to problems but will still potentially breed mozzies if left open.

What we use here is ordinary PVC drain pipe on the sink/shower/washing machine which connects (outside) via a suitable adapter to a length of (IIRC) 1¼" suction hose (it's tougher and doesn't kink).  That gets moved around on the terrace beside the house to water various fruit trees.  We don't generate black water as we have a version of the willow feeder toilet.

For connecting up multiple tanks (and pumps, if on different levels?) I would use 1" bore LDPE or HDPE pipes.  They're readily available in most building or gardening supply places, together with suitable fittings.  Can be left on the surface although the water gets hot in direct sun.  Or you can bury them without any special measures.  They're plenty tough enough to walk on etc. and HDPE will even stand up to being driven over by normal sized vehicles, provided there's not anything very sharp directly under it.  HDPE is generally used for higher pressure which you may not need but that does also make it tougher and unless you're running it a LONG distance the price difference is not extreme.
1 week ago
Have to keep an eye out for a bit of railway line.   Although I don't suppose I'd make it quite that posh.
1 month ago
I've a feeling what happened was that artificial Nitrogen was a quick fix which doubled your yield and didn't cost much so was a no-brainer for commercial farming.  Over the years it became the norm, and gradually the cost of fertiliser increased.  

Now we're at a point where there is a frankly ridiculous number of people on the planet and as a species we're dependant on Big Ag to provide metric sh*t-tons of grain, rice etc. so people don't all starve.  We're also dependent on the systems to distribute the food to cities.  

Now along comes (another) situation which increases costs, both fertiliser and transport, and there's a risk food prices will go up a lot.  

It's becoming imperative that we investigate, and invest, in more effective ways to grow the needed food in a more sustainable way.  Looking at that table in Burra's post, the US and Canada could probably do that without an enormous effort: there are legume crops that could be inserted into a crop cycle most places that wheat and corn are grown.  

What's needed for widespread adoption of this is to make it look good on the balance sheet, since that is what Big Ag is primarily concerned with - they're not really on a humanitarian mission to feed all the people, they're out to make money.  Yes, it's not permaculture but we can't switch the world to permaculture overnight however much we might want to or however desirable that is.

But if by creating more of a market for dried peas, black-eyes peas, or soya so those crops have a higher market value and at the same time they cut the fertiliser cost for growing wheat, well that to me looks do-able (and some places already do it, so that kinda proves it).  

If Big Ag can be shifted from let's say zero to one on the eco scale, that would be a step in a good direction, in my opinion.
2 months ago

Mark Reed wrote:In my opinion the better half is sometimes right and in this case, I would have to agree. If you have the land and the finances for a septic system, it will almost certainly make your life easier and more comfortable. If the issue is toxic chemicals and the like getting into the rivers, all you have to do is not dispose of them in the drain, better yet don't buy them in the first place and you can also still pee outside if your so inclined. Pretty much the same rules as for a willow feeder, or so I assume without all the hauling, breathing and storing of feces or sourcing an ongoing supply of sawdust.


Ah well, finances are a big aspect in fact.  The smallest/cheapest "official" septic tank is north of €600 to buy before you add in the plumbing, any needed licensing and installation.  Even if I do all the installation myself, it's likely gonna be not far short of a grand to get it all done right.  It's possible to make a multi-chamber septic system using IBCs, but that's more work and more digging and the geography of the place requires it to be underground.  Plus IBCs don't grow on trees either.

The total cost so far is probably around €200 for materials plus about €15 for 2 oldish second hand barrels to match the 3 we already had.  If we end up buying new barrels (for lack of second hand ones the right size) then they're around €35 each.  We're hoping to avoid that but even if we end up buying, say, 10 that still beings the whole project in under the price of just buying the septic tank.  We can readily get wood shavings for not too much money which are what we use anyway in the current Jenkins system.
4 months ago
Update on the previous post:

Last night when the fire was pretty much dead, I did some more messin' with the oven door.  

Opening the door a couple of inches made the exhaust, which was quite warm, cool down within a few minutes.  If I shut the door again, it started to warm up again.  

Of note is that I want to check the bypass to make sure it's shutting adequately; if it isn't then heat could leak out from under the cooktop into the exhaust.  If I'd been on the ball when I was fixing the broken firebrick issue recently, I could've checked it then

As may be, having the oven door opened a bit caused the flue to stay cool so I left it like that, and before I went to bed I checked it again: the flue was quite cold and there seemed to be a slight cold airflow entering the oven and travelling across the bottom of the stove into the exhaust.  Cold air doing that can't really have much effect on the heat output, I don't think, since the hot part of the stove is all above that level.  

This morning when I went down and checked it, the cooktop was still a bit warm to the touch which I regard as a good sign.  As to how much difference this makes overall, that would hard to test - but any obvious heat going out of the exhaust once the fire is out can't be helpful.
4 months ago
In a recent podcast Paul mentioned his quest to shut down rocket stoves when you're done burning, so as to avoid the possibility of losing heat up the vertical exhaust.  

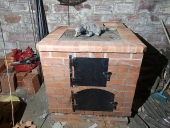
This got me to thinking about our Matt Walker stove.  I'd kind of assumed that without the fire driving it, the exhaust would fairly rapidly cool (after all most of it is outside, although insulated) enough to stop it drawing.  Recently however, on checking it some time after the fire was out, the stove was all nice and toasty warm and emitting heat into the room as it should, but feeling the base¹ of the exhaust it was still distinctly warm - and worse, there was a perceptible draft entering the air holes in the firebox door.  Clearly there was still some convection going on and heat was going up the chimney!

So, how to solve that?  I could make a cover for the air holes in the door which could be deployed once the fire was out to prevent air from entering.  But that seems a bit like work, and besides I kinda like the door as it is, aesthetically - a draft blocker would need some kind of slots to fit in which would detract from the appearance.

Now, today I had the fire on in the morning as it's a bit cold and damp.  I did 2 batches (initial lighting and one refill) and then let it die down, as without the bench I still haven't built it's prone to start wasting heat up the exhaust if you burn it 3 times in a row.  Once the fire was down to just a couple of small live embers I experimented with a handy offcut of plastic wrapping, and sure enough there was enough draft happening to suck that onto the air holes in the fire door.

At this point I had an Idea!

At the bottom of the stove is a black "oven" space although with the burning regime I've been doing it never gets all that hot.  I'd already noted that opening the door to that even slightly kills off the draft for the fire quite dramatically.  So, with the fire mostly out, I opened that door.  Immediately, the draft into the firebox ceased, and within a minute or so the base of the exhaust was significantly cooler to the touch.  Looks like I may have hit on a solution for stalling the flue so as to stop heat going up it after the fire is out.  Opening that door can only realistically let heat out into the room, which is no issue.  Unless somehow the exhaust were to reverse and suck cool air back down from outside, but I feel that's unlikely.

Later on I'll experiment with opening the door for some minutes and see what the effects are.  It might be that it can simply be left ajar until next time the stove is lit, or it might need to be shut again for some as-yet unknown reason.  


¹ the first bit off the stove isn't insulated, as it has no need to be and also that allows you easily to check if the flue is getting warm enough when lighting
4 months ago
Total flow should be OK, it's a 6" chimney so the outlet holes in the brickwork are made to be larger than that.  Counting the oven and the bench there are 2 such holes at the base of the flue.

I need to check on space available.  It should be do-able, especially with the proposed divider, to make the bench inlet a bit higher than the outlet.  The ports in the stove are at the same level but obviously the bench feed (from the stove) is nearer the "hot" end of the path, while the bench outlet is at the bottom of the flue.

It's also entirely possible that I'm over-thinking it
5 months ago
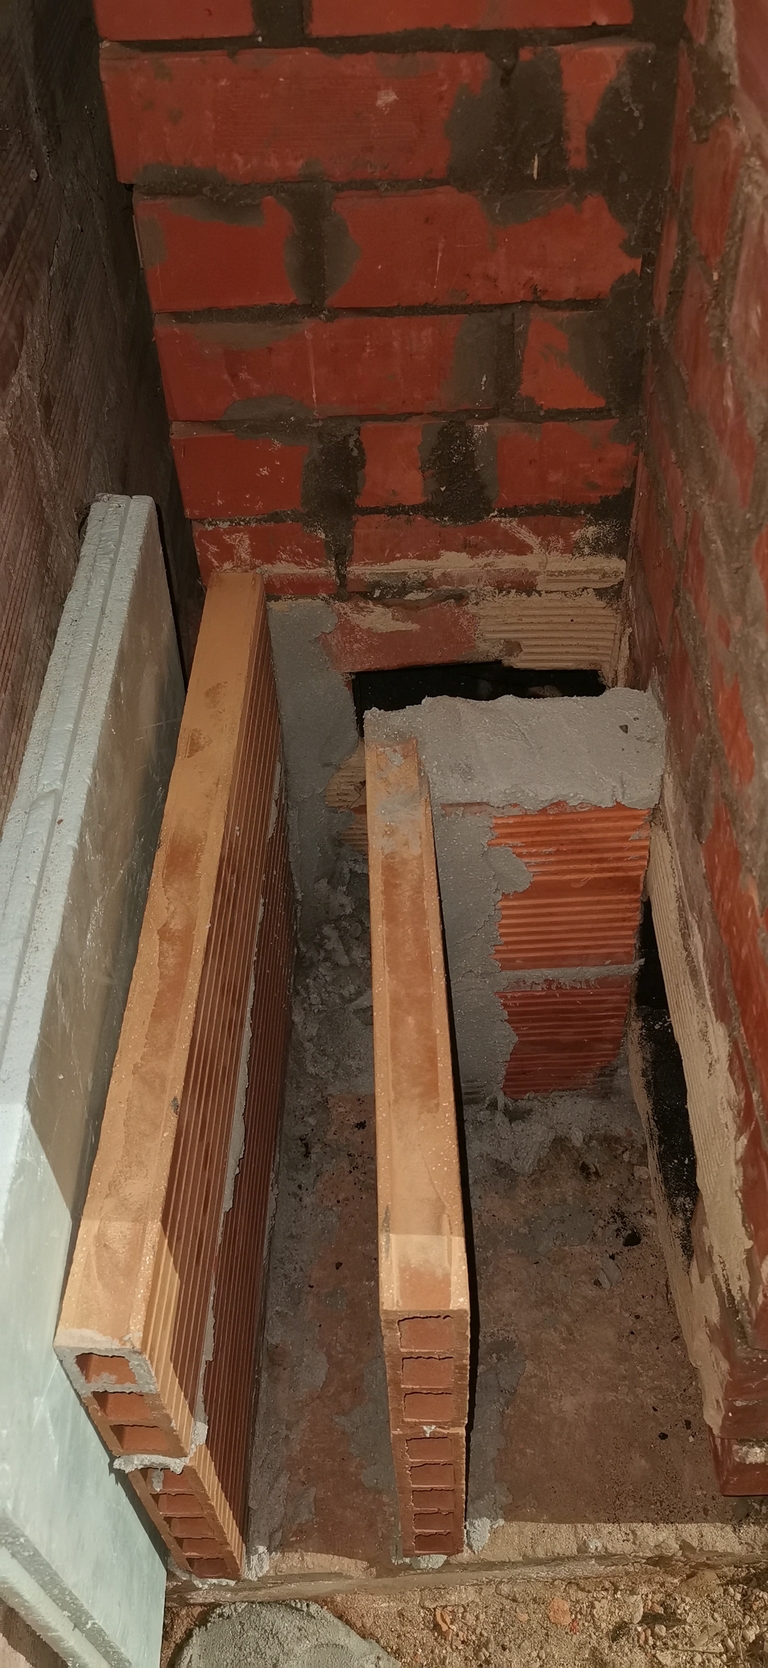
This picture shows the lower level of the stove.  


On the left side above this level is the descending passage from the top after the hot gases have gone under the cooktop.  Where Iggy (the grey dragon) is sitting is the exit from the bottom of that hot descending path which can be connected to the bench.  That exit is closed above this level by the outer wall.  There's an inner dividing wall between the core space and that descending path, as seen below.  The inner wall extends down until 2 courses above the base.  On the right of this pic is the exit from the oven space in the lower part of the stove, into the base of the flue.


There's another port which connects from the bench to the base of the flue, over on the back right.  As the base of the stove is above floor level by a couple of courses of brick, the top of those bench ports is not gonna be far off the height I want the bench strat chamber to be but will likely still be a little low.  I can close off or restrict the oven exit at the back right in order to bias the flow of gases more towards the bench outlet, if need be.

Seems to me that if I just build the whole bench as a cul-de-sac, the hot gases will scoot around the corner and head straight for the exit flue.  So I was contemplating dividing the bench at least part way down with a thin vertical wall, so the gases have to run along one side of the bench and back the other to reach the exit.  Here's a crappy sketch of what I have in mind, also showing the way the gases flow.  Matt assures me that it works if you connect it to a bench and I see no reason to disbelieve him.  
5 months ago