gus miller

+ Follow
since Jun 29, 2014
Merit badge: bb list bbv list
For More
Apples and Likes
Apples
Total received
In last 30 days
0
Forums and Threads

Recent posts by gus miller

hello,
i put a thermal cob mixture on the bell and the barrel of my heater that i think has too little sand (because i didn't want to run out of sand before the job was done).
i removed large cracking pieces and reapplied a thermal cob mixture containing more sand on the barrel and it seems to be ok (haven't used the heater yet this season).
i patched the dozens of hairline cracks in the thermal cob layer on brick sides of the bell with the sandier thermal cob mixture. however, cracks re-emerged as it dried so i'm adding more sand to to the thermal cob mixture.

how wise would it be to remove all the existing thermal cob from the sides of the brick bell before applying the latest, sandier batch of thermal cob VS. patching over the existing cracks?
thanks
9 years ago
Hello,
I'm feeling kind of down right now because I've been working on this project for the past year to get it done in time for my partners bday (which is in less than 2 wks) and now I'm feeling like this isn't going to work out.

I thought our 1st run was going pretty well as i got the fire going/good rockety effect on the first try.
however , i'm really discouraged by the huge amount of smokeback with every downdraft.
It tends to get very windy here. when i went outside to see whether smoke or steam was coming out of the flue i heard a limb snap overhead from our huge evergreen.
What can I do to counteract this downdraft from causing smoke to billow back out the feed tube?

Also, there's condensation dripping down the back of the inside vertical flue run despite the downward slope of horizontal flue which has a hole drilled into the underside of it where elbow connects to outside vertical flue pipe.
what to do ?
Thanks
10 years ago
Thanks for all your replies. I appreciate your help with this heater. It was a rough week, wasn't it!

Since it was supposed to rain today I read thru all your posts and was organizing my thoughts for a concise reply. Then, the weather forecast changed so it was NOT supposed to rain all weekend so I had to get outside to make adjustments&test this again.
It took me 4 tries but the 4th try where i stuck 1 rolled up paper in the burn tunnel & 1 sticking out into the feed tube with kindling on top finally got the fire going.

Then, it started raining...argghh. Thankfully, I put up a "tarp hut" which could cover the heater without getting too close/igniting earlier in the week in the event it began raining during testing. Of course there was a downpour but I kept the fire going and now we are looking to finishing the flue install& getting this heater installed inside t-o-m-o-r-r-o-w, finally !
The firebrick riser will be surrounded by perl-clay which will be within a 30gallon barrel which will be within a 55gallon barrel with exhaust going thru a manifold (4x10 to 6" register from home depot) into a clay brick (staggered : ) bell with cleanout on the W end & finally exhausting thru the S end up thru vertical indoor flue then horizontally out thru thimble in wall & up into outdoor flue w/raincap.

The changes made today are:
reconfigured riser so the 2 clay bricks were replaced with the last firebrick
adjusted riser, burn tunnel &feed tube to widen them for these csa's:
feed: 6.25" W x 4" L = 25 (square inches)
riser: 6.25" W x 4 5/8" L = 28.90625
burn tunnel: 6.25" w X 4.5" H = 28.125

The test was initially done with the riser with the 30g barrel over it. 75 mins into the burn, we put the 55g barrel over it. 2.5 hrs after I got the test going these were notes i recorded: on a scale of -5 to +5 (where -5 is worst & +5 is best) +5smokeback +2rocketyness
fahrenheit temps: 300top of barrel; low bottom sides of barrel: 280W 134N 130E 120S ; top side of barrel 267W 227N 190E 218S ; burn tunnel exterior 370S ;
240clay brick on top of burn tunnel ; 290fire brick on top of burn tunnel ; comments:700F when i removed clay bricks in front of feed tube so could measure temp of floor of burn tunnel

Wish us luck tomorrow
10 years ago
Hi Al, The very bottom of the setup are concrete bricks, next layer are concrete pavers, then red clay bricks from home depot :
manuf by mutual materials Model # RED0126MCO 8 in. x 2-1/4 in. x 4 in. Clay Brick
http://www.homedepot.com/p/8-in-x-2-1-4-in-x-4-in-Clay-Brick-RED0126MCO/100323015 .
My brain is probably a little worn from this tough week so maybe you can help me get clearer on some of what you're recommending.
What are you referring to when you say "1/2c" ?
I'm also having a tough time understanding your suggestions in your last paragraph, although I'm crystal clear and already prepared to fill the space between the heat riser & the 1st barrel with perl clay.
I searched for "staggered bond brickwork" but only found one listing which wasn't too helpful.
Do you think the "4-brick stacks" on the N&S sides of the riser&burn tunnels will be adequate supports?
Thanks Al
10 years ago
Thanks Al. My firebricks are on edge.
After the first test of the heater yesterday morning, I increased the riser csa by moving the north & south vertically on edge riser firebricks ~1" to the north & south. Perhaps I will increase the width of the burn tunnel by moving adjacent N&S horizontally on edge tunnel firebricks ~1" to the north & south to increase the tunnel csa.
This will mean that these north & south firebricks that are horizontally on edge will have 1.125" surface area rather than 2.25" to support the roof of the burn tunnel, west side of the riser & both barrels surrounding the riser.

I can bolster both of these supportive firebricks by centering the clay bricks that are supporting the N&S riser firebricks between them & these N&S burn tunnel fire bricks that I'd move N&S to widen the burn tunnel. This would increase the csa of the burn tunnel from 16.0625 to 24.1.

Will these 2 stacks of 4 clay bricks each, on the N&S sides of the barrel that support the barrels, be adequate support to hold up the 2 firebricks forming the roof of the burn tunnel & the W sides of both barrels & the N&S sides of the heat riser?

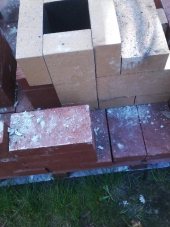
Here's those pix.

(edit = clay brick = 8 x 4 x 2.5 )
10 years ago
Hi Big Al! Thanks for your reply.
The height of the vertical feed tube from ash grill to top of feed tube is 4.5". The csa is 4"W x 4 1/16"L but is adjustable as 3 of the 4 bricks forming the feed tube opening can be slid to increase or decrease the size of the opening.
I took note of Ianto saying the csa of the burn tunnel "should be the tightest part of the intestinal system" and when ernie said: "I try to make sure the burn tunnel is as short as possible... if i could get it on all the systems the burn tunnel would not be more than a third of the heat riser height..." while piecing together the bricks I had to work with to form this configuration.
However, I'm hoping you can help me integrate your advice while considering the limitations of my resources : }
The dimensions for the bricks I'm working with are: Firebrick = 9x4.5x2.25 (comprimising almost all of the burn tunnel&riser & supplimented with clay brick = 7x3x2.5 . I only have 1 spare firebrick and ~20 clay bricks remaining.
How/where are you saying to add another brick laying on its side to the burn tunnel? To increase the csa like you're suggesting would mean widening it or increasing the height which would require multiple firebricks (right?) but I only have one left so how could I achieve this with the clay bricks considering their difference in dimensions?
I'll try to upload some pix as soon as I can.
tx
10 years ago
I finally got to test my 6" heater outside yesterday. I expected it would be more rockety and want to make sure it's a good build before i install it inside on Saturday.
Will someone give me feedback on these csa's:
burn tunnel = 4.0625 x 4 = 16.0625
riser =6.25" x4.5" = 28.125
manifold entry 10" x4" = 40 / manfold exit 6" circle =28 .
It is a 6" system with a 30gallon barrel surrounding the 39 1/4" heat riser ( height of floor of burn tunnel to top of heat riser) with a 55 g barrel over it & exhausting to a small clay brick bell (no cob bench for this build).
THANKS!
10 years ago

Erica Wisner wrote:
2) Both types of brick, and varieties in between, are suitable for use in rocket mass heaters. Almost all clay-based materials are capable of handling over 2000 F.


thanks for the thorough, helpful post erica.

i still am unclear whether it's safe to use 44 cent home depot red clay bricks for the entire core (feed tube, burn tunnel, riser).

i understand it's preferable to use insulated firebricks for the core but can i safely use these home depot bricks for the core ?

are any/all bricks sold as "clay bricks" ok (albeit not preferable) for construction of the core?
thanks !
10 years ago
Hello,
Can someone point us to RMH designs that are simple enough to heat a PNW, USA 1000sqft home that don't require extensive skills or tools?

We have very limited construction skills but we were able to install a wood stove/flue/chimney in our 1012 square ft rambler 3 years ago. We need to replace or supplement it with a RMH as we primarily need to reduce the amount of wood we collect and burn. We've read Ianto's book and threads on permies, permsteading, donkey32, reddit, aquaponisnation, others, & tons of youtubes to try to figure this out ourselves.

Can someone help identify the RHM we can/should build for our situation & our skills. We need it to be as inexpensive as possible. Some looked promising like the sheet metal one at http://velacreations.com/energy/heat/40 ... eater.html but we need one that wouldn't require expensive tool purchases or advanced skills like welding.

We keep checking our local Habitat for Humanity RE-store to find parts (ie 55 gal barrell, firebricks, ducting) but they haven't carried what we need & hiked their prices so it looks like we'll have to buy materials from the the big box stores.

Our home has a crawlspace so if we built the cob couch we'd have to install a beam in that area to support the 2-5 tons . If we were to build something simpler/similar to the velacreations model or something that required use of our existing flue/chimney, we'd have to remove the wood stove & might need to add another beam in that area depending on the total weight of the rmh design vs. the amount of support 1 beam would give.

Thank for your guidance & recommendations.
(crossposted at permsteading)
10 years ago