

|

|

|

|

|

|
|
|
|
|
|
|
|
Tereza Okava wrote: I also can't recommend highly enough temperature therapy- soaking the hands in very warm water, especially with Epsom salts. Massage with warm oil or cream. My physical therapist set me up with paraffin soaks one time (you simply put your hands in warm paraffin, keep them there for a while, and later take it off) and it was absolutely magical.
M Ljin wrote:
Thinking more, horsetail keeps popping into my mind, which has a reputation for being good for connective tissue, and not only that but also is supportive of the kidneys. There is some information on my favorite websites, which supports the idea of using it for supporting the joints:
https://pfaf.org/user/Plant.aspx?LatinName=Equisetum+arvense
http://naeb.brit.org/uses/search/?string=Equisetum
I found it interesting to hear about native Alaskans harvesting large quantities of horsetail to feast on the stem juice. I tried last year and it is delicious! The plant reminds me via the doctrine of signatures makes me think of synovial fluid, and the overall jointed nature of the plant. Not that I am pushing or recommending the plant—I don’t have experience of using them for osteoarthritis. It could be something to try with further research and if it feels right.
M Ljin wrote:In certain forms of medicine, there sometimes is a focus on various qualities in the body, like moisture, dryness, heat, cold, etc. Osteoarthritis sounds like it would have something to do with lack of moisture—maybe not literally that the joints are dry, but that this quality of moisture is less present (if that makes any sense? It does to me)
Edit: maybe what I mean to say is that there is less of what holds onto water in the joints, ie cartilage and synovial fluid.
M Ljin wrote:
The average 70 kg (150 lb) person has roughly 15 grams of hyaluronan in the body, one third of which is turned over (i.e., degraded and synthesized) per day.[6]
So it sounds as if maybe one would need to eat it constantly to have benefits, if the issue is the body isn’t making enough of it.
Glucosamine is one of the most abundant monosaccharides.[2] It is produced commercially by the hydrolysis of shellfish exoskeletons
Jill Dyer wrote:I can't grow Phaseolus coccineus either! Drying out of pollen also affects the tomato plants. . .
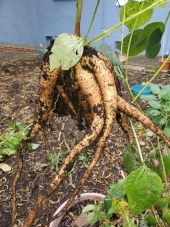
Robert Ray wrote:Burra, did your runner beans produce a tuber to eat?
Burra Maluca wrote:I'd recommend finding someone near to you who grows beans successfully and begging a shovel-full of soil from their bean-patch to mix into a slurry to inoculate your seed, just in case your soil doesn't have enough of the right bugs.

Rebekah Harmon wrote:
Sarah Joubert wrote: I'm willing to change my diet to build a better world, but I can't see a nutritional reason to force someone to eat sunchokes every day!
HAH! Sarah! Thats hilarious! And I totally agree with you. They aren't bad on a salad. I could eat a little one every day on the side somehow. But they aren't a delicious way to fill a plate.