Hello Lina,
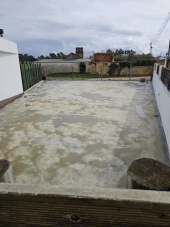
I acquired a paved lot in the middle of Philadelphia in 2008 at a Sheriff Tax Lien sale. It was an abandoned property. The paving was old concrete, with cracks and imperfections, but still paved. It was about 120 by 60 feet and had the remnants of foundations for the garages/stables that had once been there, as well as one dilapidated 36' by 20' garage/stable. The ambiguity stemmed from the relatively narrow widths of the spaces where the doors would have been. Anyway, I rebuilt this structure to be a workshop and built a new one opposite it.
https://www.zillow.com/homedetails/5012-Pentridge-St-Philadelphia-PA-19143/440402212_zpid/?mmlb=g,60
See pics 59 and 61.
Now to your post. Prior to selling the property (which has since been redeveloped with a fancy house - but they left my two outbuildings, to my delight, see pics) (note the use of lovely salvaged red brick) I built raised beds on top of much of the paved area. I was able to enclose it all with 10' industrial cyclone fence which I acquired at a salvage yard for literally $20. Took an hour to winch the roll into my truck it was so heavy. So I had this 'compound' right there in the middle of West Philadelphia with a large (by city standards) garden. I built rainwater catchment for cisterns for watering. It tends to rain frequently there during the growing season, so I only had about 1000 gallons of storage. Amazing how quickly you can go through that however.
The raised beds were made of untreated 5' lengths of 10 inch by 14 inch, roughly, rough lumber. I salvaged about 100 or so of these from a surface rail (subway cars) upgrade the transportation authority conducted in 2009. They bolted these things together with 1 inch threaded rod, into pads that the cranes and heavy equipment could be situated upon (the legs or outriggers). I watched the progress and noticed that as they completed each quarter mile or so of new elevated track, they were just leaving the pads! So I hunted down the fellow in charge and got permission to take them. It meant less work for them so, no problem. I burnt through a couple Lowes chainsaws, Poulan I think, ripping them into ~6 inch wide units and double stacked them to get a relatively deep bed. Used rebar to affix them. My beds were about 5' by 20' I believe. Now, the soil was the next issue... Philadelphia has a composting program whereby they compost the herbivore manure from the zoo, combined with leaves and other sweepings from the large parks there. This compost was amazing... I loaded multiple pick up loads of this and used it for the beds, straight. I suppose my vegetables were probably mineral deficient because this wasn't exactly soil, but the plants loved it. I found I could ignore normal spacing guidelines for greens and such because of the nutrient density. I worried a bit about contamination so I did test for lead, but never found any.
How does my experience help you? Well, reasonably tall raised beds are going to entail some cost. If you can find salvaged materials, that will help. Soil is expensive, too, unless you can find a cheap source. Here in southern Oregon I can get a load of organic compost loaded into my pick up for $40 or so. It's just composted manure but still far cheaper than buying bagged stuff of dubious content. I don't know what your options are there. Still, unless you have free or very cheap labor, breaking up the concrete is going to be expensive. Granted, you can use the broken concrete for dry stacked bed walls. I did a lot of urban greening work while in Philly, cutting tree pits into sidewalks for the local volunteers to plant trees into. I could do 10 a day with an electric jackhammer and one helper. It was brutal but I was younger and stronger then. Point is that concrete isn't THAT hard to remove once you figure out how to do it. There is a learning curve and I really do recommend a jackhammer. But it does take muscle and stamina. In those days I could move fridges by myself, so it is all relative.
If water is a concern, one advantage of keeping the concrete and putting beds on it is that with a basic berm system, you can recover a lot of your water. I didn't do this but considered it. You could even put a couple of sumps in and use solar powered pumps to retrieve it and store in IBCs. Basic sump pumps are cheap but you would need an inverter and such. Or oyu could just go with 12 volt DC utility pumps. Feasibility of reclaiming your water will depend on slopes of the concrete.
FYI, I never had to amend my raised beds but I was only there for 5 seasons or so. I think I would have eventually had to add some rock quarry dust for minerals eventually, but every organic farm I knew of in Pennsylvania was doing that anyway.
Bottom line is that you are going to have to do a cost comparison of both basic options and as part of that ascertain the availability of cheap materials, unless you really do have deep pockets.
Good luck and feel free to ask for clarification if I have failed to adequately convey useful information.


