Chris Clinton

+ Follow
since Oct 14, 2024
Merit badge: bb list bbv list
Biography
Georgia native. semi feral neo-peasant animist skill collector. Founder with my wife, Isia, of Crack in the Sidewalk Farmlet located on the edge of Atlanta in 2008. Been growing an expansive diversity of produce and more recently flowers for local farmer's markets as well as offering many foraged edible plants and mushrooms continually full time since. Turned on by traditional and primitive skills, natural building, bioregioning, community, the outdoors, old tools and machines, books, etc etc blah blah blah
Looking for a larger landbase to steward in lower Appalachia, generally near where Ga, TN, and NC meet. might start a village.
Apples and Likes
Apples
Total received
In last 30 days
2
Forums and Threads

Recent posts by Chris Clinton

Making more charcoal for the gardens and the hugel. Didn't get any pictures once the fire was really cooking as it was my birthday party and I didn't remember to get any. You gotta have a big fire to get people to come to your midwinter parties. Probably 500-600 gallons of charcoal made, 8 hours from lighting to extinguished.
17 hours ago
just a quick sharpening. Wasn't necessarily completely dulled but I hit the dirt a little cutting up some logs for the hugel project that had been on the ground a while. Always faster to take a break and sharpen than to keep trudging with a slow cutting chainsaw.
17 hours ago
darn this, darn that. I didn't think this pair of socks was that bad off but it sure doesn't look that way now that I'm finished with repairs. 100% wool socks, %100 wool yarn.
1 week ago
thanks again for the above. Got another query for yall.

I picked up an extra large post drill this week that was locked up. Over the course of a few days I eventually got it dismantled, cleaned to my satisfaction, and put back together ready for action. Looking at the potential BBs under tool care to submit this for there is one for "clean and oil a stationary power tool" and one for "remove rust, clean and oil a hand tool". The power tool one specifically references drill press but my machine is strictly hand cranked though many models of these were made or modified to be belt driven by a dedicated motor or line shaft. The hand tool BB is much more for simple tools not really machines like this.  It was likely more work to free up, clean, and grease this thing then a more modern drill press would require. I'd argue this fits more in the stationary power tool BB but am unsure if the lack of motor is a deal breaker. What say ye?
thanks for the feedback Mike and David. I concur that is a rather rudimentary and unrefined execution of the technique, especially as it was my first time trying it and agree with your points assessment. More sand level than straw, I'm reminded of the sand/straw levels for spoon carving. I haven't been doing skip long and there is an extra appeal to attempting some of the "unclaimed" BBs but I see this is very much your wheelhouse David and I'm happy to let you go first and follow your lead. Given the high artistry of your work I'm rather keen to see what you think just meets the criteria to warrant 2 points. I hope to play more with copper in the future anyway. Also when you do your submission I'd love it if you could highlight sinking vs raising a bit. cheers
Hi, I just completed a little project with some scrap copper making a "ring thimble" and was wondering if it would work for  the Sink a small bowl or spoon - metalworking.straw.sink PEP BB. It's the same methodology except the end result has a different purpose, but is basically a spoon ring. No big deal if not. If yes I'll do a proper write up with pics of the process. thanks.
Mend one elbow and sooner or later you'll have to do the other. Here we go! I think this makes the sixth darn repair on this sweater. I dare say it won't be the last.
2 weeks ago
I try to keep several of these around and my last one died a bit prematurely so I need some more. I have some woods I prefer for these, but they're not on hand and I cut a black cherry down recently so I figured I'd try it out. This chunk is well over 4" in diameter. I went with a knotty section that otherwise would be firewood. Hatchet only. Already back riving some fencing from white oak.
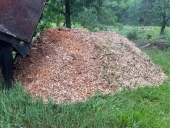
I've been busy working on other stuff leading into the holidays and the end of our farmer's market season but here's an update on the hugel process and progress. Linear progression had run into the old pile of subsoil from earlier activities and I have tried to document how I go about mixing and refining our raw clay into something I feel satisfied with going into service building long term fertility. The first images show the clay subsoil moving from the pile by the broadfork at the upper left to the shallow pit being used for mixing. When working with sticky clay like this it's nice to have a "hoe scraper" like the one pictured that I carved out of cherry years ago, simple but handy item for this scenario. Once the clay is in the mixing site I begin layering in other materials to work into it. This can be all kinds of types of organic or inorganic materials but here I'm using unsifted but mostly broke down woodchips for the bulk of it. I have at various times used compost, topsoil, sawdust, coffee grounds, spent mushroom substrates, vermiculite, punky wood, silt, leafmold, etc etc in whatever combination comes to hand. I am also adding ashes from the woodstove and crushed eggshells. Most importantly to me I add lots of ground charcoal. The picture strip represents the pathway it moves from my goodly sized charcoal burning pit to the the two IBC totes with their tops cut off where it is charged and then to the sink garbage disposal I used to reduce it in size. The sink grinder is a bit of a bottleneck but I actually like the slurry that results and have developed myriad techniques that take advantage of it's ability to flow. After many years of abuse the disposal finally called it quits shortly after this photo and I had to seek out a cheap replacement. The old one was a 3/4HP and my new one is a 1HP, they can chew through most things they encounter including small rocks but do not like chunks of uncarbonized hardwood or any kind of metal. I tried a 1/2HP unit at one time and it did not have what it takes for this job. After a couple buckets full of ground charcoal is added to the pit I leave it to sit and reach the right moisture level for shovel mixing. I should probably try to make video of this procedure at some point but the next pictures attempt to show the repeated process of turning the pile a bit then smacking it with the back of the shovel while drawing it back towards me. This folds, crushes, and smears the various ingredients together quite effectively in a short while. If I didn't have a convenient pit then this works great with tarp mixing, or small quantities in a trug. While still mostly clay it will become loose and crumbly. Ready to go back to the garden so life and soil processes can take it even further. I charged this charcoal prior to use but I will also be diverting plenty of urine to the ongoing build.

As far as wood sources go I have started breaking down and working with this large pecan tree that fell about two years ago. Notice the oyster mushrooms on some logs. I think I will set those aside for outer scaffolding on the bed.

Lastly, some photos of where the project stands at this moment from various angles. Still just the first section but growing upward. New mix in the the pit. One more round of subsoil to amend after that and the footprint of the bed and continue on.
1 month ago
I must have misread this one at first or maybe I was going off the note under Aurora's post above, either way I didn't plant these a foot apart so I won't submit for verification. Cleavers comes up starting in the fall where I live so I took some pictures of that when I found this BB back in October. First couple pics show a spot where I must have thrown some down in the mulch, they don't normally grow right there. While looking at a spot along a footpath where I usually harvest cleavers I managed to find some seed on a little old straw growing on a chainlink fence. Poking around I managed to find slightly over one hundred seeds that had been hanging off the ground all summer, would they germinate having dried completely? may as well find out.
I made a little furrow and put the seeds in about an inch apart and covered them with some sifted compost mix. It ended up being about 9 feet long. Time passed and they germinated, but I waited till they grew more and developed their characteristic whorls. The cotyledons look very different but have a little dimple at the tip that helps distinguish them from other weed sprouts. I wasn't paying much attention to this but noticed one day that a lot of the seedlings were getting chewed on so I went ahead and got some photos. I counted 86 total including the nibbled ones which we're mostly in the section between the 2 and 5 foot marks.
Now I wonder if anyone could enlighten me to the purpose of the 12 inches apart requirement? Do they grow bigger or better like that? Here they grow all over the place and in pretty dense carpets where they're happy. I've added another photo of a self seeded patch getting going at the end of November.
Next time I'll do the 100 and 300 at the same time. I'll have to wait till fresh seed is produced and then till next fall to plant them. I'll admit I'm not picking up on what the wood BB proves beyond the straw BB. I see germination needs to be better but it seems mostly like proof of being able to crawl farther on my hands and knees. Not to imply that I can't, I can still crawl with the best of em.
1 month ago