• Post Reply Bookmark Topic Watch Topic
  • New Topic
permaculture forums growies critters building homesteading energy monies kitchen purity ungarbage community wilderness fiber arts art permaculture artisans regional education skip experiences global resources cider press projects digital market permies.com pie forums private forums all forums
this forum made possible by our volunteer staff, including ...
master stewards:
  • Nancy Reading
  • Carla Burke
  • r ranson
  • John F Dean
  • paul wheaton
  • Pearl Sutton
stewards:
  • Jay Angler
  • Liv Smith
  • Leigh Tate
master gardeners:
  • Christopher Weeks
  • Timothy Norton
gardeners:
  • thomas rubino
  • Jeremy VanGelder
  • Maieshe Ljin

Hand built hugelkultur-frog pond-biochar and more follow along

 
Posts: 41
Location: Atlanta, Ga
10
forest garden foraging trees medical herbs wood heat woodworking
  • Likes 3
  • Mark post as helpful
  • send pies
    Number of slices to send:
    Optional 'thank-you' note:
  • Quote
  • Report post to moderator
This will be a thread documenting my labor intensive digging of a small pond in conjunction with building a fairly long hugelbed heavily amended with biochar and whatever spin off projects that are bound to emerge in the process.

I found the Skip program about a month ago and spent some time looking through the badges getting a sense of what I could accomplish around here that wasn't some massive detour of my time and energy. At first the hugel BB's seemed perhaps a tall order for me. I do not have a digger. I have a tractor but no front end loader. I have built a number of hugels over the years but even when they incorporated several truckloads worth of wood they were never taller than 3 maybe 4 feet upon completion. Also I am looking for a new property to move on to, do I want to invest the time and energy to build this to both Paul's and my own standards when it might take 2 or 3 years to really come into it's own? Where exactly would I build it? hmmmm....I had to let it percolate until the path forward presented itself. At first I thought perhaps I'd go down to a friend's farm and do a quickly build with his tractor, I still might but then I realized I had a spot where a roughly 25 ft bed would be a good solution to a handful of tasks that were already needing to happen. This is a regular phenomenon for me, I might struggle trying to figure out where to place an individual feature in the landscape, but when the idea complexifies and I can see the connections and functions stacking it will all of a sudden jump out where the whole assemblage fits. I didn't see this particular opportunity for a hugelbed at first because it was where I had built one already....

but let's get some visuals before I continue...
2024-10-21_00040.jpg
before
before
2024-10-21_00039.jpg
before
before
2024-10-21_00040_mapped.jpg
what's what
what's what
2024-10-21_00039_mapped.jpg
plants to move/harvest
 
Chris Clinton
Posts: 41
Location: Atlanta, Ga
10
forest garden foraging trees medical herbs wood heat woodworking
  • Mark post as helpful
  • send pies
    Number of slices to send:
    Optional 'thank-you' note:
  • Quote
  • Report post to moderator
alright, that should give some landmarks for me to describe the prior use of this site and the plan that is beginning to be implemented now...
but first I wanted to tip my hat to Liam for this thread: https://permies.com/t/212487/Wood-dirt-pile-Hugelkultur-ongoing that inspired me to start this one.

Hopefully those initial pics will help this all make sense.

I have to dig a small pond, because I promised the frogs that I would. Hopefully then I can have all my wheelbarrows and impromptu rain barrels back during the summer, instead of having to attempt to rear tadpoles or drive them to some nearby body of water. I have a lot of tree frogs here but no breeding habitat other than some container that fills up during the rain that they get to before me, which happens year after year. Time to fix that.

This property is at the top of a hill but is generally pretty flat. I do not have a lot of contour to work with and no water flows onto this property from outside, it's kind of high and dry. Our farm is on more than just this particular property but we own this one and not the others so major investments make much more sense sited here. The spot where I decided to create a pond is a slight low spot that I will be able to direct some water flow to without too much change to the topography. It's about the only spot that has anything to recommend it as a pond. It will encompass the area where the catch pits are marked that I will describe further down.

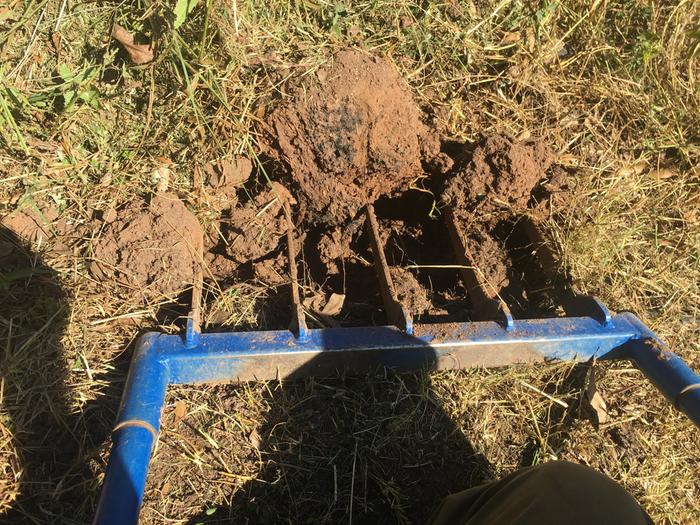
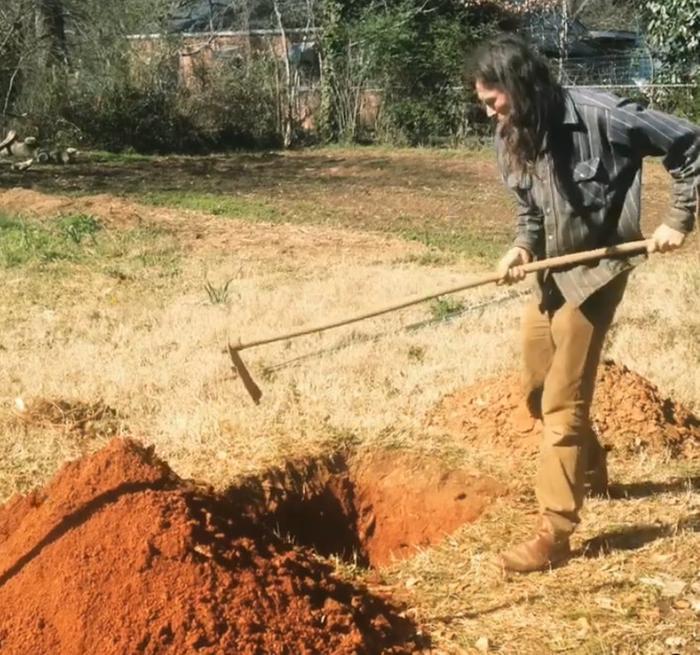
The general area pictured is a bit of a boundary zone between the vegetable garden (to the left in the pictures) and the center of the lot that used to have a house and a wrap around driveway that was demolished before we became the owners (to the right). The old hugelbed and and the old raised bed are the dividing line between edible growing space and a lawn/materials depot zone that we treat as potentially contaminated. Both of those beds needed to be reworked. The old hugel was built years ago after code enforcement hassled me about the remaining logs from an enormous tree we had fall during a hurricane. I dug a large pit probably a couple feet deep or more, piled the logs in, and put the soil back on top. The bed has since sank back close to the surrounding grade but is still much looser, richer, and contains charcoal that I added back then. Some perennials are still extant that I will set aside to replant but a lot of bermuda grass and bramble has invaded and I will have to dig those out as well. I do not think even a 7 foot tall hugel would stop bermuda from finding it's way up, I've seen blackberry send shoots up through 2 ft of material too. Best to dig them out with the broadfork, which will be lots of work before I even really get started on the new hugel. There was a large Ronde de Bourdeaux fig tree planted about where the compost ring is now that ambrosia beetles killed 2 or 3 years ago. The catch pits were to benefit its root system. They are of the type recommended by Steven Edholm of Skillcult who is a big inspiration of many of my projects. I'll post his youtube video about it but in short, it is a deep hole that is back filled gradually as materials like animal carcasses or whatever are tossed in and layered with biochar and the original soil. It aims to make permanently super fertile sites that I usually plant trees on, but now the fig is gone and the area is getting reimagined so I'm digging the pits back out. I will mix that rich black earth with the rest of the soil dug for the pond and additional biochar and organic matter to more quickly improve the red clay subsoil that will be excavated. I'll describe that process in future posts. Even with all the woody matter in a hugelbed my raw clay subsoil is a poor growing medium on its own. I'd say it would take our clay going through the long composting process of a hugelbed 2 or more times to really become nice soil. The subsoil pile marked in the photo is leftover from the catch pits when they were filled. In the years that it has sat there only really tough plants have colonized it, blackberry, honeysuckle, and goldenrod. It has slightly improved with their help but is still a pile of dense, sticky red Georgia clay. I will have to shovel that into a mixing pit before it will be ready to go on the new hugel. I want to deal with old clay piles like this and avoid making anymore. It shouldn't be too hard to seal a pond though.

So making this hugelbed will accomplish getting the pond made, fulfilling my promise to the frogs, refreshing and improving some growing spaces that have become problem areas, cleaning up fallen trees and logs in at least 6 nearby spots, and I suspect a few other BB's will piggyback this project down the line.

Okay, enough text, I'll put some pictures after I cleaned up and mowed around the site where I'll mark the planned locations of the new hugelbed and the pond.

here's the Skillcult video:

babyfrog.jpg
lil' cutie
lil' cutie
babyfrog2.jpg
[Thumbnail for babyfrog2.jpg]
2024-10-24_00035.jpg
cleaned up a bit, different angle
2024-10-24_00035_mapped.jpg
rough sketch
rough sketch
2024-10-24_00036.jpg
[Thumbnail for 2024-10-24_00036.jpg]
2024-10-24_00036_mapped.jpg
rough sketch
rough sketch
2024-10-24_00037.jpg
catch pits, one partially dug out already. lots of bones visible
2024-10-24_00038.jpg
test broadforking in the old hugel, too dry to remove plants, old biochar visible
catchpit_Feb2017.jpg
found this of me digging one of these catch pits in Feb. 2017, lots of red clay
 
Chris Clinton
Posts: 41
Location: Atlanta, Ga
10
forest garden foraging trees medical herbs wood heat woodworking
  • Likes 1
  • Mark post as helpful
  • send pies
    Number of slices to send:
    Optional 'thank-you' note:
  • Quote
  • Report post to moderator
Next I continued working to prep the site. First I dug out the plants I wished to keep and heeled them in at a small adjacent hugelbed. Starting from one end I began removing the bermuda grass and blackberry plants, setting them aside in piles to desiccate for later use as mulch while retaining the blackberry roots as a harvest for herbal or leather tanning applications.

I performed a small controlled burn to tidy around the site, particularly around the old raised bed that will be partially swallowed by the new hugel. I did a small top lit brush fire on the top of second old catch pit to clean away vines and produce some extra charcoal to be worked in with the soil. The initial fire took maybe 10 minutes before I covered it in chestnut hulls, which I have a special application for in biochar pit burns which I'll detail elsewhere. When everything was embers the fire was quenched with water. With a shovel I crush and mix the charcoal with the catch pit soil to in turn be used to improve more clayey raw soil in another shallow pit on site.

Concurrently to all that I am bringing logs closer into the site from some various locations. Primarily moving materials by hand except where logs are too large to move with my arch or wheelbarrow or crossing the street with them is too sketchy. The first log I moved into place had to be split lengthwise for my small log arch to grip. Others have needed a visit by the chainsaw. About half the length of the hugel has been cleared of unwanted vegetation and had the first layer of logs laid in place.
strip.splitting_first_log.jpg
[Thumbnail for strip.splitting_first_log.jpg]
2024-11-05_00025.jpg
[Thumbnail for 2024-11-05_00025.jpg]
2024-11-08_00022.jpg
cleaned up all these logs. lion's mane!
strip.log.loading.jpg
loading
loading
2024-11-11_00009.jpg
unloaded
unloaded
strip.tl.fire.jpg
[Thumbnail for strip.tl.fire.jpg]
strip.pit.mix1.jpg
[Thumbnail for strip.pit.mix1.jpg]
2024-11-11_00004.jpg
rough soil+improved soil+charcoal+composted chips in the mixing pit
2024-11-11_00005.jpg
[Thumbnail for 2024-11-11_00005.jpg]
2024-11-11_00006.jpg
[Thumbnail for 2024-11-11_00006.jpg]
2024-11-11_00007.jpg
[Thumbnail for 2024-11-11_00007.jpg]
2024-11-11_00008.jpg
[Thumbnail for 2024-11-11_00008.jpg]
2024-11-11_00001.jpg
[Thumbnail for 2024-11-11_00001.jpg]
2024-11-11_00002.jpg
[Thumbnail for 2024-11-11_00002.jpg]
 
Posts: 34
Location: East Texas
12
  • Likes 1
  • Mark post as helpful
  • send pies
    Number of slices to send:
    Optional 'thank-you' note:
  • Quote
  • Report post to moderator
Looks like you've got some cool projects going on. I've done a couple trench burns that turned out really well. Both spots I dug them in are way more fertile than other spots in my yard.

I did some growin up in Atlanta your backyard looks like a lot of the backyards around there, reminds me of my brothers old spot in East Atlanta. Small pond projects are really cool and I'm fond of our amphibian friends. My kin just moved into a new house outside of ATL and I was encouraging him to implement a couple vernal ponds in the wooded area of his property to encourage more diversity. Keep us posted.

Have you tried growin any apples yet?
 
Chris Clinton
Posts: 41
Location: Atlanta, Ga
10
forest garden foraging trees medical herbs wood heat woodworking
  • Mark post as helpful
  • send pies
    Number of slices to send:
    Optional 'thank-you' note:
  • Quote
  • Report post to moderator

Thombo Corley wrote:
Have you tried growin any apples yet?


I've got lots of different interests, and am always at risk of having too many irons in the fire.

yeah, we're just a bit south of East Atlanta, did the farmer's market there for 10 years.

I started planting apple trees pretty early on here, but many are gone for one reason or another. Mostly cause I guerilla planted many at all the derelict houses around me and they got whacked as the neighborhood gentrified on us. I was really into the idea of growing apples as standards when I got started, to have large trees that live longer. The trade off is that it's taken over a decade for those trees to get started fruiting. I started grafting at some point and have frankentreed most of them and a lot of the weedy bradford/callery pears. I have a large callery in the back yard that has had probably over 20 kinds of apples, pears, and asian pears top worked on it. Mixed success with that as I've learned that grafted on to such large established trees can really promote vigorous growth which is just super susceptible to fire blight. Fire blight is my main problem in general and can get pretty discouraging, I need to gather more of the resistant cultivars and start breeding with that in mind. The youtube channel I posted above, Skillcult, has many fantastic videos on apple breeding that make me want to get started. Squirrels trying to run off with most of the crop before it is even ripe is a problem too. I started to prune back the canopy to try and air gap the apples so the squirrels have to take more risks to get at them. That said I am getting more and more fruit and had more than we could eat or store properly back in August-September or so. The apples do seem to skew to the early side down here.
 
Thombo Corley
Posts: 34
Location: East Texas
12
  • Mark post as helpful
  • send pies
    Number of slices to send:
    Optional 'thank-you' note:
  • Quote
  • Report post to moderator

Chris Clinton wrote:

Thombo Corley wrote:
Have you tried growin any apples yet?


I've got lots of different interests, and am always at risk of having too many irons in the fire.  


I understand this and it's something I'm always trying to manage. Learning about soil and doing experiments is my favorite hobby, though. I'm familiar with skillcult we've been buyin seeds and scions from him for a few years now. We've had mixed success with apples too which is why I'm always asking southern growers about their experience. We've had as many losses as successes but the successes we do have are still really cool and valuable to me. The good thing about planting seedlings every single year is after a few you should be expecting new flowers every year from now on. Which is where we're at now. And the thought of trying new fruit is what keeps me going. Even if some of our survivors make less than ideal apples I'll still be stoked to have vigorous full sized trees for other needs, like future breeding and feeding livestock/wildlife. And trying to manage the encouragement of wildlife vs. them taking the crops is something I'm always considering. Barncats have a place on the homestead.
 
Chris Clinton
Posts: 41
Location: Atlanta, Ga
10
forest garden foraging trees medical herbs wood heat woodworking
  • Mark post as helpful
  • send pies
    Number of slices to send:
    Optional 'thank-you' note:
  • Quote
  • Report post to moderator
I've been busy working on other stuff leading into the holidays and the end of our farmer's market season but here's an update on the hugel process and progress. Linear progression had run into the old pile of subsoil from earlier activities and I have tried to document how I go about mixing and refining our raw clay into something I feel satisfied with going into service building long term fertility. The first images show the clay subsoil moving from the pile by the broadfork at the upper left to the shallow pit being used for mixing. When working with sticky clay like this it's nice to have a "hoe scraper" like the one pictured that I carved out of cherry years ago, simple but handy item for this scenario. Once the clay is in the mixing site I begin layering in other materials to work into it. This can be all kinds of types of organic or inorganic materials but here I'm using unsifted but mostly broke down woodchips for the bulk of it. I have at various times used compost, topsoil, sawdust, coffee grounds, spent mushroom substrates, vermiculite, punky wood, silt, leafmold, etc etc in whatever combination comes to hand. I am also adding ashes from the woodstove and crushed eggshells. Most importantly to me I add lots of ground charcoal. The picture strip represents the pathway it moves from my goodly sized charcoal burning pit to the the two IBC totes with their tops cut off where it is charged and then to the sink garbage disposal I used to reduce it in size. The sink grinder is a bit of a bottleneck but I actually like the slurry that results and have developed myriad techniques that take advantage of it's ability to flow. After many years of abuse the disposal finally called it quits shortly after this photo and I had to seek out a cheap replacement. The old one was a 3/4HP and my new one is a 1HP, they can chew through most things they encounter including small rocks but do not like chunks of uncarbonized hardwood or any kind of metal. I tried a 1/2HP unit at one time and it did not have what it takes for this job. After a couple buckets full of ground charcoal is added to the pit I leave it to sit and reach the right moisture level for shovel mixing. I should probably try to make video of this procedure at some point but the next pictures attempt to show the repeated process of turning the pile a bit then smacking it with the back of the shovel while drawing it back towards me. This folds, crushes, and smears the various ingredients together quite effectively in a short while. If I didn't have a convenient pit then this works great with tarp mixing, or small quantities in a trug. While still mostly clay it will become loose and crumbly. Ready to go back to the garden so life and soil processes can take it even further. I charged this charcoal prior to use but I will also be diverting plenty of urine to the ongoing build.

As far as wood sources go I have started breaking down and working with this large pecan tree that fell about two years ago. Notice the oyster mushrooms on some logs. I think I will set those aside for outer scaffolding on the bed.

Lastly, some photos of where the project stands at this moment from various angles. Still just the first section but growing upward. New mix in the the pit. One more round of subsoil to amend after that and the footprint of the bed and continue on.
2024-12-26_195722.jpg
loading the pit
loading the pit
2024-12-26_195819.jpg
sticky clay + scraper
2024-12-26_195903.jpg
charcoal steps
charcoal steps
2024-12-26_223531.jpg
adding ingredients
adding ingredients
2024-12-26_223805.jpg
turn-smack-smear-repeat
2024-12-03_00001.jpg
well mixed. terrible lighting, unfortunately.
2024-12-26_224552.jpg
next logs, with oysters
2024-12-26_00001.jpg
[Thumbnail for 2024-12-26_00001.jpg]
2024-12-26_00002.jpg
[Thumbnail for 2024-12-26_00002.jpg]
2024-12-26_00003.jpg
[Thumbnail for 2024-12-26_00003.jpg]
 
Chris Clinton
Posts: 41
Location: Atlanta, Ga
10
forest garden foraging trees medical herbs wood heat woodworking
  • Mark post as helpful
  • send pies
    Number of slices to send:
    Optional 'thank-you' note:
  • Quote
  • Report post to moderator
Making more charcoal for the gardens and the hugel. Didn't get any pictures once the fire was really cooking as it was my birthday party and I didn't remember to get any. You gotta have a big fire to get people to come to your midwinter parties. Probably 500-600 gallons of charcoal made, 8 hours from lighting to extinguished.
2025-01-18_00001.jpg
emptying the rest of the char from the pit, transferring to the totes
emptying the rest of the old char from the pit, transferring to the totes
2025-01-24_00010.jpg
bird's eye of the area
2025-01-26_211656.jpg
feedstock. the split rails in the tall rick are probably 7 feet long. all the cans are full of chestnut hulls
2025-01-24_00005.jpg
early stage of the fire just getting through the brushy stuff
2025-01-26_213225.jpg
Lot's of char! and freed up space and cans
 
Happily living in the valley of the dried frogs with a few tiny ads.
2024 Permaculture Adventure Bundle
https://permies.com/w/bundle
reply
    Bookmark Topic Watch Topic
  • New Topic