• Post Reply Bookmark Topic Watch Topic
  • New Topic
permaculture forums growies critters building homesteading energy monies kitchen purity ungarbage community wilderness fiber arts art permaculture artisans regional education skip experiences global resources cider press projects digital market permies.com pie forums private forums all forums
this forum made possible by our volunteer staff, including ...
master stewards:
  • Nancy Reading
  • Carla Burke
  • r ranson
  • John F Dean
  • paul wheaton
  • Pearl Sutton
stewards:
  • Jay Angler
  • Liv Smith
  • Leigh Tate
master gardeners:
  • Christopher Weeks
  • Timothy Norton
gardeners:
  • thomas rubino
  • Jeremy VanGelder
  • Maieshe Ljin
  • Likes 1
  • Mark post as helpful
  • send pies
    Number of slices to send:
    Optional 'thank-you' note:
  • Quote
  • Report post to moderator
This is a badge bit (BB) that is part of the PEP curriculum.  Completing this BB is part of getting the sand badge in Homesteading. (Note that this BB is part of a three-part choose your own adventure list BB called Big List. You must complete three Badge Bits in the Big List.)

If you have a traditional wood stove or fireplace, it is often recommended to sweep out the chimney annually.  The complexity of the job is highly dependent upon your particular stove installation and roof access.  Let's clean out our chimney!

Here's a video of sweeping from the roof:


Here's a sweep working from below the chimney:


To complete this BB, the minimum requirements are:
 - clean a chimney for a wood stove or wood burning fireplace
     - including any horizontal runs to the stove

To show you've completed this Badge Bit, you must provide photographic or video (less than 2 min) evidence of:
  - tools you used to clean the chimney
  - cleaning in progress
  - the collected ash/soot/cresote
  - a description of how you cleaned your chimney, what you had to uninstall and any hurdles you overcame
COMMENTS:
 
steward
Posts: 15505
Location: Northern WI (zone 4)
4846
7
hunting trees books food preservation solar woodworking
  • Likes 2
  • Mark post as helpful
  • send pies
    Number of slices to send:
    Optional 'thank-you' note:
  • Quote
  • Report post to moderator
Approved submission
I swept out the chimney the other day.  I have a SS liner in a block chimney.  In the basement there's a "T" and it exits the wall and then 90's down to the wood stove.  First I have to unscrew the cover plate around the chimney where it goes through the wall.  Then I lift it off the stove and wiggle the L shaped pipe out of the wall and carefully take it outside.  Then I tape a plastic bag over the open chimney hole and go up on the roof.  I take the chimney cap off (thumbscrews) and assemble the brush. I run it up and down the chimney a few times.  Once back in the basement I carefully remove the plastic bag and scoop the ash out into the bag.  I keep track each year of how many cups of ash I get so I can see if things are getting better or worse over time.  After cleaning the "T" out I sweep the "L" shaped pipe in the back yard and then reinstall it and screw the cover plate back on.
Pre-cleaning.jpg
Pre cleaning
Pre cleaning
-L-pipe-removed.jpg
L pipe removed
L pipe removed
Bag-installed-(cleaning-underway).jpg
Bag installed (cleaning underway)
Chimney-sweeping-brush-assembled.jpg
Chimney sweeping brush assembled
Aftermath-in-the-T-at-the-bottom-of-the-chimney.jpg
Aftermath in the T at the bottom of the chimney
One-beautiful-bag-of-ash.jpg
One beautiful bag of ash
Staff note (Mike Barkley) :

I certify this BB is complete.

 
gardener
Posts: 325
Location: NW Washington - Zone 8b (15 to 20 °F / -9.4 to -6.7 °C)
270
2
cattle goat foraging trees earthworks cooking building solar sheep wood heat
  • Likes 5
  • Mark post as helpful
  • send pies
    Number of slices to send:
    Optional 'thank-you' note:
  • Quote
  • Report post to moderator
Approved submission
Sweeping my chimney isn't too difficult because my wood stove has a bypass damper that provides unobstructed access to the chimney from inside the stove, so no need to climb onto the roof and remove the chimney cap. The stove does get clogged with soot though above the firebrick in the ceiling of the stove, so about twice per winter I have to remove the ceiling firebricks and clean out the soot. I just reach up there with my hand and clean it out.  Then with the bypass open I can use my cordless drill to sweep the chimney from below and the creosote just falls down into the stove box. The chimney sweep has many sections that connect, so i attach one, run it up the chimney, attach another, run it up, and repeat until I hit the chimney cap. I clean out the ash and soot, but spread the creosote out in the bottom of the stove for the next fire to burn.

Here is a short video of the sweeping in action.
20210115_180636.jpg
Tools used to clean the chimney.
20210115_180842.jpg
Cleaning the ashes.
Cleaning the ashes.
20210115_181421.jpg
Cleaning the soot from above firebricks.
20210115_182844.jpg
Done with the sweep.
20210115_182926.jpg
Accumulated creosote.
20210115_183015.jpg
Closeup shot of creosote.
20210115_183847.jpg
All done.
All done.
Staff note (gir bot) :

Mike Haasl approved this submission.

 
gardener
Posts: 388
Location: Zone 7a
264
6
kids rabbit chicken food preservation fiber arts
  • Likes 4
  • Mark post as helpful
  • send pies
    Number of slices to send:
    Optional 'thank-you' note:
  • Quote
  • Report post to moderator
Approved submission
Sweeping my chimney is relatively straight forward. Open the flue to access the chimney from the fireplace.
chimney sweep tools
Then, placing the brush section from this sweep set, there is a little wiggling to get over to the riser, but simple enough. I spun the brush in and as I got it inserted all the way I detached the drill and added another section. (As a personal note, to get to the top of the chimney I used 5 rods.)
feeding sweeper into chimney
Once I reached the top I spun again pulling the rods back out. I used pieces of a cotton shirt to wipe the rods down on the way out.
Most of the chimney droppings appear to be creosote so I will leave it until fire season.
chimney droppings
Staff note (gir bot) :

Mike Haasl approved this submission.

 
Apprentice Rocket Scientist
Posts: 853
Location: 4a, high mountain dessert
410
3
kids foraging rabbit fiber arts medical herbs bee
  • Likes 3
  • Mark post as helpful
  • send pies
    Number of slices to send:
    Optional 'thank-you' note:
  • Quote
  • Report post to moderator
Approved submission
Hey skip team! I'ts cold, which means, it's time for fireplace cleanout! My chimney is almost straight down to the basement; just a little elbow at the bottom, which has to be removed for this process. I shimmie'd up the chimney and blew hot air the whole way! Ok, ok, I climbed up on the roof, with my husband to spot me. I had to convince him to let me do it for this badge! The opening was heavily coated in creosote! Ew! ;-)

I started with a chimney sweep, which was nearly useless. I'm happy my husband suggested a chain. Literally a 25-foot chain which runs the length of the chimney, and twisted it all around to shake loose the soot buildup. The kids said it sounded like popcorn popping in the chimney. I think a handle would be an improvement. I dropped the dang thing into the chimney. Then, back in the basement, I removed the elbow, shoveled lots of lovely black char chunks into the ash bucket. What do we do with this stuff, btw? To the compost pile with it? Make activated charcoal, perhaps?

Anyways, then I found the chain, and cleaned up. Funny side note, my neighbor saw me at work, and asked, "why isn't your husband doing that?" Like a girl can't do a little dirty work around here, sheesh!
20211115_164640.jpg
The 2nd story chimney
20211115_164655.jpg
creosote buildup
creosote buildup
20211115_165312.jpg
trying the sweep
trying the sweep
20211115_164716.jpg
the chain was better
20211115_170550.jpg
catching creosote
catching creosote
20211115_170756.jpg
the chain
the chain
20211115_170805.jpg
filling the ash bucket
Staff note (gir bot) :

Someone approved this submission.
Note: If you weren't able to remove the majority of that creosote at the top of the pipe, you may want to have a professional sweep take a look at it.

 
gardener
Posts: 1958
Location: British Columbia
1113
3
monies home care forest garden foraging chicken wood heat homestead ungarbage
  • Likes 1
  • Mark post as helpful
  • send pies
    Number of slices to send:
    Optional 'thank-you' note:
  • Quote
  • Report post to moderator
Approved submission
- tools you used to clean the chimney
 - cleaning in progress
 - the collected ash/soot/cresote
 - a description of how you cleaned your chimney, what you had to uninstall and any hurdles you overcame

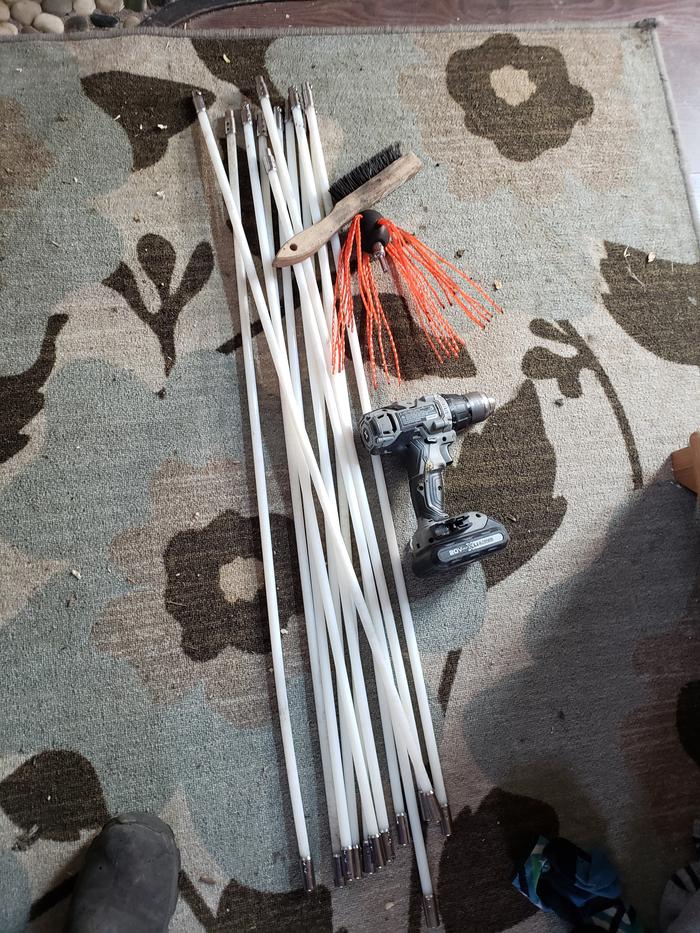
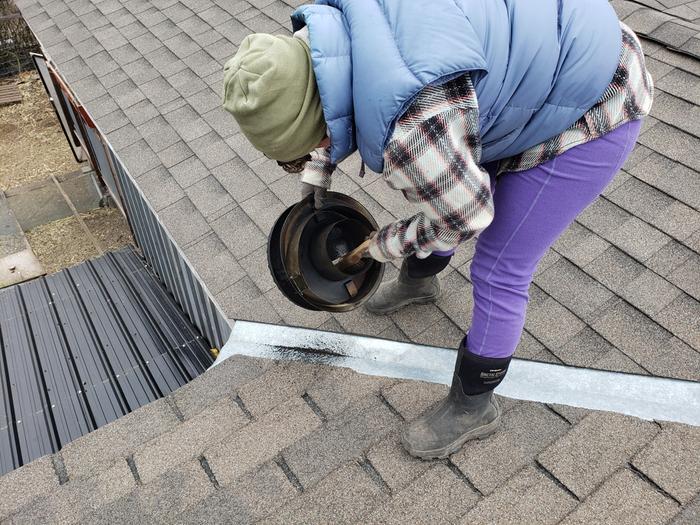
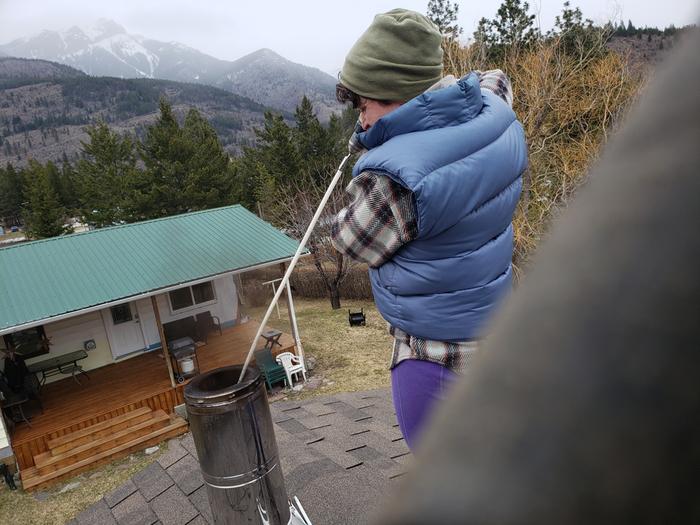
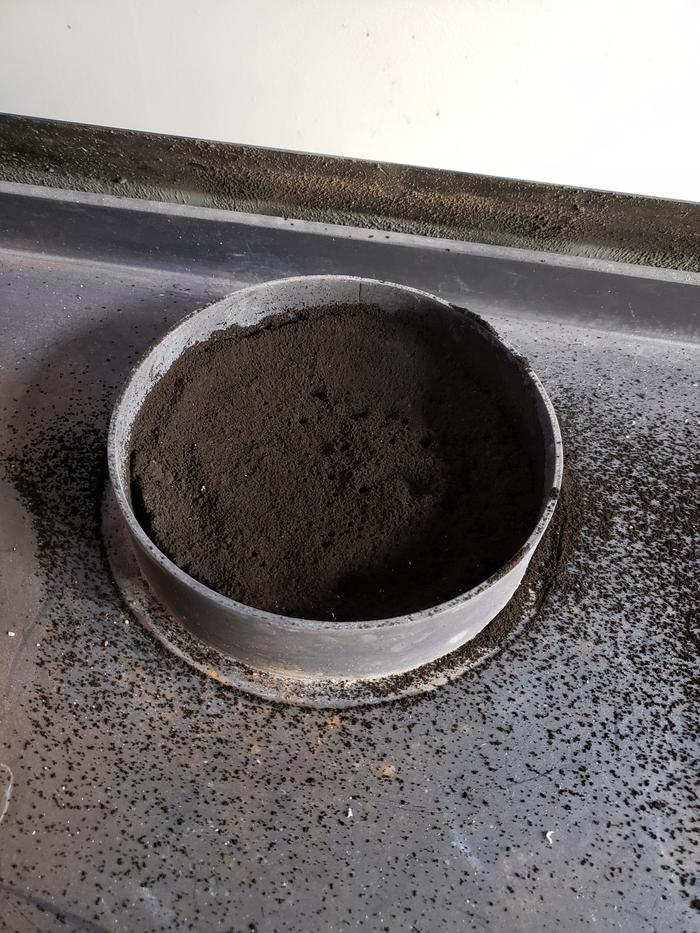
We have a very simple chimney off our wood stove. I went to the roof, removed the chimney cap, then proceed to sweep the chimney by adding segments to the drill sweep (the white rods) as I made my way down the length of the chimney. Then I went inside and removed the removed the segment of the stove pipe just above the stove to remove the creosote/soot.


Staff note (gir bot) :

Mike Haasl approved this submission.

 
pollinator
Posts: 273
Location: Gaspesie, Quebec, Canada, zone3a at the bottom of a valley
170
3
forest garden rabbit books chicken composting toilet food preservation bike building wood heat homestead composting
  • Mark post as helpful
  • send pies
    Number of slices to send:
    Optional 'thank-you' note:
  • Quote
  • Report post to moderator
Approved submission
Late summer chimney sweeping. In normal time, i do it in s
May, november and january. I used the brush, leather glove, ladder. No difficulty today or problem detected. I climbed on the roof to make many back and forth with the brush in the top part of the chimney. Then i dismantle the vertical jonction between the cooking stove and the isolated chimney. Brush it outside. Emptied the ash from the fire box. Emptied the soot and the creosote from the trap under the fire box. Et voilà! It's all done. Safe and Fire ready!
20220725_184212.jpg
Tools
Tools
20220725_184435.jpg
Brushing the top
Brushing the top
20220725_184906.jpg
Dismantling
Dismantling
20220725_185356.jpg
Brushing the lower parts
20220725_185453.jpg
Emptiying the ashea
Emptiying the ashea
20220725_185533.jpg
Opening the soot trap
20220725_185613.jpg
Emptying soot andd creosote
20220725_185843.jpg
Collected ashes, soot and creosote
Staff note (gir bot) :

Mike Haasl approved this submission.

 
Posts: 39
Location: Atlanta, Ga
10
forest garden foraging trees medical herbs wood heat woodworking
  • Mark post as helpful
  • send pies
    Number of slices to send:
    Optional 'thank-you' note:
  • Quote
  • Report post to moderator
Approved submission
Gonna be getting cold soon so it was time to take care of this yearly chore. Glad I found skip before I did this and I don't have to wait another year to document it. I have a standard brick fireplace with a woodstove insert, it's not my ideal but my house has never had central and it's sure better than nothing. Up to the roof! After pruning back some water oak limbs I did the ol' up down up down with the brush. Swept the leaves off the roof too. Back inside, the insert is a more substantial chore. I slid it out of the fireplace, revealing the creosote and crud. Not too bad. Easy to sweep up with a brush and dust pan though I used the shop vac afterwards since I have one might as well. The fiberglass insulation tape has to be replaced whenever the insert is removed which is the main pain to deal with. Scrape off the old tape, cut and apply the new tape. I pulled the electric blower unit off the front for the first time this year, it was full of old dust and cobwebs clogging the squirrel cage fan. I took it out in the back yard and blew it out with the air compressor which quickly cleaned it out. Put it all back together and back in the fireplace. Tested the blower and definitely improved after the cleaning. Shoveled out the old ashes and voila! Ready to get toasty.
IMG_3607.jpg
chimney brush sized for my chimney with extensions
IMG_3605.jpg
[Thumbnail for IMG_3605.jpg]
IMG_3599.jpg
up down up down
up down up down
IMG_3828.jpg
insert before
insert before
IMG_3830.jpg
insert pulled out
insert pulled out
IMG_3829.jpg
crud to be cleaned up
IMG_3831.jpg
not too much
not too much
IMG_3842.jpg
old insulation removed
IMG_3845.jpg
new insulation installed
IMG_3847.jpg
dirty blower
dirty blower
IMG_3876.jpg
clean blower
clean blower
IMG_3877.jpg
all ready to go!
all ready to go!
Staff note (gir bot) :

Someone approved this submission.

 
One day a chicken crossed a road and nobody questioned the motives. Thank you tiny ad.
12 DVDs bundle
https://permies.com/wiki/269050/DVDs-bundle
reply
    Bookmark Topic Watch Topic
  • New Topic