Gave this method a try. So far I've done two batches, and each time generated about %50 of the volume of the 55-gallon barrel, so approximately 30 gallons or so; I've got about 60 gallons total.
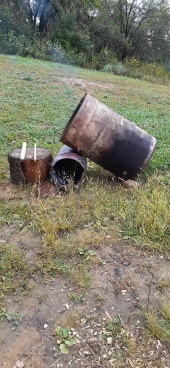
$30 for the barrel, I tilted at about 30 degrees up from the horizontal. My feedstock was anything from small sticks to 2-3" diameter pieces I cut into lengths with a chop saw. I liked this method for the ease of assembly (or no assembly for that matter,) quality of the char, and waterless quenching. Followed instructions on adding layers, letting them ash over a bit, then adding more. I will say that adding too much at a time dropped the temp and the barrel would smoke dark yellow dirty smoke until it got back up to temp. But when the barrel was full, just tip it up, put the lid on, and place a cinderblock on top.
My lid doesn't even fit that securely, so there may be some leakage during quenching, but I let it sit overnight or for two days to make sure it's out and I'm left with a big 'ol batch of charcoal. The larger pieces I plan on cooking with on my grill (another advantage of the waterless quenching method), but will likely spread the finer uninoculated char into the chicken run to be scratched in and inoculated by their manure, all the while reducing nitrogen off-gassing and smells from the coop.
All-in-all hugely successful for the amount of time and effort (an hour or so to chop the wood to size, and another hour or two to tend the fire.) I am planning on trying a trench method next with all the random branches I have lying around; I don't feel like taking the time to cut them into pieces, and can generate probably a good bit more than 30 gallons depending on the trench size. Will just have to a buy a long hose to be able to water quench the pit, but if I'm using it strictly for biochar and not grill coals the additional water shouldn't be an issue.
Thanks Trace!