I've tried before to grow sprouts using the jar method and even with a little kit, and I hated the result, curly thin little deformed things with all the shells still on and inevitably some of them going slimy in the bottom of the jar. so I decided to find out how to grow those nice fat straight ones you can buy in the shop.
ones that look like this

not this
 Stolen from here, a simpler way to make them, but not as pretty.
Well the first thing I found is that there is a lot more info available out there now than there used to be, but the best videos are all asian and not in English so it becomes a nice little guessing game and a lot of trial and error. My method which I have perfected for me is what I'm going to post here.
To start with you need some mung beans. this method will work with any large seeded sprout, the smaller the seed the less weight you need on top.
Then you need a container with a flat bottom and holes in it, you need another container for that to sit in to catch the drips and something to use as a lid to keep out the light.

Assembled my set up looks like this, these are old meat trays in three different sizes I pick them because I have them and they stack together nicely, they are also safe for food and easy to clean.
On top of that you need two heavy cloths, you could use paper for the top layer if you made it thick but the bottom layer needs to be something the beans can get their
roots into.
So for the method. for two people take a large handfull of dried beans and soak them overnight in some
water. in the morning soak your cloths and then fold one up into a square that fits inside the container with holes. It's much easier later if you manage to fold this so it has a flat top surface. spread the beans over this cloth and cover them with a double layer of the second cloth. you can stack up to 3 sets of cloth/beans in the same container. both cloths
should be soaking wet any excess water will drip down out of the holes. Put the holey container inside the container you intend to catch drips in (or place where the drips do not matter) and cover to exclude all light. Now you will have something that looks a bit like the above picture. Put this contraption somewhere warm.
At least once a day open it all up and pour running water through the entire thing. remember to empty the drip tray! The water in the drip tray and your cloths will get stained a dark brown colour, this is normal and will come out in the wash later.
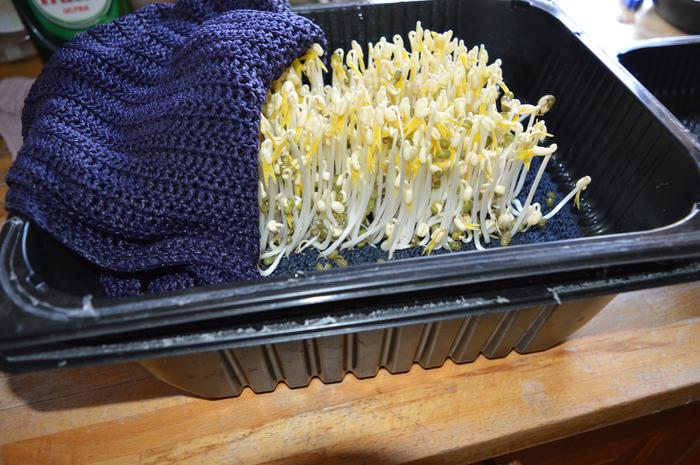
After 3-7 days depending on the temperature this happens.

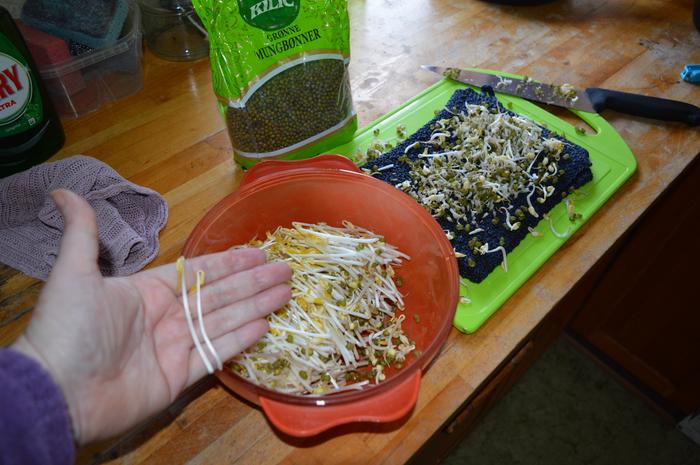
Now your sprouts are ready to eat, if you have a nice flat bottom cloth it's easy to run a sharp knife along the cloth and cut the sprouts off, this will seperate out the roots and most of the old shells, you don't need to do this you can pull them off instead, but I prefer the cleaner look on the finished product.

And there we go, a bowl of thick straight sprouts ready for tonight's dinner. Don't worry about clean up that's easy even though at this stage it looks terrible. let the cloth with the roots in it dry out and they will all shake out easily.
This method gives you the thick straight stems as the bottom cloth gives the seeds something to
root in to stabilise them and the top one makes them grow thick and strong to push it up. they can manage to push up 2 layers on top of the bottom one but 3 layers I found made the bottom sprouts short and stumpy. Since we are only two people I don't need more sprouts than one layer provides anyway.


