|

|

|

|

|

|
|
|
|
|
|
|
|

|

|

|

|

|


God of procrastination https://www.youtube.com/watch?v=q1EoT9sedqY
God of procrastination https://www.youtube.com/watch?v=q1EoT9sedqY
God of procrastination https://www.youtube.com/watch?v=q1EoT9sedqY

God of procrastination https://www.youtube.com/watch?v=q1EoT9sedqY
Benen Huntley wrote:Haha. Well our space to heat is quite large. Where did you get the plans from? I would like to try building one from old bricks outside to test.
God of procrastination https://www.youtube.com/watch?v=q1EoT9sedqY
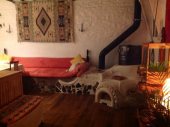
![[Thumbnail for 14928586905231025744558.jpg]](/t/65005/a/49627/14928586905231025744558.jpg "Filename: 14928586905231025744558.jpg
Description:")
God of procrastination https://www.youtube.com/watch?v=q1EoT9sedqY
regards, Peter
God of procrastination https://www.youtube.com/watch?v=q1EoT9sedqY
Benen Huntley wrote:Ah really? How did you go about casting the core? I've never done anything like this.
God of procrastination https://www.youtube.com/watch?v=q1EoT9sedqY
God of procrastination https://www.youtube.com/watch?v=q1EoT9sedqY
God of procrastination https://www.youtube.com/watch?v=q1EoT9sedqY
God of procrastination https://www.youtube.com/watch?v=q1EoT9sedqY
regards, Peter
regards, Peter
Benen Huntley wrote:Why won't the pchannel work as is? Air too hot if it is passing through the bell?
regards, Peter

|
Normally trees don't drive trucks. Does this tiny ad have a license?
GAMCOD 2025: 200 square feet; Zero degrees F or colder; calories cheap and easy
https://permies.com/wiki/270034/GAMCOD-square-feet-degrees-colder
|


![[Download heater.skp]](https://permies.com/templates/default/betaview/images/download-attachment.gif)