

|
-A.png)
|

|

|

|

|
|
|
|
|
|
|
|

May Lotito wrote:... After a year of slowly adding minerals back, I tried again and it works! Seedlings are strong and healthy and they start setting fruits a few days ago. It is still a couple months away from harvest but I am just so excited and want to share now.
William Bronson wrote:...
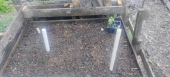
I.planted some old dried up garlic in here, but nothing came up, so I'm hedge my bets
...
Nynke Muller wrote:...
I am not so sure about the garlic. I have some unions (same family) planted around in my garden. The ones on a small new made bed, made from wood and compost don't do very well, while they trive in more established situations. It could be my specific situation. Somebody else maybe has experience with garlic in new beds from leaves and compost?
...