Mark Cunningham

+ Follow
since Dec 15, 2018
Merit badge: bb list bbv list
For More
Apples and Likes
Apples
Total received
In last 30 days
0
Forums and Threads

Recent posts by Mark Cunningham

James Marquardt wrote: My thought is to parallel some smaller pocket plate Nifes I have up to 240 or 320Ah and use that as a replacement cell in the big string but I don't know how it would affect the others or if the replacement might pop!


I did that for a year or so on one of my serial strings.  It worked okay ...... but .....

If the composite cell you build is larger in capacity that the other cells in that string it will under charge ..... Not a very big deal in the Ni world .... but it does have an effect.

The lower capacity cells in that same string will attempt to over charge.  Once again not a big deal ... but you will hydrolyze more DW.

Last but not least, just because all of the parallel cells in the composite "Franken batt" are connected .....  does not mean that current is flowing through them.

It is very possible, likely even, that 3 ED-80's in parallel to emulate an ED-240 .... will have a current flow that excludes, or is diminished, in one or more of the cells in that parallel grouping.

The result being that over all capacity of the serial string would be diminished to the capacity of the actively charging cells in the composite battery.  

In example .... if the majority of the current is flowing through two of the above 3 cell composite .... then the effective capacity of the entire string is now 160ah.

At least that is what my experience and measurements have been.

So ... do it as a stop gap .... while you are scrounging hard for a suitable replacement cell.


Hope this helps

2 years ago

Greg Payton wrote:Hey Mark Cunningham, wood gasifiers have always been interesting to me, but I haven't been sure how to maximize them. One thing I have always wanted to see is a wood gasifier setup that does THREE things in a unified setup - is this possible???

1. Cooking
2. Boiling water to turn a turbine and produce electricity
3. Collect the water back out for use in a home and and farm (and even use it for defrosting solar panels and passive blacktop roof water heaters and other things during the winter)
(BONUS: 4. Recycle unused water back into the system to reduce waste & probably need a way to clean out hardwater deposits)

This wood gasifier usage might be the best use for this wood if there's some effective ways to use this as such!


You might be confusing steam power with pyrolysis.

Steam power would be a great use for your wood chunk resource.  But the available machinery and knowledge base around steam has atrophied.  It is my understanding that steam power is more efficient.   Some folks swear by it.

Wood/Charcoal gasification (pryolysis) is converting bio mass into gasses that can be consumed by an internal combustion engine.  The advantage of I.C. engines is that there is a much larger knowledge / support base and they are ubiquitous.

{minor hijack on}

We have lots of "trash" wood where we are at.  Specifically Katuray and Malungay.  We have a small orchard of the stuff.  The flowers, leaves,  and beans we eat.  The rest of the soft parts we feed to live stock.  

https://www.jbsolis.com/2018/07/herbal-medicinal-plant-katuray-benefits.html
https://en.wikipedia.org/wiki/Sesbania_grandiflora

http://www.medicalhealthguide.com/articles/malunggay.htm
https://www.philippineherbalmedicine.org/malunggay.htm


The woody part is  too soft to be used in building or for implement handles / furniture.  The caloric/tar content and our humid climate are such that direct wood gasification is difficult.  So we charcoal it in a smoke-less retort.  

Here is a video of the inventor demonstrating it.  All the credit goes to him.  I just followed his lead because his climate and materials match ours.

https://www.youtube.com/watch?v=M6HWtknE0vk


The best charcoal is sieved out for diesel irrigation/threshing/milling/hauling machines.  Here is his example of the most common agricultural engine in use in our area.

https://www.youtube.com/watch?v=NYUvU38F5Sg

The next lower quality charcoal is stored for cooking.  Part of that we convert to "activated carbon" for filters and medicinal purposes.

The smallest fines and dust are either added to our grow beds directly, or steeped in fertilizer and then added.

{/minor hijack off}


Hope this clarifies.
3 years ago

Greg Payton wrote:I was hoping to get some ideas of what one might use these for?


Charcoal or Wood Gasification

Easiest / cheapest  ...... Gary Gilmore charcoal gasification.  Here is an intro to get you started.


Pro Bonus Tip.   ......  Charcoal that is not suitable for engine fuel can be repurposed for cooking.  Small fines and dust can be soaked in anaerobic digester effluent or other organic fertilizer to make a slow release direct soil amendment.

Wood Gasification.  More complex but double the recovered power.  Flash001usa .... "Flashifier".  Step by step build videos.  30 or so in all.

Run video


Best forum  to learn .......  Drive on Wood.  http://forum.driveonwood.com/


Hope this helps


2021.09.04 edit.  Substituted better flash youtube video.

3 years ago

Walter Racka wrote:Thanks All for the info. I'm not ready to commit to all the work that appears necessary to buy and bring these batteries back to life. Would love to do it but...I'm a newbie to all this and just want to get my feet wet not get in over my head.  Thanks again, Walt


That is probably best.

The real value of ED-240's is that they can be rebuilt .... within reason.   Everything is designed to be removed and replaced.

They only make sense for someone who has the know how, tools, and extra cells for spare parts.


Good luck.
3 years ago

Walter Racka wrote: I am trying to find out more about the Edison 240 batteries as I have an opportunity to buy 20 of them.


Here is a previous thread on ED-240's

https://permies.com/t/130801/information-Edison-Ed-Nicad-batteries#1036837

$600 sounds expensive to me.  I bought mine for scrap prices which in 2010 was $18 each.

Inspect each cell.  ......

1.)  If it is dry do not buy it.  You have no idea how long it has been dry, or if it was shutdown, emptied, and dried properly.

2.)  There is a date code on top.  First 4 digits = mfg mo/yr.

3.)  If it has lots of black scum sticking to the inner cell walls, either at the top or collected in the bottom .... don't buy it.  That is plate material that has softened and leeched out of the plate.

4.)  If the cell has red coloration it is rusty inside.  Iron Poisoned.  Don't buy it.

5.)  You are going to need gallons -n- gallons of distilled water on an ongoing basis.  Wally world distilled water will not cut it.  One bad gallon can ruin your day.  You will need to make your own on a large scale,  or locate a trusted source.  

6.)  You will have to change the electrolyte.   You will have to make the electrolyte yourself.  If you are unable, or unwilling, to do that then don't buy.
 
7.)  Check on the availability of  technical, or preferably re-agent, grade Potassium hydroxide (KOH) and Lithium Hydroxide (LiOH).  If you cannot get it,  then don't buy.

8.)  20 in series is a 24vdc battery.   You are going to need an alternate way to charge these cells to recover lost capacity due to Nickle phase shift, (folks commonly confuse this with "cell memory").   An ED-240 needs to be reconditioned charged at at least the C/10 rate which is 24 amps DC to a cell total of 360 ah.   You gonna have to recondition charge a minimum of 4 or 5 times  before you see any lasting improvement.  If you are not prepared to do that ..... don't buy.

9.)  You need to be able to measure the health of these cells.  You do that by titrating the electrolyte for potassium carbonate,  measuring the specific gravity, and monitoring cell voltage and current.   If you not willing to do that ..... especially the titration part .... don't buy.

All of those things being said .....  I have a 920ah 48v solar bank that is on average 35 years old.  It currently produces about 75% of its OEM capacity.  I have had this bank in production for 8 years.  I am extremely satisfied with it.

The manual linked in the thread I referenced earlier can teach you how to do all of the above.


Hope this helps


Edited P.S.

Keep in mind that the calendar age of these cells is by in large deceptive.  Most ED-240's were in rail service.  Backing up switching gears and road crossings.   They sat for decades under float charge, usually in a good structure, with  routine maintenance and checks mandated by the Railroads.


3 years ago

Phil Stevens wrote:two masterful replies


I don't know about "masterful".  I still inventory my fingers and toe's after cutting.

The two adjustments I talked about are better described here.

the jolly scythers new zealand, SCYTHE SETUP PART 2 of 3

01:20 angles of the blade


Phil Stevens wrote:the arc you want is different and creates a fine slicing movement.


Like this?  I notice how the belly of the blade does not leave the ground.  

Scything lawn-length grass


Good luck.
3 years ago

r ranson wrote:

  • Either the end of my stroke the tip goes up - most common
  • Or if I keep the tip down, the start of my stroke is up.


  • Your using your arms.  The upward trends are because that is the limit of your reach on either side of the stroke.   Your arms should just be ropes and hooks that attach your hips and legs to the snath.

    Get a mp3 player.  Load up some waltzes or polka music.  Something with that tempo.   I know it sounds silly but it works.  

    Keep in mind ..... your not working, your dancing or doing kata's

    r ranson wrote:

  • Or if I can somehow get both start and stop of the stroke to stay at the right level, the middle bit didn't cut.  It just bent.
  • I also seem to be having a problem with keeping the blade low enough to the ground.  Most of my cuts are at ankle height.  


  • Pick a spot where you can make a lot of strokes on virgin grass.  

    After you have corrected the natural tendency to use your arms to "hack" at the stuff to be cut ......  Make a test stroke.  Did the blade cut uniformly throughout the stroke?  No?  Adjust the "toe" of the blade, the angle of the tip of the blade relative to the snath in or out with shims and wedges.

    After each adjustment test another stroke on new grass.   Rinse and repeat until your satisfied.

    r ranson wrote:

  • There is a lot of grass laying over on its side.  This is the mid-height stuff, just about ankle height.


  • This happens to me all the time.  Change the angle of the cutting edge relative to the ground to be cut.  The deeper the angle the more aggressive the cut.

    Aggressive cutting angles will really wear on your blade as you are slicing more earth, rocks, roots, etc.  So this is a temporary adjustment to cut a particularly tough area only.

    r ranson wrote:
    Two things I want to look up before the next scything session

    1. my back feels hunched up, it seemed to get into a very rounded posture and I feel I could scythe longer if I could keep it upright.
    2. can I adjust the snathe on this somehow to make it match my height better?  


    I had a lot of problems with this myself.  I followed all of the internet available length, dimension, spacing advice.  Finally solved it by lengthening my snath by 8 inches and decreasing the distance between grips by 4".

    The snath dictates how you will feel after scything.  It's not a generic hatchet, pick, or shovel handle.  It has to fit you, and the terrain your working on.  Otherwise it will beat you to bruises.


    Hope this helps.

    3 years ago
    We built our home with earthbag about a decade ago.  

    Sarah Tennant wrote:What if I used an earthen plaster on the interior walls, so the earthbags could breathe that way?


    Vapor sealing the outside and leaving the inside open to breath would probably create a good terrarium.   In our climate we would grow mold everywhere.  Especially in unmentionable places.

    Sarah Tennant wrote:I've seen a method of earthbag construction where the earthen plaster is applied at the same time as the earthbags are laid


    We did that.  Did not notice any problems with it.  Makes timing the build a little more difficult.

    Sarah Tennant wrote:thermal mass of earthbags, but am worried about their lack of insulative properties.


    We are on the equator.  What we have found is that earthbag is a thermal battery.  It stores up heat throughout day, and releases it during the cooler times.  Same is true for cooling.  Cold absorbed at night is released into the house during the day.  In our location the temp lag is about 8 hours.

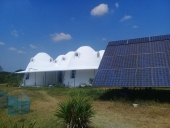
    Do not discount the effects of mass.  You may not need any insulation.   I built one dome as a prototype first.  We lived in it while we built the big house.  Now I use it to store batteries / solar.   Lessons learned from that little outbuilding made all the difference on the forming of our house.

    Sarah Tennant wrote:then cover that ... in plaster/stucco, possible with a stone facade for the bottom few feet


    Our earthbag material is a mixture of 3 parts basic river sand to 1 part clay from our rice field.  Then we stabilized that with one part of portland cement.

    We left the form sack material on.  We did an earthbag material fill coat onto the sacks to smooth out the dome shape.  Heavily scratched for a mechanical key.  

    Then went on top of that with a Lime plaster that is 1:3 lime/river sand.  The lime we get here is "fat" lime.  Limestone primarily from sea shells.  I will stress that for our plaster and washes we used "quick-lime" not hydrated lime.  We had lots of problems with lime until we switched.

    Rough finish the plaster so the exterior coating has a good mechanical key.

    We tried all sorts of different ratios and mixtures for our exterior lime coating.  So far the best performing one has been a mixture of 1 part freshly slaked quick lime to 1 part exterior latex paint, to 11 parts water.  Super thin with lots of coats on successive days.  Thorough wet down of the area to be painted before, during, and after painting.

    The latex cuts down the vapor permeability a bit, but so far it is not detrimental as far as I can see.  


    Hope this helps.  Good luck.

    3 years ago

    Paul Canosa wrote:I think the challenge to financial independence is from fiat currency


    I skimmed through this thread and noticed that everyone is thinking in fiat paper.   As a thought exercise start pricing the things in your life in Silver, Gold, Corn, or Porkbellies for that matter.

    Do that a few times and you will see how the value of your labor, intuition, intelligence, and time in this life is "diluted".


    "The Creature from Jekyll Island" by G.E. Griffin makes for interesting reading.


    https://archive.org/details/isbn_9780912986166


    Hope this helps
    3 years ago

    Tomas Marhold wrote:

    Hello Mark,  Thanks for all of the information.  I think you know a lot about electricity and solar.  Yesterday I put one panel in the sun and hooked up the multi meter.    22.4 volts and around 2.4 - 3.04 Amps. But the Amps kept fluctuating.       Upon further inspection the silver ribbons in the panels look damaged at the intersections.   I attached a photo.     Surprisingly, one panel is working but damaged.    I switched my batteries back to 12v and using the one panel to charge them but it's not working so good.    I got a battery charger today and using it now to keep the batteries fresh.     But they sat at 12.4 for a weeks.   I will check out your function test on YouTube.     I ordered a soldering iron from Shopee but it didn't arrive yet.    I borrowed one from my friend but it has no power it's useless.
       I'm in Nueva Ecija, Palayan city, Luzon.   Small Town.    
        Thanks.   Ignat.     T---


    Ok let's do a bit of math.  22.4vdc * 2.4a = 53.76 watts.  I seem to remember that those were 100w panels.  To be honest that sounds about right to me.

    The specs that you were sold are not the specs that you can expect the panel to produce in real life.  Look at your spec sheet, (may have to download it from the mfg),  Most will have a "STC" and NMOC rating.  Standard test conditions, (the best they can get in a lab setting).  Normal mode of ..... whatever.  That is usually 70%->90% of STC.  Estimated real life.   You were advertised STC specs.

    My Jinko's STC is 460w.  The NMOC is something like 360w if memory serves.  I've measured them producing 500+ watts.

    So sticking a meter on a panel in an open circuit normal environment is good for basic  Pass/Fail tests.   Not so good for actual real world performance testing.

    What is the Model and Mfg for your panels and charge controller?   I'll look them up and maybe we can sort this out.


    3 years ago