Sue De Nimh

+ Follow
since May 05, 2016
Merit badge: bb list bbv list
For More
Apples and Likes
Apples
Total received
In last 30 days
0
Forums and Threads

Recent posts by Sue De Nimh

A nylon hooded poncho, made for going over a backpack. I have one attached to my backpack (which is how I transport my laptop and all the other geek paraphernalia of my life; also a hank of paracord, magnesium fire starter, and a good knife for when the apocalypse comes) in a pouch attached to the MOLLE straps, for when a trip to campus turns rainy.

At the remote hunting cabin being slowly turned to retirement haven, another poncho hangs by the door for those runs through rain or snow to the "wilderness toilet".  For those unfamiliar, with the term, this is a hole with a wooden box over the hole, with a seat to sit on. No walls. No roof. Just you and nature, communing. Keep a tarp over the top to keep the hole from flooding. The great thing about a poncho for that is it covers your legs, keeps rain out of your pants, and the toilet paper dry until it is applied where needed. Speaking of TP, a plastic coffee can is ideal for keeping your TP dry while it sits next to the box. A can of mosquito repellent is handy to keep stashed nearby, because mosquitos love exposed cheeks.

If the poncho is too flappy while you work in a light rain, one can always tie a length of paracord around it at your waist to enhance mobility. If it's really pouring, I don't bother trying to work.  And one should always remember that ponchos are incompatible with moving machinery, even cinched at your waist. But machinery tends to be unhappy about rain, and slippery wet surfaces make it hazardous to be around machinery anyway.  I don't risk it, so that stuff waits for dry weather.
3 months ago
I'm a coffee addict, but I like the occasional cup of tea for variety, but not enough to make a fancy blend myself (hats off to those who do).  In the grocery store, there's a brand called Harney's that makes a "hot cinnamon spice"-black tea with cinnamon and orange peel. Enough cinnamon to punch you in the face in a mid-afternoon slump in front of the office computer.

I also liked the Republic of Tea's Spring Cherry Green Tea. And, oddly enough, there was a variety in the foreign food section called "Chinese Restaurant Tea" that was very drinkable (an oolong tea).  Other kinds were the herbal teas Raspberry Zinger and Orange Zinger (my husband likes both of those, though his preference is the old standby Lipton for ice tea, done as sun tea).

Where I work, we have many visiting scientists from around the world. One woman from China brought green tea from home and shared it.  The leaves were rolled into little balls as they dried (maybe kept it fresher as it dried?).  It had much more complex flavor without the astringency than most of the other green teas I had tried.  Maybe you could go to a Chinese grocery store and ask which tea they liked? Or just try their teas at random until you find one you like. Maybe invite people over for a tea tasting to make the ones you don't like find a home with someone else ha ha ...
1 year ago
Wikipedia:
"Yeasts are eukaryotic, single-celled microorganisms classified as members of the fungus kingdom".

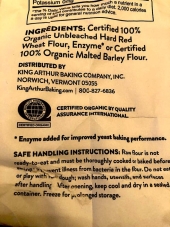
     "An amylase is an enzyme that catalyses the hydrolysis of starch  into sugars. Amylase is present in the saliva of humans and some other mammals, where it begins the chemical process of digestion. Foods that contain large amounts of starch but little sugar, such as rice and potatoes, may acquire a slightly sweet taste as they are chewed because amylase degrades some of their starch into sugar. The pancreas and salivary gland make amylase (alpha amylase) to hydrolyse dietary starch into disaccharides and trisaccharides which are converted by other enzymes to glucose to supply the body with energy."

"Malt is a cereal grain that has been made to germinate by soaking in water and is then halted from germinating further by drying with hot air, a process known as "malting""
"Malting grain develops the enzymes (α-amylase, β-amylase) required for modifying the grains' starches into various types of sugar, including monosaccharide glucose, disaccharide maltose, trisaccharide maltotriose, and higher sugars called maltodextrines. It also develops other enzymes, such as proteases, that break down the proteins in the grain into forms that can be used by yeast. "

It took me less than 5 minutes on an internet connection to find definitions.  We live in an age where we swim in information.

There are 2 parts to this discussion: 1) is a fungal enzyme dangerous? Is it dangerous when it is fermented in a room with washable walls that has the name "lab" by a tall guy named Dave in a white lab coat who washes the stainless steel fermenter after every batch? Is it less dangerous when it is fermented a wooden hut in a barrel that gets added to every week by a sweet little old lady that calls you honey?  It depends on the skill of the person and their attention to detail, not what they wear or the walls of the room.  And as has already been pointed out, one of the fungi widely cultured to produce an array of products has been used for centuries in both wooden huts and tile walled laboratories.
2) Are the results of malting barley and fungal fermentation the same?  Both produce the enzyme amylase.  However, the side products of the biologic organisms can be different, and may be incompletely removed on the way to the final product.  For a person with food sensitivities, the answer may actually be that they are not the same.  Both aunts and my mother had sensitivities: seafood, anything derived from soy, strawberries, oranges, tomatoes. I learned to read labels to screen out a lot of products.  The number of products with soy derivatives is mind-boggling, and yet they never blamed anyone else for their misfortune, they simply made their own mayonnaise and taught me how to make my own.  

If you are a person with food sensitivities or allergies (they are NOT the same), reading labels every time is a smart self-protective strategy, but even then, things that are labeled the same may have important differences when the process used changes.  The product may change at any time, and the only way to actually control that is to buy your own raw ingredients.  Getting angry at the customer service representative making minimum wage will not change the product.  You need to make the effort to find contact information for the higher management, and politely contact them with your story.  Changes are not made out of malice, and they may be unaware of the needs of their customer base.  

You may also want to explore the products from Bob's Red Mill.  It appears that their management has a higher level of understanding about food sensitivities and allergies, and may be able to provide more or better information about all their ingredients.
1 year ago
With your Ryobi tools, you will benefit from purchasing the 12V auto charger. I have one at our cabin, and it works great. But when the mice use it for a latrine….  It cleaned and worked fine.  With the Ryobi batteries, you can use their hybrid fans with the undersized kit batteries in the heat of the summer.

The solar system I built started small so I could understand what it could do. 1 100 W panel from Home Depot and a 12V deep cycle marine FLA battery. I ordered the SC 2030 charge controller from Bogart Engineering http://www.bogartengineering.com/products/solar-charger-controller.html. What with one thing and another (like not having the cabin walls insulated yet) the charger stayed in its box while I just hooked the panel direct to the battery using terminal clamps from the local farm and barn. Attached a 12V camping light from Goal Zero, a 400 W inverter to charge my laptop, and a 12V lighter socket for plugging in phone chargers. I learned the battery was too small for the panel when I found it “boiled” off all the electrolyte. 2 deep cycle marine batteries are better (battery 1 is still in service for just the cabin light and occasional phone, using a cheap panel and charge controller from the farm and barn, coming up on 8 years now). But with 2, we started running my husband’s CPAP, which works for 1-2 nights, but can’t recharge enough with the shorter days during deer season. Add a second 100W panel.  Then add a third battery when those start overcharging.  

Finally 2 years ago I put on the charge controller and swapped the batteries for a pair of 6V golf cart batteries. I don’t have enough time on that to project for the long run (COVID, other health issues), but it worked great the whole week of deer season.  

In retrospect, the charge controller was the most important part of the system. The batteries were the second-most important, and the most expensive.

My biggest suggestion would be to put your DC fridge on its own panel, controller and battery set. Instead of treating the system as, well, a system that has to have one incoming massive feed that you then split off to branch circuits, treat each load as its own system.  position your charge controller and batteries close to the load-it’s easier to deal with voltage drop in the panel to charger wires than anywhere after the charge controller (because the panel voltage is high to begin with and varies depending on the solar intensity).  Smaller charge controllers and inverters cost less, and as you know, use more power even when idle. Positioning 12V loads near the batteries lets your battery to load wires be smaller.

I know you wanted ways to calculate, and this doesn’t give you that. What i hope to have shared is the basic concepts that make the calculations work. 12V DC has constraints, like voltage drop over distance, that we just don’t worry about in a 120V AC house. In a solar powered world, we guzzle power while the sun shines, and turn off every power drain after dark. Until power storage is as cheap as panels, anyway…
3 years ago
I have had a tiny solar system at our hunting cabin, starting with a single deep-cycle flooded lead-acid battery like you would use for a trolling motor (rated at 74 Ah) from the local farm supply store and a 100W polycrystalline solar panel from a big box store,.  Our first inverter ran my husband's CPAP all night long the first year, but since the panel was wired direct, it continued shoving voltage in after the battery was fully charged, so it hydrolysed electrolyte, not so good for long life, and wouldn't run the CPAP all night the next year, so I added a second battery.  Time passed, I bought a charge controller (Bogart Engineering SC-2030) that is still sitting in the box.  My current setup has 2 100W panels and 3 of the same batteries (one of which I managed to boil dry-it took over half a gallon of distilled water to bring it back up), but when I bought a new, larger inverter (not even pure sine), it would alarm after a couple hours.  Rearranging cable connections did not help. Finally for whatever reason, when I put the CPAP on an extension cord with no other changes, it worked fine. So there is something about the way the inverter draws current from the battery that makes it dip into a state it thinks is low voltage, and maybe the cord sort of evens things out so the draw isn't as deep.  I suppose if I dragged my $10 used oscilloscope up there I could find out...

The other thing is, the SLA and AGM batteries I have had experience with are not robust when it comes to solar or other practical uses. We have replaced my husband's AGM ATV battery at least 3 times, and he has only run the ATV a handful of times. PITA. But he got it cheap, used, so that met his standards.

If you really want to learn about making a solar system and how it responds to loads, you can get far with just your multimeter, with the caveat that VOLTS only tell half or less of the story.  You must know the amp draw in order to correctly understand your battery state of charge. And to measure amps, you need a known resistance to measure voltage across, so you can use our old friend V= I*R.  A Radio Shack 1/4 watt resistor will not do the job, for that you need a "shunt" (see this page for description. Other places sell them too). All a shunt is, is a resistor that can pass all the current while not heating up or reducing the voltage drop very much, and you put it in line with the positive line from your battery, so all the current passes through it. A good analogy is a water meter-water comes from the supply, all of it passes through the meter, and then to the various loads.  Every amp you use has to be replaced, AND a little more, by your charger. Put in the shunt, measure the amps going into the battery from the charger, and out to your loads.  

The other key thing to understand about lead-acid batteries is that the temperature affects the voltage. And for the long-term life of your battery, you should not discharge deeper than 50% state of charge. According to this chart, 11V is 10% state of charge, and this is not too good for the life of your battery.  Make sure you understand, though, that the chart shows OPEN CIRCUIT voltage (no loads) and you can't measure this accurately until after AT LEAST an hour has passed since you drew a load.  

It seems like a lot to learn, but you can really get very far indeed with good, concise information. I highly recommend Handy Bob Solar, as this guy is a retired electrical engineer who has written pages about setting up a usable solar system for RVing or small off-grid cabins, and he shares his actual experience with the components he recommends.  I haven't found any information there that did not work as he said it would.

Good luck, and enjoy your system!
4 years ago
Looking through all this, the key point To emphasize for newbies is that the Kickstarter funds an experiment and the documentation of the experimental setup, ie your Kickstarter campaign is a grant proposal (sorry, science research is my day job). I can see you have the temperature sensors listed, 2 questions: Where are those being placed, and are there being done in a fashion that they can be replaced when they or their connecting wires fail? What are the data collection plans, and will there be data summaries? Or opportunity to somehow acquire the data?

I just mention this because, really, what all your work here is, is citizen science. It is important. The area you do research in is obviously interesting to a number of people. It certainly isn’t boring, and it is achievable science foe anyone to replicate.

Having the long-term data available in some fashion aids the people who build on your work. Simple images of graph paper with data points plotted by hand go a long way toward achieving this goal. Electronic measurement reduces the workload tremendously.  I personally would be interested enough in your experiment to contribute a couple of microcontroller boards set up to do data collection and could discuss some of the cloud platforms for data display.    
5 years ago
Count me in (around the $25 dollar level)!

I am also North Country high water table, so any thoughts/possible approaches based on your experiments would be good.  Some mention of design values for round timber structures would be greatly appreciated. Earth-bermed deer stand, anyone?
5 years ago
We have 40 acres in the north woods (zone 4), currently with a hunting cabin just big enough to sleep and keep warm with a wood stove in the colder seasons.  You could call it seasonal occupancy, but we go up any time the weather will allow us to use the wilderness pit toilet without freezing off portions of our anatomy. For purposes of this discussion, a wilderness toilet is a box on top of a pit, and I made it fancy with a plastic tarp on a tripod to keep the snow off your back.  Needless to say, our cooking facilities are...spartan.. though, since cooking takes longer, our shelter is actually more resistant to precipitation.

The first year, we had a 16'x20' tarp over an  A-frame made of 3-4" diameter peeled balsam fir poles-2 on each end and one ridgepole, with 2 sawhorses and a sheet of 3/4" plywood for a counter. Serviceable, with open ends, the rain would blow in, and in the end, the ridgepole couldn't handle the weight of the snow that slid down, pulled down on the tarp and broke it. Considering the snow that year was 2 feet deep, I was surprised it survived that long. Kitchen v2 was moved to a shadier spot (the tarps stop visible light, but not infrared, so we still got hot). The pictures attached show the framework, where we used 3 pairs of fir poles and a much more robust ridgepole, covered with a 24x32' plastic tarp, and the finished "Mess Hall".  We also used some poles for cross-bracing. The whole thing is tied together with paracord, and the ends of the center pair of poles were cut near to the ridgepole and then wrapped in scraps of tarp to keep them from poking through the cover. This is its third winter-I have had to recover it twice-the center pole points and couple spots on the side frame rubbed holes in the cover, and I noticed last summer that tree fungus was growing on the ridge pole there.  To make it more comfortable in cold wet or windy weather, the back end had another large tarp tied at the ridgepole, and then to the sides of the end frame.  I attach another tarp over the front end that keeps out most of the winter snow, though not all.

We can fit chairs in there, though I never took out the scaffold from the center, since we put the stove under it; friend gave us a "camping kitchen"-essentially a folding table with side shelves-that the stove goes on. We used a propane camping stove, and upgraded to a duck blind stove when the mice made a nest and had babies in the camping stove.  We never store food in the "Mess Hall" (there are bears in the area), when we still had only a tent, it went back into vehicles.

We now have a 12x20' Amish-built cabin - really, just a shed, but it has 2 doors and 2 windows, and now it has insulation and a wood stove, as well as a bed and a cot. We think it is safe to keep food in there, and we use a big cooler for cold stuff, as well as storing food and cooking gear in a large plastic storage bin with a locking lid, just in case the mice find their way in and aren't repelled by the mothballs we have in the cabin corners.   We have a really nice 8 foot long picnic table under a shady tree for prep and eating.  We can cook almost everything we could at home-I use a dutch oven with charcoal for cake and biscuits, wrap other things in foil and roast over the coals of a wood fire, or just cook meat directly over the coals. With the duck blind stove, anything stove top is just like home.  I did buy a BaseCamp wood-fired grill/cooker that also charges a battery pack, but that is more of curlicue than a central piece of kitchen equipment-great for grilling with wood trimmings from our woods, though, and reduces our charcoal consumption.

We either heat up wash water over a wood fire in a galvanized 20 gal garbage can or galvanized pail, or in a kettle on the propane or wood-fired stove.  Put the wash water with dish detergent in a plastic dish pan (hot and cold to get comfortable temp) and there's your dishes. Use the old girl scout dunk bag to rinse, or just pour over.  We make sure the food scraps are scraped off the dishes before washing, then when little food scraps wash off, we pour the used dish water onto the gravel driveway at least 100 ft away from camp, so as not to attract the bears.  Eventually, I think a keyhole garden might be a great way to reuse the dish water, but I still would put it well away from the cabin until I saw if the bears or coyotes were attracted.

My key considerations for camp cooking fall along the lines of food safety first, and keeping a bear-free camp.  I'm pretty flexible about what I need to have to cook, having camped since I was a child.  Any stable flat surface is a counter; adjust cooking methods to fit the heat source-and you really can't go wrong with a cast iron dutch oven if you have either charcoal or a wood fire gone to coals.  Cooking like this takes some practice, maybe a little more time, and if you are someone who is uncomfortable improvising in a recipe, you won't be happy until you make a more kitchen-like setting for yourself.  The biggest thing I miss up there is my microwave, but we are off-grid, and a microwave just won't run on a pair of deep-cycle 12V batteries and a 100 watt solar panel.  For the future, I am slowly building an earth oven, but I keep getting attacked by sloth and sit in my chair reading while the birds chirp, and then it is winter again for too many months.  We also thought we could just get the Amish fellows to build us another shed, but again, that is money that maybe we need to spend on a permanent home for our retirement...
7 years ago
4 years ago, we bought at $1300/acre in Northern Wisconsin (zone 4a) when the market was close to bottomed out. Assessed value for taxes was in line with what we paid. On a paved and plowed county road, classified as rural land, no structures, the soil is silty sand with frequent rocks (standard Wisconsin glacial till), wooded, aspen/balsam fir in the drier part and muck (the actual soil classification) with black spruce and alder shrub (classified as wetland) in the back. We will definitely need to use Sepp Holzer type methods to get food out of it. Right now it is decent hunting land, though the wildlife is quite wiley, so vegetarianism would be an enforced option if we were to depend on the land alone to feed us.

As we were looking, there were other properties available-the adjacent 40 acres were sold at $10K more just because they had a trailer with a deck and electric brought in about 30 ft to pole with RV connection. The purchasers ended up replacing the trailer (it was full of mold). I couldn't understand the logic of paying that much extra for a moldering trailer-and we ended up having a local Amish guy build us a barebones 12x20 cabin that met the building code for seasonal dwelling for $5K. No mold, doors front and back and I added screen doors the next summer-I love the place. The township reassessed all the properties last year-since we put a structure on it, it falls under a new classification and the assessed value went up $10K. We also looked in southwestern Wisconsin-the price per acre was $3-5K-which meant smaller property and no better soil. And more people.

Other factors worked into our purchase decision-the adjacent county had a property we almost bought-then I discovered we could not dig a privy unless we replaced it with a permanent septic system or holding tank within 3 years. Our county has no problem with us digging permanent privy, and if we drive a well-point ourselves, we can have a hand pump. This allows us to take our time transitioning to permanent habitation without large expenditures of cash early in our ownership to make it happen.

Most counties in our state have their land records accessible on-line and one can access assessed valuations that way. Our adopted county has very nice people in the land and permitting offices, and the township board of assessment agreed with out petition to have the wet half of the property assessed as wetland, which offset the increase in value from the change in classification. One can also find on-line maps of soils for a prospective property at NRCS Web Soil Survey with some estimates of suitability for septic or building-though I can tell you for our property at least, all the unsuitable rating means is it will cost a little more for septic, or a little extra care or constraint on building methods. One other constraint on what we can build is determined by the state building codes (and the county and township modifications to them). Our county is pretty mellow about what you build, our current county is pretty snooty about it, so if the locality you pick has "keep the riffraff out" rules, doesn't matter how the land is priced, if you can't do what you want at your pace.
9 years ago