I have been hooked on Cob ever since I picked up Kiko Denzer's book on building Earth Ovens. I currently live in the Bay Area in CA, and so I always felt it was a pipe dream to actually build with Cob one day. Until
chance came along and changed everything. Order of events that allowed for this creation that I am about to chroniclize:
[li]Friend at a local industrial arts center was giving away firebrick[/li]
[li]Another friend knew of a local Coffee shop that has a 1 acre yard for community events/garden, that has been dreaming of having a wood fired pizza oven[/li]
[li]Coffee shop has a huge pile of old brick from who-knows-what that can be used for this project[/li]
[li]1 girlfriend and 3 friends are on board to volunteer their time[/li]
[li]We apply, and win, a community grant to pay for the cost of additional materials needed[/li]
[li]Sounds pretty awesome, right!? l[/li]
Bear in mind, that the most Cob experience that the group of us have had has been from reading and watching videos about it, or from demolishing old cob ovens that were abandoned (tear).
I am reaching out to you guys, not only because your awesome and wonderful, but I would love to get some opinions on where we messed up

So, that is the short version of the background.. now, here is how we did it!
Day 1 - Planning and trenching

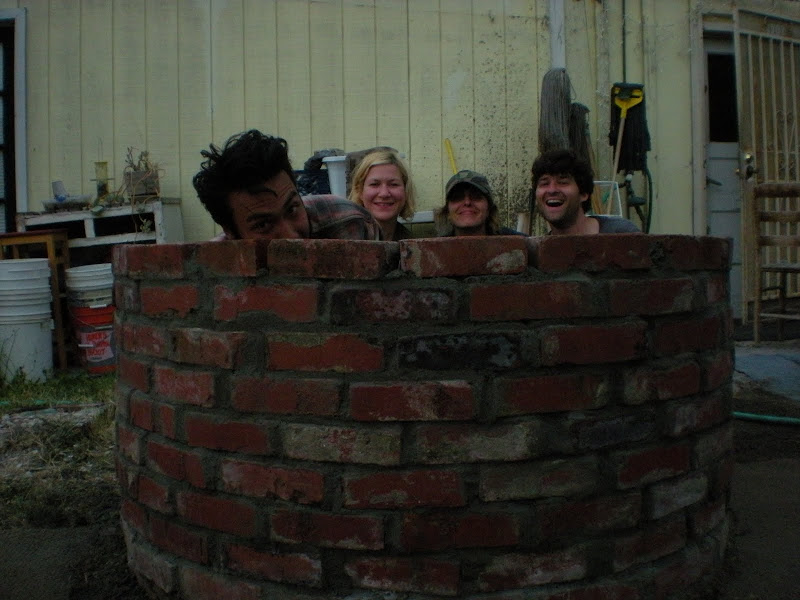
We found the most level area in this beautifully large adult playground of a back yard, luckily it just so happened to be near the building so that shuffling pizzas from inside to outside won't be a long haul. We dug up the earth with some heavy maddocks and other big heavy pieces of metal attached to long sticks. Made a nice trench, roughly 2 inches wider than a brick, filled said trench with 2-3 inches of moist drain rock, and proceeded to tamp the heck out of the trench with our homemade tampers (chunks of 4x4).


Here we are holding tools and pretending to work.

It was fairly ambitious. We started the day thinking that the 4 of us were going to build 10-11 courses of brick in one day. We ended up only laying 3 courses that afternoon. Oh well, good thing no one is expecting this to be done anytime soon. This is also a good time to mention that only 1 of us has any experience whatsoever with laying brick. I Love learning useful stuff. We really did want to use earth mortar for this portion, but we didn't have access to any clay/sand yet, so we just went with your standard HD mortar.

Here is a layout of the first few courses of brick, with the rough intention of the final hearth brick layout. The final interior diameter is something like 50 inches. I hesitate to use the word diameter because our circle never started out circular. whoops.

Our method of 'leveling' each course. We got to the point where we felt that it was OK if the bubble wasn't between the lines as much as we wanted it to be. It's still going to hold weight even if it's not level, right?

Now we are getting somewhere!

Chugga Chugga! Here comes the Cob train! This is the day that we finally dreamed about. We spent many a weekends on building the darn base for this sucker, and now we get to actually play with mud!! YAY!

OK, time to take a step back and explain, so that I can get some feedback. Inside the 'tunnel' we threw in some urbanite, funky bricks, love letters from high school, bad childhood photos, and a bunch of wet dirt. We tamped the heck out of this mixture until we thought it was compacted enough. Again using the 4x4's and this time we had a huge breaker bar for some nice bicep workouts. After we got to our planned height, we stopped and threw down a 2.5 inch layer of concrete with some chicken wire in the middle. Once the concrete dried, we threw down a 1/2 layer of sand, and then put down all of the 'soft brick' that we had. Honestly, I am not sure how the insulating properties compare to a perlite/clay/bottle mixture, but these softbricks were free and fun to work with, so we figured we would give them a shot! Hopefully they will be a good insulating layer...

And so we are finally here! the SAND FORM ! We piled a bunch of bricks in the middle of the pile so we didn't have to use a lot of sand. You can't see it, but there is a 16" high stick at the max height of the oven mold. We then compressed the sand all around, pretending we were 12 years old again playing on a warm sandy beach, without a care in the world.
And here is where I leave you until the next update.
Feel free to let us know if we have FUBAR'ed this project by doing something absolutely backwards, or if you think we are still good to lay on the actual oven layer (which we have actually done already, but I can only post so much in one post

)


 )
)


 I think that this also might have something to do with our cracking (if we had more silt than clay?)


