• Post Reply Bookmark Topic Watch Topic
  • New Topic
permaculture forums growies critters building homesteading energy monies kitchen purity ungarbage community wilderness fiber arts art permaculture artisans regional education skip experiences global resources cider press projects digital market permies.com pie forums private forums all forums
this forum made possible by our volunteer staff, including ...
master stewards:
  • Nancy Reading
  • Carla Burke
  • r ranson
  • John F Dean
  • paul wheaton
  • Pearl Sutton
stewards:
  • Jay Angler
  • Liv Smith
  • Leigh Tate
master gardeners:
  • Christopher Weeks
  • Timothy Norton
gardeners:
  • thomas rubino
  • Jeremy VanGelder
  • Maieshe Ljin

Utilising exhaust of rocket oven for dehyderating fruits and vegetables

 
Posts: 9
  • Likes 6
  • Mark post as helpful
  • send pies
    Number of slices to send:
    Optional 'thank-you' note:
  • Quote
  • Report post to moderator
Hi all,

I am Kiran Patil from India. I have been reading this topic for three four weeks now and got very valuable inputs. I decided to join this community as I found very cool discussions here.

Let me introduce myself first - I am a 43 yr who took early retirement from an automotive sector corporate job and now following my interest in food, farm and everything related to it as a lifestyle, and as a business too.

I belong to a farming family and we have a small farm in western India. We are planning to expand our farming business into a small food processing unit. I'm designing a rocket oven ( black type)  to produces smoked vegetable purees on my farm. We are planning to use farm waste biomass as a fuel to produce some smoking hot tomatoes and pumkin purees.

While we are at purees, I  was wondering if the exhaust of the rocket oven can be used for another product line of dehyderated smoked paprika, tomatoes etc.

Had anyone from the community tried to do this?
Is there any precedence to follow ?

( I'll post the progress of my project as I start building the rocket oven. And I'll be happy to share my experience and inputs as I gather them )

Thank you
 
Rocket Scientist
Posts: 1809
Location: Kaslo, BC
525
building solar woodworking rocket stoves wood heat greening the desert
  • Likes 5
  • Mark post as helpful
  • send pies
    Number of slices to send:
    Optional 'thank-you' note:
  • Quote
  • Report post to moderator
Welcome to Permies Kiran,
Although I have not used my RMH to dehydrate vegetables I highly suspect that it would not work out very well for you.  The exhaust contains a lot of moisture which of course will not help you at all in achieving dehydrated foods.
A much better place to capture the heat would be on top of the barrel or somewhere along the heat extraction portion which will give a much more gentle and prolonged heat.
 
Kiran Patil
Posts: 9
  • Likes 5
  • Mark post as helpful
  • send pies
    Number of slices to send:
    Optional 'thank-you' note:
  • Quote
  • Report post to moderator
Thank you Garry,

Yes , I agree . While roasting tomatoes and pumpkin, a lot of moisture will get into the exhaust as you rightly pointed out. I think  I'll divide the project into two parts - 1. building a rocket oven for the puree product line. 2. Trials for dehyderation through exhaust - 2 find a way to transfer the recidual heat to another set up for dehyderation in some way. . Let's see if more inputs come so that the collective brainpower finds ways towards solution.

Regards
Kiran
 
gardener
Posts: 2514
Location: Ladakh, Indian Himalayas at 10,500 feet, zone 5
838
trees food preservation solar greening the desert
  • Likes 2
  • Mark post as helpful
  • send pies
    Number of slices to send:
    Optional 'thank-you' note:
  • Quote
  • Report post to moderator
Hi Kiran,
Nice to see a new member from my part of the world!

Combustion produces water as part of the process (hydrocarbon + O2 => H2O + CO2 ... with different proportions and additional products, depending on the fuel). So the exhaust from a rocket or other stove is not a good way to dehydrate things.

Where in "western India" are you? Much of that region has a very dry climate for most of the year, so if you can time your harvests to be in the dry seasons, you can probably dry everything very efficiently using the dry ambient air. For dehydrating food, the important thing is circulating relatively dry air air through it. Heating air reduces the relative humidity, but that's not necessary for most of your year (if you're in GJ or RJ). Exhaust is very humid, and is not a good substitute for heating ambient damp air.

That all said, I know that smoking has been a traditional way to preserve things like fish and sausages in northern climates. Those items are often not extremely dry. I don't know how smoking works to preserve stuff. Smoking might work in other ways, not dehydration, since smoke is so wet. I don't know.
 
gardener
Posts: 1236
360
7
trees wofati rocket stoves
  • Likes 6
  • Mark post as helpful
  • send pies
    Number of slices to send:
    Optional 'thank-you' note:
  • Quote
  • Report post to moderator
Welcome Kiran! This year at Wheaton Labs, one of the newer projects was a rocket-assisted food dehydrator. A rocket mass heater was built, and all around the metal exhaust pipe stone was stacked in an enclosed space, and the stone that would get sun exposure was also painted black. This was all under a glass enclosure, so even if the heater wasn't fired those rocks would get plenty hot and cause a natural draft, pulling air over it all as it rose to the top, where it would then draft down through multiple screens where your food would sit, and finally back up and out the very top. The exhaust from the RMH heater itself was not part of this, so no gasses or wood moisture was hitting the food. But if you have a heated mass that then heats an external air flow, that should work. I'm not sure if any tests have been done yet in the last few months after it was built. My search skills are terrible at the moment, otherwise I would link to a post or picture of it.
 
pollinator
Posts: 5347
Location: Bendigo , Australia
477
plumbing earthworks bee building homestead greening the desert
  • Mark post as helpful
  • send pies
    Number of slices to send:
    Optional 'thank-you' note:
  • Quote
  • Report post to moderator
Interesting
 
Kiran Patil
Posts: 9
  • Likes 3
  • Mark post as helpful
  • send pies
    Number of slices to send:
    Optional 'thank-you' note:
  • Quote
  • Report post to moderator
Thanks Rebecca.

I'm from Maharashtra, and it really is bright, sunny and dry most of the year here. Yes, the drying under the sun is very much a practice here. I was just thinking of speeding up the things using the residual heat from one process for another process. It's a thinking to take evry bit of useful heat out of burning the biomass.

So , dehydration is certainly not the process to use the residual heat. As of now, i am unable to find a way to put it to use. But I'll obviously keep reading and exploring .

Thanks all for responding
 
pioneer
Posts: 337
34
chicken wood heat rocket stoves
  • Likes 4
  • Mark post as helpful
  • send pies
    Number of slices to send:
    Optional 'thank-you' note:
  • Quote
  • Report post to moderator
I think if you were to run your exhaust flue through a space in which you have dehydrating racks it would provide enough heat to encourage convection and a draft in the dehydration enclosure itself.  If you built the system so that it could take advantage of sunlight during the day, and the waste heat from your stove pipe at night, then you would be getting much more dehydration time per day than a sunlight only system.  As you have already been warned, you don't want the flue gasses contaminating the dehydration space or living quarters.
 
master pollinator
Posts: 4954
Location: Due to winter mortality, I stubbornly state, zone 7a Tennessee
2118
6
forest garden foraging books food preservation cooking fiber arts bee medical herbs
  • Likes 5
  • Mark post as helpful
  • send pies
    Number of slices to send:
    Optional 'thank-you' note:
  • Quote
  • Report post to moderator
The Winiarski wood fired agricultural food dryer may be what you are looking for. There is a copy of his PDF here. Diagrams and pictures are included.

He put a metal box with racks 1 inch above the heated bench, so the heat rising from it heats up the box. The vapor from the RMH does not enter the metal box. There is a connection to the chimney for the hot air to escpe through. Maybe this is not needed?

To learn about the inovator, Winiarski's webpage is here.
 
Joylynn Hardesty
master pollinator
Posts: 4954
Location: Due to winter mortality, I stubbornly state, zone 7a Tennessee
2118
6
forest garden foraging books food preservation cooking fiber arts bee medical herbs
  • Likes 1
  • Mark post as helpful
  • send pies
    Number of slices to send:
    Optional 'thank-you' note:
  • Quote
  • Report post to moderator
Here, a person just hung a multi layer mesh thingy near a rmh. What took a wood stove 3 days, to dry, the rmh did in 6 hours.
 
Kiran Patil
Posts: 9
  • Likes 1
  • Mark post as helpful
  • send pies
    Number of slices to send:
    Optional 'thank-you' note:
  • Quote
  • Report post to moderator
Hi folks.

I have started the construction of our food processing unit. Today we constructed the masonary J tube that will feed into a barrel oven on the top of it.

I used insulating fire brics for the burn chamber and heat riser. I have used hard fire bricks for the feed tube- so that the feeding of fuel doesn't wear out the bricks. The dimensions of the chambers throughout are 160 mm X 160 mm . So, the cross section area of the J tube is close to 40 sq inches.

Tomorrow I'm going to test fire it to see if the height of the heat riser is creating sufficient pull. I feel it will not require much change, but if the draft is found insufficient, I'll add one layer of bricks at the riser for increasing the height.

Keeping fingers crossed.
IMG_20220204_135913.jpg
Masonary J tube
Masonary J tube
 
Gerry Parent
Rocket Scientist
Posts: 1809
Location: Kaslo, BC
525
building solar woodworking rocket stoves wood heat greening the desert
  • Likes 1
  • Mark post as helpful
  • send pies
    Number of slices to send:
    Optional 'thank-you' note:
  • Quote
  • Report post to moderator
Hi Kiran,
From your picture, it looks like your heat riser is short. Minimum height should be at least 3x the height of the feed tube, preferably closer to 4x.
Also, with no downdraft or mass to add to the slowing of the exhaust gases, an open test is not going to be
super accurate -  only enough to show you that it works and to have a bit of fun experimenting with before going any further.
 
Kiran Patil
Posts: 9
  • Mark post as helpful
  • send pies
    Number of slices to send:
    Optional 'thank-you' note:
  • Quote
  • Report post to moderator
Hi Garry,

You are right. The test itself revealed that the heat riser isn't tall enough. I'm adding three layers of bricks to 4x height of the riser.

Do you reckon going slightly more than 4x will give better draft?
 
Gerry Parent
Rocket Scientist
Posts: 1809
Location: Kaslo, BC
525
building solar woodworking rocket stoves wood heat greening the desert
  • Likes 2
  • Mark post as helpful
  • send pies
    Number of slices to send:
    Optional 'thank-you' note:
  • Quote
  • Report post to moderator
From my experience of heightening the heat riser beyond roughly 4x the height of the feed tube, there wasn’t any noticeable or significant improvement.  At the time of experimentation, I had a 6 inch batch box with a double barrel surrounding the heat riser so there was lots of space to play with riser heights.
 
Kiran Patil
Posts: 9
  • Likes 1
  • Mark post as helpful
  • send pies
    Number of slices to send:
    Optional 'thank-you' note:
  • Quote
  • Report post to moderator
So,

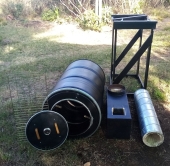
Finally the Rocket oven is installed.

These are the features-

1. Most part of he J tube is constructed in insulating fire bricks .

2.Ends of the J tube are layered using high density fire bricks. Morter for layering the bricks is 2:1:1 mix of sand, fire clay and Portland cement.

3. The oven is a black type rocket oven. We used two barrels. A clean and fresh barrel for inner part and a scrap barrel for the outer layer. Heat riser enters about four inches into the inner barrel.

4. Glasswool insulation is used between the two barrels.

Still some work is pending -

1. Installation of flu
2. Layering the inner barrel with about an inch of refractory castable
3. Layering of hearth - I accessed some used fire bricks for hearth.

We fired it up for about ten minutes . It started to roar within first 30 seconds.

Observations are -

1. A few small cracks develped around the feed tube, but none along the fire chamber or heat riser. The feed tube is made from high density fire bricks

2. I think the draft is sucking excess air, not sure though. Will it limit the attainable temperature in the fire chamber? The ten minutes test burn gave a little smoke in between feeding.


Any suggestions for further development and any issues comments with the structure as it stands are welcome. .
IMG-20220216-WA0011.jpg
Inner drum of rocket oven
 
Kiran Patil
Posts: 9
  • Likes 1
  • Mark post as helpful
  • send pies
    Number of slices to send:
    Optional 'thank-you' note:
  • Quote
  • Report post to moderator
Missed to attach this picture in my previous post.
IMG-20220216-WA0016.jpg
Rocket oven
Rocket oven
 
I agree. Here's the link: http://stoves2.com
reply
    Bookmark Topic Watch Topic
  • New Topic