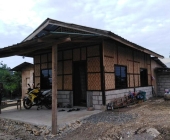
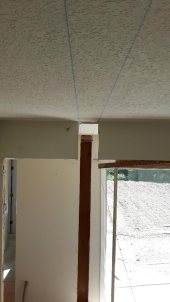
This house is being relocated, since it's present location is having a new house built there. It's kind of nuts but that's what happens near the ocean in Victoria. It's a really good house, which I have enjoyed staying in, for the last 2 weeks. I may be the most comfortable homeless man in Canada. I've lived in five nice houses in the last 2 months.
The maximum height for this move is 19 ft, which includes the house and about 4 feet of trailer. I had to cut a large rectangular section of roof at exactly the height of the shorter roof at the front of the house.
.......
This house had a generous amount of blown fiberglass and some batt insulation, covering the entire work area. I used my cordless
Ego blower, to move all of the loose insulation to the attic of the front portion and to an area around the perimeter about 4 feet wide. After the center was totally clean, I removed all of the
bats and used them to cover the loose fiberglass. I'm near the ocean. It was very important to not have the wind send insulation around this upscale neighborhood. It was a horrible job. I shaved really well and wore my asbestos mask. I also wore my shittiest shirt, which I threw out afterwards. A good quality cordless blower is the number one tool I see missing from the arsenal of most renovation people. It's because they don't know they need one.
Whenever there's fiberglass insulation, there going to be a little bit of it blowing around all the time. I wore my asbestos mask at all times when in the attic. This kept my lungs safe and prevented sunburn. On most renovations, you will see people destroying their health because dust masks are uncomfortable or for some other reason. I recently did a job in a mall, where I was drilling holes in the
concrete ceiling to hang lighting. Of the 20 or so people working there, I am the only one who took any steps to protect my lungs from concrete dust, drywall dust and welding dust that permeated every portion of the job site.
........
When a roof needs to be cut, you can't just lop it off. All of the original framing must be supported and reinforced, before the framework is cut. This house had quite a bit of sag, from years of bearing its own weight, without any pony walls.
We've been having a heatwave, so an important factor for me was to be able to do much of this job in the shade. After determining my cut line, I stripped off a good portion of the sheeting which included all of the sheeting directly above the cut. I left a good portion of the upper sheeting and a really large area on the west surface of the roof. I was able to do probably 80% of this in the shade. I always wear sunscreen and a broad brim hat in the bright sun. And I always work with a wet long sleeve shirt, in hot conditions. I probably averaged 6 shirt changes per day. I keep them in a plastic bag.
.....
The next job and the largest, was to build a support wall all the way around the perimeter of the cut. A four-foot-tall wall was perfect. I first put the top plate at an exact distance back from the cut. Then, the bottom plate which rests on the ceiling was placed using a level. Then the uprights are put in one at a time, with consideration to straightening the roof lines as the wall is filled in. I sometimes used a prop with a long pry bar under it. I press down until the proper height is reached and then hold it in position with my foot, while installing a temporary post. This was done probably 12 times while going around the perimeter.
After the pony wall was built, I was able to start installing the new flat roof rafters. They were slid into position and screwed to the original Rafters, at just the right height so that the finished sheeting would be at the correct height.
After all rafters were in, it was time to cut away the original roof, above the line of the rafters. First, all sheathing was carefully removed and any pieces of framing that did not require cutting, were pried off. Then it was time to make the cuts. I used my cordless Milwaukee Sawzall, to slice through the old fir. On really long pieces, I chopped some length off first, so that I wouldn't have the weight of the material pinching my blade. I used a good quality Milwaukee demolition blade. The entire process was accomplished with one blade that is still good. I used up 25% of the power in one 9 amp hour battery.
Then came the sheathing. There's no such thing as laying things out to match 8 foot sheets. The distance between rafters is determined by the old ones. This ranged from 20 inches to 26 inches apart. After all sheathing was in place, I went under and attached 2x4 battens to cover all joints.Long thin screws were used for this. One screw at each end, just
enough to hold it in position. Then I went to the top surface of the roof and used 2 inch screws to screw the sheathing down to the battens. Six screws in each one. One at each end and one in the center on each side of the crack between the separate sheets. The long screws protruded through the sheathing. They were broken off with a quick smack of the hammer. Only a couple broke with a little point showing, that had to be hammered down. Now there is a perfectly smooth surface for the torch on roof.
The job is done. A couple hours from now a roofer will come and put a torch on roof.
Some of this hard work will be removed shortly after the house reaches its new location. The roof will be reconfigured. But, the 4 foot pony wall will stay in place. There has been talk of going up one story from that spot. It's quite strong and it has really straightened out the lines of the roof. I think it would make a perfect place for a kid's room, or just a big room for an office. It's 13 ft by 18 ft.
That's about it's for this house. I'm also cutting the stucco and I ripped out the basement apartment, in order to get the house lifted. All of the to 2x4 used on this
project, were salvaged from the basement. There are still probably 80 sticks of 2x4 that I will place inside the house, so that they are available for concrete forming or whatever, at the new location.

 3
3


 2
2


 1
1


