Kenneth Elwell

pollinator
+ Follow
since Jan 01, 2018
Merit badge: bb list bbv list
Biography
Artist/Designer, Maker.
Metalworker, Blacksmith, Machinist, Welder, Woodworker, Builder, Farmer, Composter,
Pie Aficionado.
For More
Boston, Massachusetts
Apples and Likes
Apples
Total received
In last 30 days
0
Forums and Threads

Recent posts by Kenneth Elwell

I am hard on my clothes. My daily wear clothes, they get... worn. stained. torn. burned. My "good clothes" are that way by being rarely worn, and washed even less... worn for an evening, then hung back in the closet.

This past year, no way for 5! replacing/filling gaps in the wardrobe for winter and foul weather gear, other worn-out stuff I've been wearing despite the holes...

I am very pleased by my latest shoe purchase, two pairs of boots at about half-price, from the factory returns (worn and returned, but still good, resold at a discount). Since the very first thing that I'm going to do is scuff up a new pair of boots, why am I worried about a scuff before I get it? They're work wear, not dress shoes!

I have a mountain of mending to do, which would spare my better clothes from farm chores and lengthen their life. I also have to figure out why I have the same failure of a split crotch on many pants. I suspect that it's a fit issue, crotch too low? Or maybe waistband not high enough? due to "circumstances" (read "circumferences" lol) An earlier comment about adding gussets, is one I might try while mending some pants. In a fantasy world, I would make my own work pants, tailored to fit me, with features that I find most useful, rather than what is available for sale.
3 weeks ago
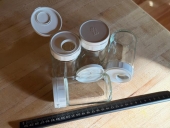
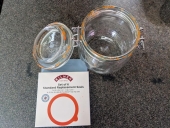
Isopropyl alcohol might work, and not as objectionable as WD-40 or acetone (already mentioned) or naphtha - which works really well on rubber/rubber adhesives...
or
Ethyl alcohol (the edible/potable kind of alcohol) might also work, if a high-proof vodka or straight 190 proof "everclear" was used.

Edible oils might dissolve the residue, or will at least prevent loosened bits from re-adhering to the jar or your scraper tool. Orange/citrus oil always amazes me by how effective it is.

Something else sticky such as duct tape, packing tape, etc... might grab the residue more than it is held to the jar? Stick, peel, repeat... This often works when peeling a label leaves a residue, the label can be used to grab the residue, or a separate piece of tape does the trick. For this to work, I think you do have to try this before any of the "oily" methods.

I understand and respect the sensitivity/objection to using non-edible solvents, and I am certain that there are solutions mentioned here that are safe alternatives, in addition to using mechanical methods. I also believe that soaps and detergents can fully remove any residue (edible or not) from a non-porous surface such as glass or metal. I might wash twice, or use an intermediate solvent or degreaser, then wash.

3 weeks ago

Ben Brownell wrote:I think the "pipeline" factor is important for keeping the process running smoothly at scale. By that I mean, having biochar production as one important step in a sensible operation/maintenance regime for your site. Making the stuff as an end goal in itself is marginal or unsustainable, but if it fits well in a sequence of other productive, function-stacking tasks, then it really is easy to establish a system and routine and make and use a lot of the stuff. For me, the pipeline is brush clearing / fuel reduction on a large neglected and overgrown property which leads to lots of light weight soil improving fill material and amendment I can incorporate in a variety of more fine tuned landscaping and nutrient cycling endeavors. It helps that my feed stock requires no pre-processing and burns quickly to a nice output in open pits, but it's an adaptable process and not hard to streamline when you have the incentive of an essential workflow serving several purposes consistently.


^^^This^^^ and the time factor... and some procrastination.
I really like the concept of seeing systems, where nothing stands alone, but fits in to solve a problem and/or serve a need, and doesn't produce "waste", only "inputs" to another element of the system. Capturing/using the heat from biochar making for space heating or some other purpose. Using lumpy charcoal for cooking or heating/forging (rather than needing to crush it) and sifting out the small bits of biochar for soil amendments.
My struggle is managing my time, and building the system and its components, so that I can operate on-time/in-season with available inputs and required outputs. Maybe this year...
3 weeks ago

John Suavecito wrote:I've had the fire department sicced on me a couple of times.  I burn in the cement driveway with a chimney.  They were annoyed that someone called, because they considered it a waste of time.  No danger whatsoever. People can have barbecues.  This is a suburban area.  I guess it depends on where you live.

John S
PDX OR


In the town where I grew up, there were restrictions on "open burning" limited to late winter - early spring, and a required call to the fire department both to get the okay due to conditions, and granting of a permit and being told the rules (hours, safety, etc.). The town where I live now, open burning is not allowed at all. So, any burning would need to be in some sort of "appliance": fire pit, cooker - grill/oven/smoker, or something else contained... probably... like a kiln or retort. So, that limits the pit or trench methods in both time and place. The kiln or retort ( or just plain fire pit) would have to be used practically speaking.

I have had the F.D. called by a neighbor on many occasions. On days when it was allowed, and we had called in for permission, and they respond to the call because that's what they do. They are compelled to, there's never a second call of "no, really it IS a fire this time! I swear it!"
They checked our preparedness (charged hose nearby) what we were burning (told to not burn too many scraps of plywood all at once... we had a small pile that we were adding to the brush.) and they even complimented us on a nice setup (a steel ring raised on bricks for airflow).
3 weeks ago

Josh Hoffman wrote:

K Kaba wrote:There's a lot of marketing involved with art and craft supplies, and it's easy to get caught up wanting the newest shiny thing. I don't do no-buy generally. I tend to leave "shiny" things on my list for about three months. If I still want it after that, it comes home with me. I think the last shiny I got was the kuretake granulating watercolors. They took a couple months to restock after I first wanted them, and I was still delighted to play with them when I finally could get them.

I try to hit my stash first for anything I need, and I am a-ok with restocking (glues, papers, sealants, etc) and replacing used up tools like brushes.  Supplies for classes come from the stash first, and then the education line in the budget. Thrift and estate sale stuff I treat a lot like cooking supplies or clothes, if I know I'll use it and it's at a good price it comes home with me unless the stash has plenty of it already.


I like the 3 month policy. I have a 30 day list. Everything we need to purchase goes on that list minus the things we need recurringly like food we can't grow or butcher and items needed for repairs.

Enthusiasm dies down quick in 30 days. I bet 90 days would be a better list time period.


A lot of both of these comments makes sense. I think the "cooling off period" is applicable in so many ways, allowing time to think, reflect, get more information/experience/advice from experts or friends. Rather than spending impulsively from savings, playing a mind-game of "earning the money" to make the chosen purchase, a personal lay-away plan, could confirm your intent.

I've been away from one of my main hobbies for quite some time, but have continued to collect free/salvaged materials to use for it. So, I find myself with a slightly different flavor of a "No-Buy" challenge. In some ways, it is exactly the same... use what I have on hand first. In other ways it is different... it IS already no-buy! (except for electricity, fuel, and consumables needed to create) Except that free stuff isn't totally free, when it overwhelms the space and time available. There are some things, such as metal bars and pipes which are universally useful, but other things that catch my eye and imagination "this could be a..." or "if I had one more of this, I could make a..." or "here's 1/3 of what I need to build that thing I was talking about, now I need to find the rest!" have caused me lots of problems. Space that could be a workshop is so full of "free materials", that it is all unusable. I am starting to tackle sorting through, keeping only what I still think is useful/worth doing something with.

A long time ago, a good friend tried helped me with this same problem, and he had me label with that day's date and what I planned to do with a thing. Which in concept is a way of measuring my progress/lack thereof? assigning a sort of "arrival date" to the stuff, and possibly inferring a time limit to keeping it? These older ideas/projects/materials are entangled in nostalgia, good intentions, self-identity, sunk cost, and so on...
I could really use a self-accountability-"No-Keep" strategy for new stuff, with possibly a 30 day cooling-off period, to let the enthusiasm for an idea, and the dopamine from the discovery/acquisition fade. Revisit the idea/thing and decide whether or not to "own" the thing, or let it go.

1 month ago
That smith in the YouTube link I shared has a video or two about the size of charcoals. The raw charcoal he makes is limbs, sticks, lumber off-cuts, and not particularly usable as it comes from the retort/kiln. He goes though a process of chopping with a small cleaver to break down these larger pieces into smaller ones. The aim is to make as much of the "large size" chunks as possible, however poor aim, fractures, luck... will create smaller pieces, and even more smaller bits. He uses some screens to classify (four?) different sizes, which seem to each have a purpose in the Japanese forge tradition, so not a lot is wasted.
I would guess that used for agriculture, one would have even more use for the small bits than at the forge, and rather than going directly to crushing everything for soil amendments, screening out the forge sized chunks would be an easy first step.
1 month ago
In addition to the health effects of high sodium and/or MSG, some ramen noodles contain TBHQ (an anti-oxidative stabilizer added to the oil component of the food), which is one of those chemicals that are banned in some places due to carcinogenic concerns... Here in the USA, there's FDA guidelines about RDA which looks a lot like research and math homework to do, or you could just read a label and avoid it, or don't subsist on 3 meals a day of ramen (or Cheez-its, Pringles, etc.) for months at a time.

I like my ramen with an added carrot, rib of celery, half an onion, with 150-200% of the suggested water. Boil 3 minutes with veg only, turn down heat or OFF, then add ramen and spice packet for 3 minutes. In serving bowl (large enough!) I add 1/4 cup peanut butter and draw two circles around that with sriracha, and a couple grinds of black pepper. I add about 1 cup of the broth to the bowl and whisk to dissolve the peanut butter and sriracha, before adding the rest. Additions of corn kernels, green peas, broccoli, kimchi, chicken, parsley, Bell's Seasoning (a poultry/stuffing blend) also happen occasionally.

A hack from my college days which I do now and then, is to add the cooked ramen noodles to a can of soup. (drain the noodles, or not, depending if condensed soup, or ready to serve, or personal preference) The boiling hot noodles and the room temperature soup meet somewhere north of lukewarm which is perfect for eating in a hurry.
1 month ago
Douglas, surely you could. Whether it is practical or profitable would depend on how you were to go about it. As a curiosity-quenching exercise, and possibly an in-kind trade for your neighbor's work, it would probably be a memorable experience for you both! You couldn't put a price on that.

But, if you did want to put a price on it, then start by comparing your labor and materials to merely buying a bag of lump charcoal... you'd likely need to find a way to get multiple returns along the way for it to be "economical".  
If you needed to clear out some wood anyways, that's one, (maybe two, if you did it for hire).
You need to heat your home/shop/barn/greenhouse, so that's one (if you have a way to utilize the heat while making the charcoal).
If you have a need for by-products like syngas, wood vinegar, and wood tar, that's maybe one or two more... (run a generator, or "drive on wood" with a gasifier in your truck)
Maybe there's a way to combine making charcoal and smoking meats?

Some of the small scale retorts (inside of a regular wood stove) would be simplest to do, with little extra equipment or cost, and multi-tasking/function-stacking during the heating season.
Larger retorts, kilns, gasifiers, would all involve significant cost and effort, but would be more efficient or benefit you in others ways as well.

Crossed Heart Forge - YouTube , based in Vancouver, Canada, has many wonderful videos about making and using charcoal for forging museum-quality blades in the Japanese tradition.
1 month ago

Anne Miller wrote:Why use/make this if it:

have clinkers, hot spots and cold spots, which ruin these delicate blades.


Confusing to me.


This comment is about metallurgical coal (a selected grade of fossil coal) and pet-coke (a type of coke made from by-products of oil & gas refining).
And, is the reason why the neighbor/bladesmith uses wood charcoal instead. Wood charcoal doesn't contain sulfur, which is undesirable in steel, nor the many other contaminants present in fossil coal which create clinker and ash which make it difficult to maintain a clean, even fire for forging.
1 month ago

Daniel Schmidt wrote:I've recovered a few hundred cells for my ebikes with good success. A lot of times the BMS shuts off for various reasons. It depends on what happened. If one of the safety features turn it off like a short circuit, or the whole pack starts to fall just below the voltage threshold, then it can usually be jump started like mentioned. It can be the same when you install a new BMS, if it doesn't work, a quick tap of the correct voltage range to the input will turn it on.  

Another thing that happens if a pack is left for many months or more, the battery management circuit very slowly draws power from only one of the parallel cell(s), because it would be too inefficient/costly/heavier to draw from the whole pack and use a larger buck converter to power itself. So you end up with one of the parallel cell(s) much more drained to the point the BMS shuts off. These are the packs that would be dangerous to just throw at the charger. If one cell is too low, the difference will be added to the other cells which over volts them! That's the dangerous part.

Some tool BMS's don't balance the cells with the BMS. Some only do it on the charger like RC cars. Some only balance near the end of charging called 'top balancing', and often this ends up with it trying to burn off a few mA per cell on the higher ones so the low one can catch up. If a battery sat really long or has a dead cell then it may never correct itself and needs those cells charged separately or replaced.

I noticed some of the USB-PD and other car chargers take 12V and 24V input, often having higher output at the higher voltage. I hooked one up to a couple different batteries advertised as 18V-20V and it was able to charge my Chromebook in use for hours which takes 15V.


At least one of my packs to be repaired has just one low cell. Is it possible to charge that one drained cell while it is welded in place in the pack, or does it need to be removed to charge it? Is the cell powering the BMS easy to identify by extra wiring or by it's location in the circuit?
2 months ago