Kevin Olson

gardener
+ Follow
since Sep 29, 2020
Merit badge: bb list bbv list
Forum Moderator
Kevin Olson currently moderates these forums:
For More
The Old Northwest, South of Superior
Apples and Likes
Apples
Total received
In last 30 days
13
Forums and Threads

Recent posts by Kevin Olson

It also looks like one model of Simple Pump's solar/hand combo systems (with their proprietary inline dual-pump valve) can be installed in casings as small as 3".  The Bison specs look like they need a 5" casing to install their hand pump beside an electric pump (but an existing or third party electric pump can be used, in that case).  The smaller required bore hole diameter for the Simple Pump dual pump system might be particularly relevant for people who are drilling with low power or hand percussion methods in remote places, or for a retrofit to an old well.

Somewhere, I have the International Rice Research Institute's plans for constructing a portable percussion drill rig, based on a two-wheeled walking tractor (a homemade BCS, more or less).  Somewhere...
1 week ago
I have no experience with them, but Bison makes hand pumps which can be installed in the same casing as the electric deep well pump (at least under suitable circumstances).
https://www.bisonpumps.com/products/standard-deep-well-pump-system/

The HydroMission SlapShot deep well pump can be DIY'd from hardware store plumbing parts with minimal machine tool work:
http://www.clean-water-for-laymen.com/well-hand-pump.html
I am very doubtful of the quoted parts price of $45 (US) - that must be quite old.  Perhaps something more like twice that figure is more realistic at today's prices.  You'd still need to add in the cost of the sucker rod (1/2" nominal PVC pipe) to reach the desired depth and an actuator (e.g. a pump handle or treadle) of some sort.

I don't think either of the foregoing actually answer your questions, however.  But, they probably pretty well cover the full spectrum as regards cost.
1 week ago

Douglas Alpenstock wrote:We also went with the more expensive unit that can operate without grid electricity; since our natural gas grid is largely independent of the electrical grid, it made sense.


Which make/model did you choose?  I am cogitating on various backup heat systems options.  In the interest of maintaining both domestic tranquility and my peace of mind, a non-electric gas fireplace may be an easier sell at the present moment than installing the very nice lightly used soapstone wood stove which I already own and have been preparing to install.  However, in the event, SWMBO is currently affecting aversion to any possibility of: smoke; dirt; or ash.  But, I still want backup heat (and will keeping working on introducing a solid fuel heat source); a non-electric gas fireplace would be halfway there, though the ultimate goal is to have at least one heat source which can be fed our locally common version of solar energy (cord wood).  I could keep that supplied as long as I am hale enough to use a buck saw.  She has allowed that if it lives in the basement, she might countenance its presence; it would be quite an engineering project to get the heat up to where it's needed, though not impossible.  In any case, that sort of project wouldn't be happening this heating season, and I'm chary to pass another heating season as things have been.

I nearly bought a vintage gas fireplace insert a year or so ago (open the valve and light the burner with a match - nothing could be simpler), which used a bunch of little ceramic inserts which were heated by the gas flame to the point of incandescence to radiate heat.  But, the sheet metal back was pretty rusted out and raggedy, I would have needed to replace a bunch of the ceramic tile inserts (though I did find a source, and they weren't outrageously priced), it was quite unlikely to be code compliant or insurable, and - worst of all - the antique store owner was awfully proud of it, as reflected in the stratospheric asking price.  I looked at it three times, but just couldn't pull the trigger, given its state of deferred maintenance and general decrepitude.  It may still be sitting there, for all I know, since I haven't been back in the store since the run up to Christmas last year.  A buddy of mine just got a good off-brand iron bodied user grade moving fillister plane - cracked body, very functionally mended, though in keeping with a rather brutalist aesthetic - from that antique store; I guess handsome is as handsome does, as regards the plane and its mending job, though he did pay a bit more than I would have done.  In the past, I have scored a couple of socket framing chisels, also very user grade, from him, and at prices commensurate with the condition, so he's not always a robber baron.

Anyway, maybe I should take a swing through that shop again, to see if the gas fireplace is still languishing in the dim recesses.  But, if it's already found a new home, other options would be gladly entertained.  Whatever you installed might be a good place to start.

1 week ago
I did find an orphaned whisk for a Hobart 40 quart mixer pretty reasonably priced.  Shipping was about the same as the nominal price.  I have a hex shaft from a broken (cast) mixer paddle - since replaced with a cold formed and welded model - to which I can probably fit an adapter to drive the whisk.  However, I don't know if I will have a chance to mess with it in the next few weeks.  There are still a lot of "end of season" tasks in the queue!
1 week ago

M Pearson wrote:Having tried Ben's method, and by the results in his own video, i would classify it as "does not work as advertised." I didn't even see 2x expansion, whereas all the other guys like Honey Do Carpenter are getting 6x or more. Even in his own video at the end, when he tests making the cinder block, he barely gets 2x and writes it off due to other factors.

I wouldn't call it aircrete at <2x expansion, just "weak cement."


It's good to hear your independent experience on this.

I may try to track down a used floor mixer whisk.  I have a sneaking hunch that would be better at entraining air than a mud paddle or paint mixer; generally the latter are used for purposes for which entrained air is unhelpful - sheet rock mud, paint, etc.  Whereas a whisk is used for frothing cream, making meringue, and so on - in other words, a lot of entrained air.  I really doubt that a whisk would make as good of a foam as a proper foam generator, but if it could get someone 80% of the way there, that could still be useful.  Domegaia uses a paint mixer, but only to fold the foam and cement together, not to create the foam (but they don't seem to use a separate stabilizer such as xanthan gum or J-Lube).

Also, didn't Darwin (Honey Do Carpenter) mix up his foam, then add the dry Portland powder to it?  Ben added the detergent/xanthan gum mixture and cement powder together, then tried to froth/mix it up.  It might be worth trying Ben's recipe, but Darwin's procedure.

Where's Julia Child when you need her?
1 week ago

Mart Hale wrote:
I have already built a foam generator.....     so I don't see the great advantage of using the  xanthum gum   instead of building the foam generator...   Yes you don't have to generate the foam, but on the other hand you are paying for the Xanthum gum,  which i have found it pretty expensive at least where I buy it.


You didn't specify which foam generator, but the Honey Do Carpenter recipe for aerated concrete uses inexpensive shampoo (Suave Clarifying) as the foaming agent, with J-lube as the stabilizer.  J-lube is a veterinary obstetric lubricant, with several "off label" uses - if searching online, be prepared.  J-lube uses a vegetable starch, but I'm not sure which one; I haven't found anything that specifies exactly.

I guess my point is that the DIY concrete foaming recipes I have seen utilize a detergent and a stabilizer.  Perhaps there are DIY friendly recipes which do not, but I haven't yet found them.  From what I have been able to suss out, commercial aerated concrete mixes generate the foam chemically, often by reacting powdered aluminum in the alkaline mix, though other chemical reactants such as gypsum can also be used.

I think the main advantage of the foam generator (at least the HDC one) is that it can provide a lot of very fine bubbles, whereas I suspect (though I have not verified empirically) that the bubbles formed by Ben's method of mechanically beating/frothing with a drill paddle or mixer may result in fewer and larger bubbles.  I am basing this on my kitchen experience, which may not be a good analog to masonry mixing.  I have mixed quite a bit of sack concrete (without detergent!) with a drill and paddle in a bucket, though.  If my conjecture regarding bubble size is true, Ben's method might be better suited to creating open cell foams, if that is the desired outcome.  Ben's method uses tools which many people already have, or which can be readily acquired, whereas the foamer method requires building (or purchasing) the foamer head and also necessitates the air compressor system.  For someone who was properly tooled up to conduct the experiment, it would be interesting to do a head-to-head comparison between the HDC and Ben recipes, with both means of aeration, to see what differences result.  That is, what can be attributed to the recipe, and what to the method of mixing.  I've also wondered, pondering Ben's simpler method, if a large balloon whisk (maybe from a scrapped-out commercial floor mixer) would entrain more small bubbles than a mortar paddle.
2 weeks ago
Eric -

Have you seen the Richard Hill Stickwood boiler?  This was from the bad old days of the oil crunch.

He was a professor at University of Maine, and developed a wood fired atmospheric boiler under a US Department of Energy grant.  It was quite similar to a J-tube, but used both forced and induced draft.  The best quality scan of his DOE report that I have found is here:
https://web.archive.org/web/20260122141201/http://www.hotandcold.tv/resources/woodfiredfurnace.pdf

He does give some details of the water tube boiler.  He batch fired the burner, stored the heat in two used fuel oil tanks, then pumped the hot water through his heating loop for a couple of days before firing again.  He had a small expansion tank in the attic, open to atmosphere.  This might give you a starting point for the boiler side, but using a J-tube as the burner.

I am currently investigating whether adding a home brew biomass burner - either pellets or cord wood - to a low pressure steam heating system (under 2psi, and with the new Vaporstat, maybe under 10 oz/in2) is possible - or wise.  I know I could do it by converting to a vapor system, but I am trying to come up with something that is a longer term off-grid solution.  I the power is out for a week because there is a big ice storm or the local substation in non-operative due to a mishap, I'd rather be the one with the house where all of the pensioner neighbors can keep warm than the one who is freezing right along with them.

I may end up just running a parallel heating system - RMH, or similar.
3 weeks ago
The Project Highlander YT channel has a discussion of these heaters:


He has a lot of other stuff likely to be of interest to Permie or Permie-adjacent types of folks, from log building to growing potatoes,
4 weeks ago
What about Erica Wisner's Caddis Fly design, here (about halfway down the page)?
https://ernieanderica.blogspot.com/2015/10/pyronauts-in-montana.html
or on Archive, in case of future link rot:
https://web.archive.org/web/20231001000000*/https://ernieanderica.blogspot.com/2015/10/pyronauts-in-montana.html
I think it's fair to characterize it as a pocket rocket with thermal mass.  She intended it for just such applications, though I don't know that she did any further development work on it after the initial collab at Wheaton Labs with Peter Van den Berg and others.

This is somewhat akin to a half-pint pönttöuuni, a Finnish heater built of bricks and/or fire bricks fitted inside a cylindrical steel skin, discussed in this thread, among other places:
https://permies.com/t/40876/ntt-uuni-metalcontainer-wood-burning

There were also small masonry heaters of quadrilateral footprint (as compact as 2X2 bricks - perhaps 16 to 18 inches or 400 to 500 mm square, depending on the size of bricks), apparently somewhat common as heaters for upper floor apartments in parts of the Eastern Bloc, which were built of common red bricks and sometimes fire bricks or specially shaped pre-cast refractory blocks, with a steel angle tension frame and having sheet steel skins slipped between the bricks and frame.  Since these were usually single skinned, due to the space constraints, the sheet steel shell gave some additional protection against leaks due to eventual cracks in the mortar joints.  David Lyle shows a plan for one or two of these small stoves in the appendix at the end of his masonry heater book, as I recall.  Some of the Soviet stove building manuals also detail such small masonry heaters, but I don't have the references at my fingertips.  With adequate framing, these might withstand some shifting and shimmying in a van.

Gustaf Edvard Asp also shows several smaller form factor masonry heaters built into steel shells in his book "Uuninmuuraaja" (I have a scan of the 1948 edition), though he does not appear to envision these in mobile applications (!).  There are both two and three pass contraflows shown which aren't far removed from Erica's Caddis Fly, give or take some height and a fuel door.  Erica's version is simpler, smaller, lighter and would be cheaper & easier to build.
4 weeks ago
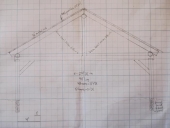
Here is the scan of Appendix 3 of James Mitchell's book on Short Log and Timber construction, giving dimensions for various beam loadings, with a brief tutorial on computing simple loads.