• Post Reply Bookmark Topic Watch Topic
  • New Topic
permaculture forums growies critters building homesteading energy monies kitchen purity ungarbage community wilderness fiber arts art permaculture artisans regional education skip experiences global resources cider press projects digital market permies.com pie forums private forums all forums
this forum made possible by our volunteer staff, including ...
master stewards:
  • Carla Burke
  • Nancy Reading
  • John F Dean
  • r ranson
  • Jay Angler
  • paul wheaton
stewards:
  • Pearl Sutton
  • Leigh Tate
  • Devaka Cooray
master gardeners:
  • Christopher Weeks
  • Timothy Norton
gardeners:
  • thomas rubino
  • Matt McSpadden
  • Jeremy VanGelder

Building a Rocket Mass Heater in a Tipi

 
Posts: 2
1
  • Likes 1
  • Mark post as helpful
  • send pies
    Number of slices to send:
    Optional 'thank-you' note:
  • Quote
  • Report post to moderator
Howdy! I will be living full-time in a 20' tipi on my off grid property sometime in the next few months. I watched the videos and bought the DVD about the RMH that was built in a tipi and I really think this is going to be my best option for heat thru the winter. I live in Arkansas, so our winters are fairly mild with only short bouts of extreme cold/snow thru the season. I had originally planned to just setup a regular wood stove, but I think that will be a constant struggle to keep warm and also waste a LOT of firewood in the process.

I've researched on RMH for years, but haven't ever built one. Hoping to get some ideas from you all on the best way to design this thing. First of all, I should mention that I am determined to also keep the open firepit (or possibly a chiminea) in the tipi. I would also like to design it so that it doesn't take up as much floor space as the one in the video does. I will only have a twin size mattress, so no need for a huge sleeping area.

One idea I'm tossing around in my head is to have the barrel part start to the left or right of the door, then have the mass with a single 6" (or 8"?) pipe around the entire perimeter of the tipi ending with an exhaust sticking up into the tipi on the opposite end. I'm also thinking about building up a stone "foundation" where the poles will set to get the whole tipi off the ground better (it's wet here) and should also allow me to sink the cob mass lower into the ground in the middle if necessary to save space. Is it worth it to insulate the ground under the tipi? like around the edges of the "foundation" then the bottom under everything? Seems a good vapor barrier along with insulation would help keep the ground from just sucking up all the heat I create, but unsure if this would just cause other issues I'm not thinking of.

I am open to any and all suggestions! Thanks
 
Rocket Scientist
Posts: 1809
Location: Kaslo, BC
525
building solar woodworking rocket stoves wood heat greening the desert
  • Likes 2
  • Mark post as helpful
  • send pies
    Number of slices to send:
    Optional 'thank-you' note:
  • Quote
  • Report post to moderator
Hello Susie and a Grand welcome to Permies!

What an exciting adventure your embarking on. Such a  bold and adventuresome spirit you have.

Your idea to put a heated bench all around (or partially) the perimeter sounds like a logical place to start. A couple things come to mind.
First, if you have the exhaust pipe exiting the bench close to the barrel, this will allow you to install a bypass which will make starting much easier.
Since the delta between inside and outside temperatures in a tipi are not going to be that far apart, draft will probably be hard to get established so I think a bypass will definitely be of great value.

Secondly, I would skip putting pipe in your bench and turn it into an elongated 'bell'. Essentially just a hollow chamber which has been referred to as a stratification bench. This eliminates a lot of pipe bends that would otherwise put a lot of friction on the exhaust gasses and slow down your draft.
Insulating and raising the floor also sound like very good insurances as well. A drainage ditch around the perimeter and a channel leading away down slope also would be a good thing to consider to keep everything inside dry.

Look forward to seeing what you come up with. Share your ideas with drawings and pictures so we can get a better idea of where your going and help you out with what we can.

 
Susie Ward
Posts: 2
1
  • Mark post as helpful
  • send pies
    Number of slices to send:
    Optional 'thank-you' note:
  • Quote
  • Report post to moderator

Gerry Parent wrote:Hello Susie and a Grand welcome to Permies!


Thank you! Been lurking a really long time. I lived off grid in a log/cob/shack structure with dirt floors for 5 years and have had my current property for a couple years now, but so far just still living in a tent there since I haven't been there full time since I got the property. Life and all that :)

Gerry Parent wrote:First, if you have the exhaust pipe exiting the bench close to the barrel, this will allow you to install a bypass which will make starting much easier.


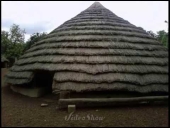
Hmm, I'll have to think on this one. Not sure how I'd go around the tipi and get back to the start without blocking the doorway. I wonder if I could setup a secondary exhaust at the barrel and use that for starting it up, then switch to the main exhaust once it's going? But then I'd have two ugly pipes in my ceiling area. I am assuming without this, the RMH will still work fine, but I might get some smoke blowback until it's heated up good enough? Maybe since I'm in a tipi, which is basically a chimney, that won't be much of an issue if I can't make that happen.

Gerry Parent wrote:Secondly, I would skip putting pipe in your bench and turn it into an elongated 'bell'. Essentially just a hollow chamber which has been referred to as a stratification bench. This eliminates a lot of pipe bends that would otherwise put a lot of friction on the exhaust gasses and slow down your draft.


This is actually a question I meant to ask in my initial post as I'd like to avoid using metal pipe if possible. How would you form the channel for this?  Can it be square instead of round? Could I just freehand a constantly curving channel so that it's smooth with no sharp bends? If so, what would I use for support to cover the top? Also, what about cleanouts? I need to do more research on this idea!

Gerry Parent wrote:Look forward to seeing what you come up with. Share your ideas with drawings and pictures so we can get a better idea of where your going and help you out with what we can.


My drawing/sketching abilities are very lacking, but I will definitely be sharing here and seeking advice along the way from this wonderful and knowledgeable community. Not sure yet when I'll be back on my property to get started, likely a couple months yet, but wanting to get my game plan together now so I can get started straight away when I get there. Winter waits for no one lol

Thanks so much for the reply!
 
Gerry Parent
Rocket Scientist
Posts: 1809
Location: Kaslo, BC
525
building solar woodworking rocket stoves wood heat greening the desert
  • Likes 2
  • Mark post as helpful
  • send pies
    Number of slices to send:
    Optional 'thank-you' note:
  • Quote
  • Report post to moderator
The one great thing about a bell/stratification chamber is that the exhaust doesn't have to follow a set path like a piped system does. This is one place where it really shines as its shape can be modified to suit almost any outline, vertical or horizontal. With longer vertical runs however, it does have a tendency to heat up the section of the bench closest to the exhaust input more than the far end. To help alleviate this though, a simple solution is to extend the exhaust input further down the bench (maybe to the middle point or slightly further) within the bench itself. So in a sense, it becomes a hybrid system utilizing the best of both worlds.
To better describe a bell, just think of a hollow chamber. It can be made in a lot of different ways. One way would be to build two brick/rock walls lets say with an 18" gap between them and maybe 16" high, then cap with some flagstone, granite, urbanite slabs etc. Seal with a little mortar and your done. Another way can be a half barrel system. Slice a barrel lengthwise in half, lay them down sideways and use them as a form to hold a rock/cob lasagna over them.

Now is a good time to start collecting items for your dragon. Look through craigslist and other online resources for local places to pick up inexpensive or free stuff. A lot of good deals out there, but usually pays off if your patient and snoop around a bit.
gift
 
Rocket Mass Heater Manual
will be released to subscribers in: soon!
reply
    Bookmark Topic Watch Topic
  • New Topic