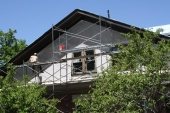
We are finally plastering the interior of our 1927 craftsman home restoration. Project pasge
Many of the walls are severely cracked from a massive earthquake in Richmond that brought down a few buildings including the historic stone church a block away. There has also been delaminations from 40 years of leaky roof(no exaggeration).
We air sealed(Pro Clima DB+) and insulated the exterior walls(Roxul R-23 batts), so they have been covered in drywall. The DB+ paper sticks out on the edges and is hot-mudded(gypsum) to the plaster walls with some fiber tape to prevent cracking.
First the cracks are packed with plaster, then fiberglass tape is added to the wet mud to prevent the cracks from telegraphing through the new plaster.
Then plaster on top and into the fiber tape to complete the repair and it's ready for the first coat of lime plaster.
We use our own custom blend of lime, gypsum, sand and manure to repair the cracks in the plaster and even to plaster right onto the wooden lath where the plaster is missing.
The lime putty was mixed 2 weeks ago from bags of hydrated type s lime.
Basic recipe; 7.5 gal lime putty, 7.5 gal all purpose joint compound (I like National Gypsum for all my gypsum needs) 2 big shovels full sharp quartz sand and 1 big shovel full horse manure or if you would like to do the work of the horse, you can shred the straw yourself.
IMG_7556.JPG
Equal parts lime putty and gypsum (all purpose pre-mixed)
Sometimes we must remove a large portion on plaster from a severely damaged wall and just replaster.
The first thing is to repair any damaged or loose lath. Splice any cut boards.
Then gather the ingredients;
Lime putty 10 gal
Sharp sand 20 gal
Horse manure(well aged dry) 4 gal
Wood shavings 1 gal
Wood ash/charcoal 1 gal
put additives in a bucket and break them down with an electric paddle mixer
Once the plaster has been mixed well, apply to a well wetted wall ensuring proper adhesion and key by splatting each bit of plaster onto the wall. Then after a dozen or so plats, trowel smooth. Let dry just a bit and trowel off, holding the trowel at a 45 angle to the wall, which will raise the sand so the next coat can bond well.
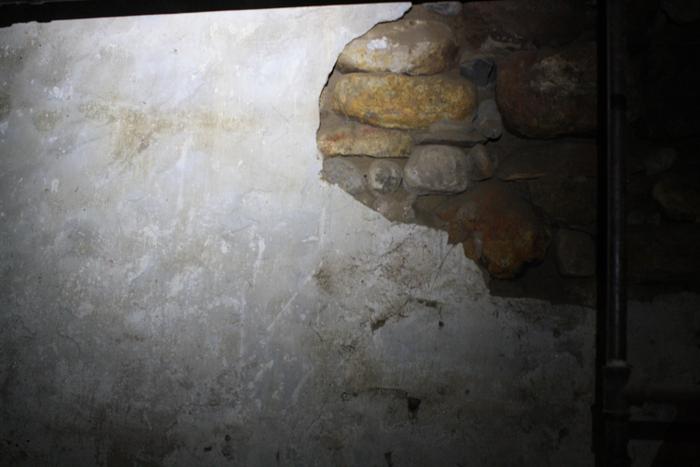
If we cut open a wall like in the first photo where we cut open the wall for a walk-in shower, we save the lath and re-install the wooden lath on the new section. I don't like to use drywall for this because of differences in expansion/contraction causes cracking.
This first coat is thin, just enough to cover the lath well. When this has dried for a few days, then we will apply another coat of the same mix, but sometimes even more sand like 1 lime to 3 sand. This coat levels everything up.
could you please elaborate on how you insulated the exterior walls? is it correct to understand that you added a layer each of (1) pro-clima (2) rpxul, then (3) drywall over the existing plaster wall? if so, how much thickness did this add to the wall? also, could you also explain what you mean by hot-mudded?
thanks mate.
I think having land and not ruining it is the most beautiful art that anybody could ever want to own. - warhol
The exterior wall assemblies are 1- 1 1/2" lime plaster, 3 1/2" dense packed cellulose, 1" lime plaster, 5 1/2" Roxul R-23 batts, DB+, 1/2" drywall, topped with 1/2" lime plaster. This adds 6 1/2" to the wall thickness, so the doors need to be remounted in new frames and the windows just get more trims.
I mean setting gypsum, but we have started to just use our taping mix for this as well.
Did you test the old plaster for asbestos? In buildings that I demolish, about a third of those your age, contain it.
Even when the product contains no asbestos, I wear a full face asbestos grade mask, to avoid filling my lungs with silica and mouse droppings.
........
Great pictures and documentation.
Hi Dale,
Yes, old gypsum does often times contain asbestos, but not ours thankfully. There was a fair bit of asbestos in the boiler room, but nowhere else.
I buy a full PPE set up for each new apprentice, after that it is up to them to wear what they wish. I keep these N95 masks on hand as well and they choose them more often than not.
So, sometimes you've got a complete delamination and you must rebuild the lime plaster from the lath up. The well haired base mix is pressed firmly, but gently into the lath in one clean motion from the hawk to the wall and up. This ensures proper key while not spreading the mud too thin.
Once the render is set up but still wet, scour the surface lightly with a wooden float. Then scratch diagonally across the surface with a pointed lath board to provide key.
Another little secret is to save or scrounge leftover roofing membrane as it makes the very best plastering tarps. I don't like to use my good canvas tarps because they get crusty and ruined.


 3
3


![[Thumbnail for IMG_7573.JPG]](/t/44248/a/25877/IMG_7573.JPG "Filename: IMG_7573.JPG
Description:")
![[Thumbnail for IMG_7576.JPG]](/t/44248/a/25878/IMG_7576.JPG "Filename: IMG_7576.JPG
Description:")
![[Thumbnail for IMG_7577.JPG]](/t/44248/a/25879/IMG_7577.JPG "Filename: IMG_7577.JPG
Description: Removing latex paint with a carbide scraper")
![[Thumbnail for IMG_7574.JPG]](/t/44248/a/25880/IMG_7574.JPG "Filename: IMG_7574.JPG
Description: Create grooves")
![[Thumbnail for IMG_7578.JPG]](/t/44248/a/25883/IMG_7578.JPG "Filename: IMG_7578.JPG
Description: Remove paint")
![[Thumbnail for IMG_7581.JPG]](/t/44248/a/25884/IMG_7581.JPG "Filename: IMG_7581.JPG
Description: Repair with lime/gypsum/sand")
![[Thumbnail for IMG_7587.JPG]](/t/44248/a/25885/IMG_7587.JPG "Filename: IMG_7587.JPG
Description: Completed basic repairs")
![[Thumbnail for IMG_7592.JPG]](/t/44248/a/25886/IMG_7592.JPG "Filename: IMG_7592.JPG
Description: Fiber taped cracks")
![[Thumbnail for IMG_7595.JPG]](/t/44248/a/25887/IMG_7595.JPG "Filename: IMG_7595.JPG
Description:")
![[Thumbnail for IMG_7556.JPG]](/t/44248/a/25888/IMG_7556.JPG "Filename: IMG_7556.JPG
Description: Equal parts lime putty and gypsum (all purpose pre-mixed)")
![[Thumbnail for IMG_7554.JPG]](/t/44248/a/25889/IMG_7554.JPG "Filename: IMG_7554.JPG
Description: 2 parts sharp quartz sand to 1 part horse manure")
![[Thumbnail for IMG_7560.JPG]](/t/44248/a/25890/IMG_7560.JPG "Filename: IMG_7560.JPG
Description: Mix well and it should look like this")
![[Thumbnail for IMG_7613.JPG]](/t/44248/a/26055/IMG_7613.JPG "Filename: IMG_7613.JPG
Description: Lath splice")
![[Thumbnail for IMG_7603.JPG]](/t/44248/a/26056/IMG_7603.JPG "Filename: IMG_7603.JPG
Description: Additives")
![[Thumbnail for IMG_7607.JPG]](/t/44248/a/26057/IMG_7607.JPG "Filename: IMG_7607.JPG
Description: Hand mixing")
![[Thumbnail for IMG_7608.JPG]](/t/44248/a/26058/IMG_7608.JPG "Filename: IMG_7608.JPG
Description: New and old plaster")
![[Thumbnail for IMG_7610.JPG]](/t/44248/a/26059/IMG_7610.JPG "Filename: IMG_7610.JPG
Description:")
![[Thumbnail for IMG_7609.JPG]](/t/44248/a/26060/IMG_7609.JPG "Filename: IMG_7609.JPG
Description: Proper key")
![[Thumbnail for IMG_7588.JPG]](/t/44248/a/26354/IMG_7588.JPG "Filename: IMG_7588.JPG
Description: Original plaster")
![[Thumbnail for IMG_7589.JPG]](/t/44248/a/26355/IMG_7589.JPG "Filename: IMG_7589.JPG
Description: Rough sawn wood lath bites well, better than steel")
![[Thumbnail for IMG_7590.JPG]](/t/44248/a/26356/IMG_7590.JPG "Filename: IMG_7590.JPG
Description: Thin and fibrous original lime plaster")
![[Thumbnail for IMG_7640.JPG]](/t/44248/a/26357/IMG_7640.JPG "Filename: IMG_7640.JPG
Description: Stan the Man giving pointers")
![[Thumbnail for IMG_7643.JPG]](/t/44248/a/26358/IMG_7643.JPG "Filename: IMG_7643.JPG
Description:")
![[Thumbnail for IMG_7644.JPG]](/t/44248/a/26359/IMG_7644.JPG "Filename: IMG_7644.JPG
Description:")
![[Thumbnail for IMG_7717.JPG]](/t/44248/a/26954/IMG_7717.JPG "Filename: IMG_7717.JPG
Description: Nail down the lath and get it good and wet")
![[Thumbnail for IMG_7721.JPG]](/t/44248/a/26955/IMG_7721.JPG "Filename: IMG_7721.JPG
Description: Apply haired mix diagonally upward")
![[Thumbnail for IMG_7734.JPG]](/t/44248/a/26956/IMG_7734.JPG "Filename: IMG_7734.JPG
Description: Scoured and scratched")
![[Thumbnail for IMG_7749.JPG]](/t/44248/a/26957/IMG_7749.JPG "Filename: IMG_7749.JPG
Description: Float coat")
![[Thumbnail for IMG_7747.JPG]](/t/44248/a/26958/IMG_7747.JPG "Filename: IMG_7747.JPG
Description: Float over myriad cracks")
![[Thumbnail for IMG_7813.JPG]](/t/44248/a/27190/IMG_7813.JPG "Filename: IMG_7813.JPG
Description: Very wet plaster, you'd have a hard time controlling this!")
![[Thumbnail for IMG_7814.JPG]](/t/44248/a/27191/IMG_7814.JPG "Filename: IMG_7814.JPG
Description: Earth friendly and hypo allergenic")
![[Thumbnail for IMG_7815.JPG]](/t/44248/a/27192/IMG_7815.JPG "Filename: IMG_7815.JPG
Description: Wet plaster seizes with 1 cup of Murco")
![[Thumbnail for IMG_7817.JPG]](/t/44248/a/27193/IMG_7817.JPG "Filename: IMG_7817.JPG
Description: Ultra smooth! Click to zoom in.")
![[Thumbnail for IMG_7812.JPG]](/t/44248/a/27194/IMG_7812.JPG "Filename: IMG_7812.JPG
Description: Roofing membrane tarps.")