|

|
|
|
|

|

|

|

|

|


![[Thumbnail for 1030001854.jpg]](/t/5621/a/1447/1030001854.jpg "Filename: 1030001854.jpg
Description:")
![[Thumbnail for downsized_1101001947.jpg]](/t/5621/a/1448/downsized_1101001947.jpg "Filename: downsized_1101001947.jpg
Description:")
ManitouDesigns wrote:
I do have it insulated, did it just like the book said, just dont have that pic up... I had it at 2" from top of heat tube and raised it an inch, actually seems to work a bit better raised, I also increased the gap at the exhaust port to give it more flow..
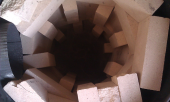
ManitouDesigns wrote:
The insulator pipe is about 20", left a 2" gab all the way around the 24" 55gal barrel. Should I make the insulator pipe smaller? Say 12-14"?
paul wheaton wrote:
I built it.
It sucks.
I think it might be too much pipe with too many turns.
I bypassed most of the pipe and it worked much better, but the combustion didn't seem as rockety as I remember. And the exhaust seemed rather smoky.
So .... a six inch duct has a cross of (pi*r*r) -> (pi*9): 28.26 square inches
I think the burn tunnel is 7.1 inches high and 4.1 inches wide.
The intersection between the two is .... less. Maybe 20% less. I suppose that could be problematic, but I didn't think it would be this problematic.
Ernie wrote:
Critical dimensions are in a word "Critical" Cross sectional area cannot be reduced by 20%. the air volume is to low and the laminar flow coefficient is too high.
Ernie wrote:
you dont need much to make the square work with the bricks; the bridge bricks just need to lap about 1/8th over the sides.
ManitouDesigns wrote:
Both feed tube hole and exhaust hole are just a little under 7.5" sq just as you say....

 I think I will get some fire brick to play with out back.
ManitouDesigns wrote:
Thanks for your help, at least someone is trying to lend a hand.
ManitouDesigns wrote:
For the exit gas I mad a 3rd chamber the same size as the feed tube, it doubled as a cleanout. The 8" pipe came out the side and started its run, for some reason (and I will figure the science of it out and post it) the gases didn't like that chamber. I think it was possible that because it share a wall with the heat riser chamber it would create heat and cause a sort of bottleneck from the heat rising.
So here is what I did...... I plugged the exit hole and tore apart the rear of the chamber, I put an elbow on the pipe shoved it under the barrel and then cobbed it to form a funnel affect,
Now on to the next RMH!

|
There is no greater crime than stealing somebody's best friend. I miss you tiny ad:
List of Rocket Mass Heater Builders
https://permies.com/wiki/122347/List-Rocket-Mass-Heater-Builders
|