Lisa Gabrielle

+ Follow
since Aug 21, 2024
Merit badge: bb list bbv list
Biography
White single Christian woman (60) with homesteading skills and a passion for gardening seeking similar traits in a single Christian man.I'm healthy, fit, non-smoking/no drugs, would enjoy meeting a guy with the same background for friendship, possibly more. My interests are growing food, permaculture, homesteading, raising hens, cooking, baking, gardening, and sewing. I live in a rural small town and work 100% remote. I am considering moving to a location with more acreage. Idaho? Wyoming? Send me a message and say "hello!"
For More
About to move!
Apples and Likes
Apples
Total received
In last 30 days
1
Forums and Threads

Recent posts by Lisa Gabrielle

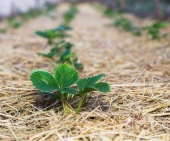
Anne Miller wrote:I am curious, young plants had what looks like straw mulch though mature plants are on plastic.  Wouldn't the straw have been a better option? Wood chips might have been an even better choice.

Yes - you're not imagining it! The first three years we used the black fabric but the temps got too high and we had some burning issues. I removed that, along with many of the dead strawberry plants. I kept the ones that I thought would recover the following year - but they never came back and I had several rows that I had to start over. So that's why you see the "babies" in the straw.

I have tried several types of natural mulch such as fabric, dry straw, leaves and pine needles.

Dark plastic row covers never made me swoon. They are great for cold climates, but I have to remove them when we have warmer temps and that means extra work and the possibility of exposing my plant's leaves to soil-borne pests.

Dried wheat or oat straw looks so lovely and bright as a strawberry mulch -- on the ground and in contrast to the green leaves and red fruit. But I have had to purchase straw from the feed store in the past. I'd prefer to avoid the cost along with the risk that the straw has not been exposed to herbicides or pesticides.

Leaves bring a different challenge. They decompose too fast and harbor pests and mold more often -- even when I am careful about water run-off from my drip irrigation.

Pine straw is generally a win as it does not significantly acidify soil, even after years of use. It can actually be beneficial for strawberries, as they prefer slightly acidic soil, and the mulch helps protect the plants from most pests, but carries a minor mold risk.

If I have the budget, I most prefer the shavings or "bedding" from the feed store used for the chicken coop. Picking up an extra large bag or two gives me the bright dried straw look I like. It's also easier to spread around under the plant and down the rows. I just always check the label that the pine shavings are "untreated."

What is your "go-to" strawberry mulch? Are you a strawberry-in-containers type, or an in ground row-grower?  Any tips on getting great yield (homemade fertilizers), please let me know!
Rolf - I hope you have found your new partner. You even make daily chores sound poetic. Personally, I would not pick Canada, though your location does sound like a slice of heaven. I'm using my Karelian Bear dog to chase away the bears in No. Idaho. Be well and enjoy!
2 weeks ago
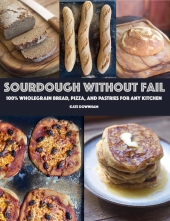
Stumbled across this post and I am sure happy I did! I do love baking - but I've always kept it to quick breads like Irish soda bread, scones or muffins. But I'm jumping into the "yeast bread" flow because I can no longer eat the terrible toxic bread from stores any more. Even the reputable "organic" breads are moving toward cheaper ingredients. Frankly, I think it's the pesticide residue that travels across farms. Wish me luck on being patient for a sourdough starter. Sourdough is my absolute favorite.  Melted butter. Crispy outside. Fluffy inside.
1 month ago
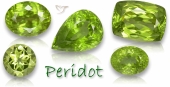
Original (French) "pear-eh-doe" or
American (English) "pear-eh-dot"

From Old French early 13c. and Medieval Latin peridotus.
7 months ago
Sorry to hear that your buddy is gone, so I'm sending up a prayer to God asking that he will send you a wholesome woman. Blessings to you and your new pup!
10 months ago
Love the first - so simple, but suggest the second for the back cover! I’ve seen other authors do this and it is very effective to show contents without first impression clutter.
10 months ago

Nina Wright wrote:Any recipes for without mayo?

Hi Nina - the recipe from Chosen Foods is without Mayo. Here it is:
Time: 15 min
Servings: 2-4

Ingredients

   5 hard boiled eggs
   1 medium avocado
   ½ tsp salt
   2-3 fresh ground pepper turns

Optional toppings:

   1-2 tsp whole-grain pickled mustard seed
   ½ tsp of truffle salt

Directions

   Cut the hard boiled eggs in half, lengthwise. Gently scoop out the egg yolks and place them in a small bowl or immersion blender cup.
   To the same bowl or cup, add the avocado, salt, and fresh ground pepper. Blend together on high until it's smooth as can be.
   Add the the avocado mixture into each half.
   Top with mustard seed and truffle salt if you’re feeling fancy!
10 months ago
All of these recipes sound delicious! My hens are slacking off so I don't have the capacity for this great dish right now. Isn't it amazing how long this recipe, in all its glorious forms, has been around? Here is my favorite:  

1. Add room temperature eggs to rapidly boiling water.  I usually make 8 eggs = 16 halves.
Some folks say a few drops of vinegar to the boiling water makes them easier to peel. You won't need it if you don't overcook your eggs. Also, overcooked eggs are not as nutritious - just so you know.
2. Drain the water after 5 minutes. The eggs will continue to cook just due to the heat.  
3. When the eggs are still slightly warm (cool enough to handle) start peeling. If you use a bowl of cool water instead of the tap water, you'll probably save water and be able to save most of the shell.
4. Save shells for the garden or grind them down for your hens.
5. Don't cut them just yet! Let the eggs cool completely. I like to place them in a bowl in the refrigerator for about 30 mins. You'll find the egg whites stay in tact better this way. This helps retain the nutrients too!
6. Remove from fridge. Slice the eggs in half and scoop out the contents into a bowl. Reserve the egg whites to fill. Mash the yolks in a bowl.
7. If any of the yolks are not the pale yellow some are used to - that is good! Use them. They are so much better for you and your Deviled Egg Recipe will be so much more glorious on the table with a bright yellow color!
8. Add to the mashed yolks, 1 Tbs balsamic vinegar, 1/4 tsp cayenne pepper, 1/4 tsp mustard powder, and a few tablespoons of Chosen Foods Classic Avocado Oil Mayo (just enough to make it creamy). Garnish with Hungarian sweet paprika powder. In winter, we usually add finely chopped fresh garlic for the extra immune boosting. Enjoy!

Chosen foods also has an Avocado Deviled Egg recipe if you're a fan. It is here: https://chosenfoods.com/blogs/central/avocado-deviled-eggs

10 months ago