• Post Reply Bookmark Topic Watch Topic
  • New Topic
permaculture forums growies critters building homesteading energy monies kitchen purity ungarbage community wilderness fiber arts art permaculture artisans regional education skip experiences global resources cider press projects digital market permies.com pie forums private forums all forums
this forum made possible by our volunteer staff, including ...
master stewards:
  • Nancy Reading
  • Carla Burke
  • r ranson
  • John F Dean
  • paul wheaton
  • Pearl Sutton
stewards:
  • Jay Angler
  • Liv Smith
  • Leigh Tate
master gardeners:
  • Christopher Weeks
  • Timothy Norton
gardeners:
  • thomas rubino
  • Jeremy VanGelder
  • Maieshe Ljin

Started building the walipini today!

 
Posts: 134
Location: Canton, NC
6
  • Likes 5
  • Mark post as helpful
  • send pies
    Number of slices to send:
    Optional 'thank-you' note:
  • Quote
  • Report post to moderator
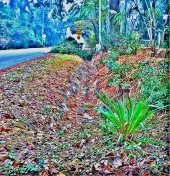
Started digging foundations for the walipini today! Building an 18 by 40 mostly underground greenhouse - it'll be exposed a little on the downhill side because of the way the hill sits. I'm also going to leave the east wall ground level (where it will naturally fall) so I can run a wheelbarrow in there easily. Got me a pile of 240ish blocks to start, and going to pour 4 yards or a little less of concrete to support the block walls. It will be 6 foot or so deep at the deepest part on the north western corner, and falling away shallower toward the opposite end. Going to pile up dirt on the southern exposed section of wall to insulate that part.

I'm just really exited we have a trackhoe in the family so I dont have to do anything but buy fuel!

oh, the ditch isnt really crooked, it just looks like it from this perspective because of the way the hill falls away.

Hope this attachment thing works!
IMG_9445.JPG
IMG_9445
IMG_9445
 
pollinator
Posts: 4715
Location: Zones 2-4 Wyoming and 4-5 Colorado
492
3
hugelkultur forest garden fungi books bee greening the desert
  • Likes 1
  • Mark post as helpful
  • send pies
    Number of slices to send:
    Optional 'thank-you' note:
  • Quote
  • Report post to moderator
Thanks for posting Matt. I'll be looking forward to seeing how it turns out!
 
Posts: 78
1
  • Likes 2
  • Mark post as helpful
  • send pies
    Number of slices to send:
    Optional 'thank-you' note:
  • Quote
  • Report post to moderator

matt sorrells wrote:... we have a trackhoe in the family ...


I hate you.

But seriously, I don't blame you for being excited. Please post lots of project pictures, 'K?
 
matthew sorrells
Posts: 134
Location: Canton, NC
6
  • Mark post as helpful
  • send pies
    Number of slices to send:
    Optional 'thank-you' note:
  • Quote
  • Report post to moderator
Picked up 240 linear feet of 20ft lengths of rebar today for 3 of the 4 sides, and also a small pile of rebar saddles. Gotta cut one of the lengths into short sections for cement depth gauges. This'll be fun (Sarcastic eye roll).

 
matthew sorrells
Posts: 134
Location: Canton, NC
6
  • Mark post as helpful
  • send pies
    Number of slices to send:
    Optional 'thank-you' note:
  • Quote
  • Report post to moderator

Got the foundation poured today. The 'crete wasnt as bad as I was thinking to work, but my back still hurts from working it down IN the ground. 270 linear feet or rebar went into the hole. Cut two whole pieces to short lengths to make the rods that go vertical in the hole to let you know if its the right depth concrete. Made wood dams out of plywood so we can step up in 8" increments and keep it all level. After this cement dries, I'll dig the hole out in the middle. I can either switch the bucket on the little trackhoe to the 3 foot wide one, or get the big hoe. Dads got another one that is 3 times the size of the little one, so I may go for that one.

Cement truck had a yard and a half extra (WHAT a blessing!) so we poured that at the entrance to the barn which was lower and the cow (Sir Tenderloin) was constantly making it muddy there going in and out the barn and bellowing for sweet feed. Now there's a 10 by 10 pad down there with all my families names written in it.

Since this is all red clay pretty much, its not worth amending for greenhouse soil - ESPECIALLY after dad had a good idea on soil to use. There was a horse barn in the valley down from us for, I dont know, 50 or 60 years or more, and it was abandoned and town down 8 years ago. All the soil below where it was is BLACK, black black. So there ya go, I like the price and the color of it. Gotta do soil tests on it to make sure, but I cant see why it wouldnt be rich.
IMG_9460.JPG
IMG_9460
IMG_9460
IMG_9461.JPG
IMG_9461
IMG_9461
 
Jorja Hernandez
Posts: 78
1
  • Mark post as helpful
  • send pies
    Number of slices to send:
    Optional 'thank-you' note:
  • Quote
  • Report post to moderator
Love the chicken in the barn window.
 
matthew sorrells
Posts: 134
Location: Canton, NC
6
  • Mark post as helpful
  • send pies
    Number of slices to send:
    Optional 'thank-you' note:
  • Quote
  • Report post to moderator
ROFL, Joria! There's always a chicken looking out!

The doggone cement wasnt hard this morning! must've been the 30 degree night, but I thought concrete produced its own curing heat?
 
pollinator
Posts: 4024
Location: Kansas Zone 6a
284
  • Likes 1
  • Mark post as helpful
  • send pies
    Number of slices to send:
    Optional 'thank-you' note:
  • Quote
  • Report post to moderator
Be happy, a SLOW cure is what you want. As long as it didn't form ice crystals, it will be stronger crete in the end.
 
Posts: 62
Location: Northeast Arkansas
1
2
  • Mark post as helpful
  • send pies
    Number of slices to send:
    Optional 'thank-you' note:
  • Quote
  • Report post to moderator
When we pour concrete and the temperature is supposed to drop below freezing, we always put insulated blankets on top of the new slab. That way the small amount of heat generated from the curing process doesn't escape and gives the slab a chance to freeze before curing.

It's probably fine, but next slab in this weather maybe throw some blankets or even hay on it to keep the cold wind off (drying the top at a different rate than rest of slab) and the curing heat in.
 
steward
Posts: 3718
Location: Moved from south central WI to Portland, OR
985
12
hugelkultur urban chicken food preservation bike bee
  • Likes 2
  • Mark post as helpful
  • send pies
    Number of slices to send:
    Optional 'thank-you' note:
  • Quote
  • Report post to moderator
If you are worried about persistent herbicides in the horse manure/soil, take some and plant beans in it. Apparently beans are very sensitive to the persistent anti-broadleaf chemicals, and if those are in the soil the first true leaves will be all deformed. Just stick them under a fluorescent light (doesn't have to be a grow light) in a warmish spot and you'll find out pretty quickly!
 
matthew sorrells
Posts: 134
Location: Canton, NC
6
  • Mark post as helpful
  • send pies
    Number of slices to send:
    Optional 'thank-you' note:
  • Quote
  • Report post to moderator
I didnt even think about persistant herbicides. Even after 10 plus years? My grandfather probably sprayed roundup at some point, but I dont remember him ever doing it, so that was probably more than 25 years ago. Good idea though
 
matthew sorrells
Posts: 134
Location: Canton, NC
6
  • Likes 1
  • Mark post as helpful
  • send pies
    Number of slices to send:
    Optional 'thank-you' note:
  • Quote
  • Report post to moderator
Pulled out the big guns to dig the hole out! I started with the small hoe, and then dad suggested I just get the big one and get it over with. no problem! Big one has a heater in it! lol My youngest son, Jonathan, can sit behind the seat of the big hoe and watch over my head the whole time too.

Took about an hour and a half to dig this big of a hole, and thats not bad. I'm always amazed at the amount of dirt that comes out of a hole. I'll wait a week or so before I get the smaller one IN the hole and dig out closer to the foundation to expose it so I can start to lay block and get the final grade down. I'm within 6 inches of final grade all over the bottom now, which will be 6 foot deep from deepest, then 10 to 12 inches of black dirt in the hole for planting. That ought to be plenty, shouldnt it?

You can hop down in there and feel the dirt, and its a comfy temp. I havent put a thermometer on it yet though.
IMG_9462.JPG
IMG_9462
IMG_9462
IMG_9464.JPG
IMG_9464
IMG_9464
 
Jorja Hernandez
Posts: 78
1
  • Likes 2
  • Mark post as helpful
  • send pies
    Number of slices to send:
    Optional 'thank-you' note:
  • Quote
  • Report post to moderator
Really enjoying these WIP pictures!
 
matthew sorrells
Posts: 134
Location: Canton, NC
6
  • Likes 3
  • Mark post as helpful
  • send pies
    Number of slices to send:
    Optional 'thank-you' note:
  • Quote
  • Report post to moderator
Been digging at edges and framing steps for a few days. ready to pour steps perhaps friday (predicting bad weather tomorrow).
IMG_9470.JPG
IMG_9470
IMG_9470
 
Posts: 33
Location: Costa Rica
2
  • Likes 1
  • Mark post as helpful
  • send pies
    Number of slices to send:
    Optional 'thank-you' note:
  • Quote
  • Report post to moderator
This looks awesome, really enjoying your pics.
 
Posts: 724
Location: In a rain shadow - Fremont County, Southern CO
21
  • Mark post as helpful
  • send pies
    Number of slices to send:
    Optional 'thank-you' note:
  • Quote
  • Report post to moderator
wow, great progress. thanks for posting pictures.

wish i had access to those types of machines, i would certainly have a walipini too!
 
Posts: 226
Location: South central Illinois, USA
3
  • Mark post as helpful
  • send pies
    Number of slices to send:
    Optional 'thank-you' note:
  • Quote
  • Report post to moderator
Nice work! I think you'll be fine with the black soil from the old barn. IMO clay is a good basis for decent soil. Holds the moisture, and once you amend it with your black dirt, ought to be great! We have a sort-of solar growhole, is smaller though 8 X 16'. I like what you're doing, thanks for the photos, keep 'em coming!
 
matthew sorrells
Posts: 134
Location: Canton, NC
6
  • Likes 3
  • Mark post as helpful
  • send pies
    Number of slices to send:
    Optional 'thank-you' note:
  • Quote
  • Report post to moderator
Did the big pour today. around 1 ton of sand, the same of rock, and 9 94 lb bags of portland cement went into around 35 wheelbarrow loads and then placed and worked. Not to mention the fill rock that went in the steps too. whooo, I'm going to sleep good tonight! Soon the blocklaying will commence!

IMG_9472.JPG
IMG_9472
IMG_9472
 
Tim Malacarne
Posts: 226
Location: South central Illinois, USA
3
  • Likes 1
  • Mark post as helpful
  • send pies
    Number of slices to send:
    Optional 'thank-you' note:
  • Quote
  • Report post to moderator
Excellent craftsmanship! Your work looks very neat! Please keep us posted!
 
matthew sorrells
Posts: 134
Location: Canton, NC
6
  • Likes 1
  • Mark post as helpful
  • send pies
    Number of slices to send:
    Optional 'thank-you' note:
  • Quote
  • Report post to moderator
Progress is slow on the Walipini. Got the stairs done and the frame torn off and have been laying block for 2 days now. I'm taking alot more time than a professional block mason would, mostly due to lack of experience, but I want the building to look like someone that built it knew what they were doing! lol I may be done sometime mid summer......

Nah, it should begin to go faster, especially when I get to the long walls and get me a string set up so I dont have to check level and plumb on 3 dimensions, only on one. Also I'll have more experience on it - already I'm able to kinda toss the mortar from a few inches up instead of smearing it on like from a butter knife. I still drop a lot, unfortunately.

I drilled the foundation and the steps every certain distance and placed a piece of rebar into it so the wall wont take a fit and jump off the foundation. I've got one in the corners, halfway down each short wall, and in the end of the short walls near the earthen wall. Also one every two steps will be added. I'll pour those probably tomorrow and fill the rest of the blocks with sawdust for insulation.

Also, at the bottom of the stairs, you may notice a hole - this will have a perforated pipe in it to collect the rainwater that comes in the stairwell and be covered in gravel and flow through the foundation to the lengthwise drain.
IMG_9477.JPG
IMG_9477
IMG_9477
IMG_9479.JPG
IMG_9479
IMG_9479
 
Tim Malacarne
Posts: 226
Location: South central Illinois, USA
3
  • Likes 1
  • Mark post as helpful
  • send pies
    Number of slices to send:
    Optional 'thank-you' note:
  • Quote
  • Report post to moderator
Looking good! Still high-quality construction. I would fill the cores with concrete and rebar, but I usually over-build and under-engineer... This past winter, I used sturdy insulation between the outside walls and the beds. Seemed to help keep it warmer inside. I bet if you'd put solid insulating panels on the outside of the steps, it'd help.

Keep up the good work!
 
matthew sorrells
Posts: 134
Location: Canton, NC
6
  • Likes 3
  • Mark post as helpful
  • send pies
    Number of slices to send:
    Optional 'thank-you' note:
  • Quote
  • Report post to moderator
Here are some updated pictures on the walipini. Got a corner built up and long wall started, as well as the walls by the steps built up to one block above the long walls. Now I need to build up the corners so I can pulls strings from them for the long walls - also because the blocks that I obtained are seeming to be mostly corner block (smooth on one end) and I want to make sure that I have enough of them for the corners. I'm down to probably 12 regular blocks, and I probably have 75 corner blocks left out of 220ish. I'll use those for the walls too after I get the corners done. I'm going to be well short of finishing it with the blocks that I purchased on the first load.

So far, I've got $1 per in the blocks, plus $430 for the main footer pour, plus $120 for portland cement so far (2 bags left), plus $70 for 2 tons of sand (little pile left). Gravel was already in field so it was free. Plus rebar at around $120. So, $960 into it so far. The wood, which looks like I may go with locust, will run me about $600 or so. I've snagged one insulated glass exterior door from a thrift store for $30, and hope to find another.
IMG_0018.JPG
IMG_0018
IMG_0018
IMG_0020.JPG
IMG_0020
IMG_0020
 
Tim Malacarne
Posts: 226
Location: South central Illinois, USA
3
  • Likes 1
  • Mark post as helpful
  • send pies
    Number of slices to send:
    Optional 'thank-you' note:
  • Quote
  • Report post to moderator

Don't despair about the block laying taking too long. The first course is slow, even for the pros, because it's just dang tedious to get it right, straight, level, in-line, and cross level. Stick with it, your work to date has been exemplary, keep it up, you won't be sorry you took the time to do it right when it's all done! Thanks for the photos, keep 'em coming! Best, TM
 
matthew sorrells
Posts: 134
Location: Canton, NC
6
  • Mark post as helpful
  • send pies
    Number of slices to send:
    Optional 'thank-you' note:
  • Quote
  • Report post to moderator
Here is a short walkthrough video of the so-far-built walipini. Also it shows our unplanted garden and our cow, Sir Tenderloin. He is for beef and his date will be soon. I was able to lay 20 block today. This is the first time I actually counted how many block I did in one day!

youtube walipini video
 
out to pasture
Posts: 12486
Location: Portugal
3354
goat dog duck forest garden books wofati bee solar rocket stoves greening the desert
  • Mark post as helpful
  • send pies
    Number of slices to send:
    Optional 'thank-you' note:
  • Quote
  • Report post to moderator
I've embedded the video below.

 
matthew sorrells
Posts: 134
Location: Canton, NC
6
  • Mark post as helpful
  • send pies
    Number of slices to send:
    Optional 'thank-you' note:
  • Quote
  • Report post to moderator


Not really any progress to speak of on the walipini lately. I started building fencing for the cow, soon to be herd. HT 3 wire fence on a 6 joule Kencove unit. As soon as I get more fencing done, I may buy more cows. Initially fencing around 4 acres, then on to the 10 to 12 acre field, but only after removing trees and clutter and burning it. I also started a chicken tractor in the basement. Also hatching chicks and caring for them in the brooder in the basement.

All this while homeschooling my two boys.

I got too many irons in the fire. lol
 
Julia Winter
steward
Posts: 3718
Location: Moved from south central WI to Portland, OR
985
12
hugelkultur urban chicken food preservation bike bee
  • Mark post as helpful
  • send pies
    Number of slices to send:
    Optional 'thank-you' note:
  • Quote
  • Report post to moderator
Hey, how about burying the unwanted wood instead of burning it? You could get some nice hugelkultur beds, that hold water in the hot season. . . I also want to put in a good word for *some* trees in a pasture (cows like shade when it's hot) but I'm sure you knew that.
 
matthew sorrells
Posts: 134
Location: Canton, NC
6
  • Mark post as helpful
  • send pies
    Number of slices to send:
    Optional 'thank-you' note:
  • Quote
  • Report post to moderator

all of them are crabapple and wild cherry, both of which will either kill or injure cattle. And I'd love to do hugelkulture, but I just cant now. plus the amount that I've got is insane. probably going to be 20 10 foot piles (mashed down by trackhoe) by the time I'm done.

I agree, I'd rather not burn the nutrients, but its just one of those things where I cant really do anything else this summer.
 
Will Scoggins
Posts: 62
Location: Northeast Arkansas
1
2
  • Mark post as helpful
  • send pies
    Number of slices to send:
    Optional 'thank-you' note:
  • Quote
  • Report post to moderator
Could you leave the piles, then cover with soil whenever you are doing your next earthworks project (digging pond, ditch, swale, foundation)?
 
matthew sorrells
Posts: 134
Location: Canton, NC
6
  • Mark post as helpful
  • send pies
    Number of slices to send:
    Optional 'thank-you' note:
  • Quote
  • Report post to moderator
it'd look like a schitzophrenic indian burial ground! lol nah, I need the pasture for grass. with 43 mostly huge oaks in the backyard, enough nearly rotten wood falls in the yard yearly to build numerous ones. I've just got too much on my plate this year to do hugel.

 
matthew sorrells
Posts: 134
Location: Canton, NC
6
  • Likes 1
  • Mark post as helpful
  • send pies
    Number of slices to send:
    Optional 'thank-you' note:
  • Quote
  • Report post to moderator
Here is an update on the Walipini so far. Just got back working on it after fencing most of the summer for cows. Maybe 150 blocks to go before that part is done, then framing.


steward
Posts: 1387
Location: Northwest Montana from Zone 3a to 4b (multiple properties)
216
11
hugelkultur forest garden hunting books chicken wofati
  • Likes 1
  • Mark post as helpful
  • send pies
    Number of slices to send:
    Optional 'thank-you' note:
  • Quote
  • Report post to moderator
You are doing an awesome job here. Seriously awesome and doing it at your pace is the way to go. I bet you will all be glad when the "pit of despair" is the "walpini of food" in the near future. I sometimes forget how red that clay dirt can get down there. Big chunk of my life spent Down East, that pocosin swamp mud is black, but just up the road past New Bern it definitely went red.
 
matthew sorrells
Posts: 134
Location: Canton, NC
6
  • Mark post as helpful
  • send pies
    Number of slices to send:
    Optional 'thank-you' note:
  • Quote
  • Report post to moderator
I was playing with sketchup for the first time and tried to do a design on it for the greenhouse.

Kinda fun seeing it in these terms, when I only had a pencil drawing and my mind telling me what it would look like.

I hope this works.


ps - these guys at Ceres are great!!! Talk to Mark or Lindsey there and they will take care of you. They have no problem talking about details of your future greenhouse, and better yet, all these "off the grid" ideas (like a rocket mass heater, or walipini...) they are familiar with!!! Thanks Mark!!
http://www.ceresgs.com/#!blog/c1whn
Filename: greenhouse.skp
File size: 2 megabytes
 
matthew sorrells
Posts: 134
Location: Canton, NC
6
  • Mark post as helpful
  • send pies
    Number of slices to send:
    Optional 'thank-you' note:
  • Quote
  • Report post to moderator


Here are some pictures of the progress as of today. Got 25 block laid yesterday, so I guess thats a personal best, with another 15 or 16 today. Getting so close its almost painful to wash out the wheelbarrow, but we've got a big front of freezing temperatures coming through for the next week or so.

MAN I want to get the roof on this building so I can work inside no matter the temperature!

Any ideas on what I can put between the sill plate on top of the wall and the blocks to seal it up? I was thinking felt, but I dont know if thats really available.


note: - admins, if there is a way to put a preview of the sketchup image in the post above, I couldnt figure out how to do it. Maybe I just missed it. Thanks!
IMG_0372.JPG
IMG_0372
IMG_0372
IMG_0375.JPG
IMG_0375
IMG_0375
IMG_0377.JPG
IMG_0377
IMG_0377
 
matthew sorrells
Posts: 134
Location: Canton, NC
6
  • Mark post as helpful
  • send pies
    Number of slices to send:
    Optional 'thank-you' note:
  • Quote
  • Report post to moderator
finally figured out how to do it!!
greenhouse.jpg
greenhouse
greenhouse
 
matthew sorrells
Posts: 134
Location: Canton, NC
6
  • Mark post as helpful
  • send pies
    Number of slices to send:
    Optional 'thank-you' note:
  • Quote
  • Report post to moderator
Got the water and power run out to the greenhouse, and much of the soil piled up around it. Sill plates next, then roof!
IMG_0386.JPG
IMG_0386
IMG_0386
IMG_0384.JPG
IMG_0384
IMG_0384
 
Tim Malacarne
Posts: 226
Location: South central Illinois, USA
3
  • Mark post as helpful
  • send pies
    Number of slices to send:
    Optional 'thank-you' note:
  • Quote
  • Report post to moderator
Oh wow! Glad to see you building again. It's easy to get stalled. Got any thoughts on framing lumber? We used cedar, seems to work OK.

I guess you know not to try and compact the backfill, esp. with block, right? Let it settle at it's own rate...

Looks good, as usual, keep up the good work!

Best, TM
 
matthew sorrells
Posts: 134
Location: Canton, NC
6
  • Mark post as helpful
  • send pies
    Number of slices to send:
    Optional 'thank-you' note:
  • Quote
  • Report post to moderator
Tim, We have been compacting a little with stomping and a tamper, but no big machines up close. We're compacting at an angle to divert rainwater as well. I've had a greenhouse builder tell me that pine will work if you can get the idaho pine plus prime it and paint it twice with an outdoor paint. Cedar would quadruple the price if not more. I'd love it, but I just cant afford a 6000 dollar roof.
 
matthew sorrells
Posts: 134
Location: Canton, NC
6
  • Likes 1
  • Mark post as helpful
  • send pies
    Number of slices to send:
    Optional 'thank-you' note:
  • Quote
  • Report post to moderator
Got the roof structure up and east wall nearly complete - I am waiting on the solexx to be delivered at this point, but in this season it'll be the first or so before it gets here. I got the window for free and the door from a thrift shop for $25. I'm painting everything numerous times so no wood is exposed and caulking every gap I can find. 4 large tubes and 3 small ones so far.
1920273_965895423424438_1173022612431904086_n.jpg
1920273_965895423424438_1173022612431904086_n
10846206_969076186439695_374236582496880807_n.jpg
10846206_969076186439695_374236582496880807_n
 
matthew sorrells
Posts: 134
Location: Canton, NC
6
  • Likes 2
  • Mark post as helpful
  • send pies
    Number of slices to send:
    Optional 'thank-you' note:
  • Quote
  • Report post to moderator
Got a video update recorded today .


youtube
 
It means our mission is in jeapordy! Quick, read this tiny ad!
GAMCOD 2025: 200 square feet; Zero degrees F or colder; calories cheap and easy
https://permies.com/wiki/270034/GAMCOD-square-feet-degrees-colder
reply
    Bookmark Topic Watch Topic
  • New Topic