To complete this BB, the minimum requirements are:
- set up a solar water pump (combo w plumbing badge)
o no battery
o direct solar panel to pump
o minimum of 5 gallons per minute in full sun
o air lift technique is acceptable/preferred
you must provide pictures or video showing:
- the area where the pump and panel will be installed
- the pump and panel before you install/assemble them
- in-progress installation
- the completed installation
- water coming out of the pipe
- description of the materials and process, including how 5gpm was measured
1 point for a temporary test - something that can be put away after the BB is complete
2.5 points for a permanent installation
- at least 10 feet of head
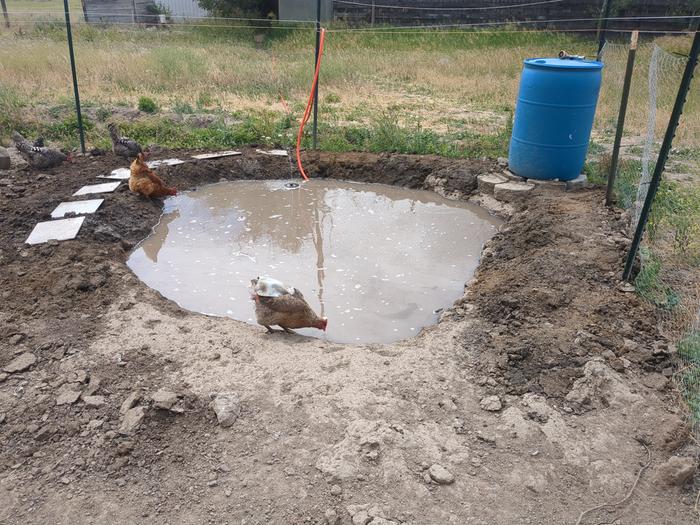
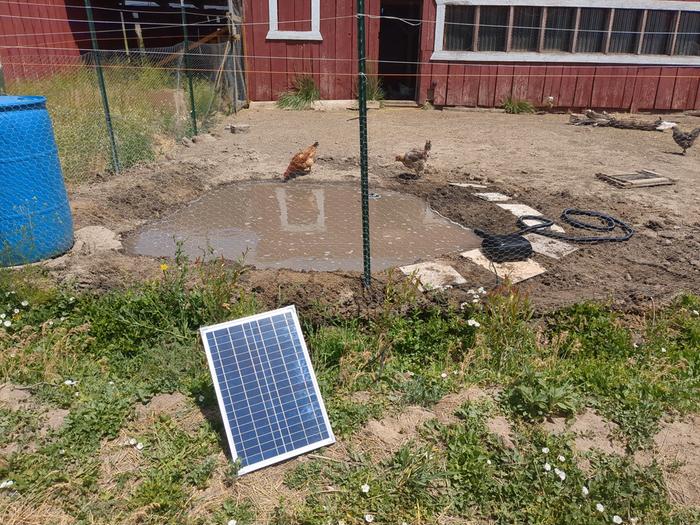
This is a temporary test for a pond that I am building.
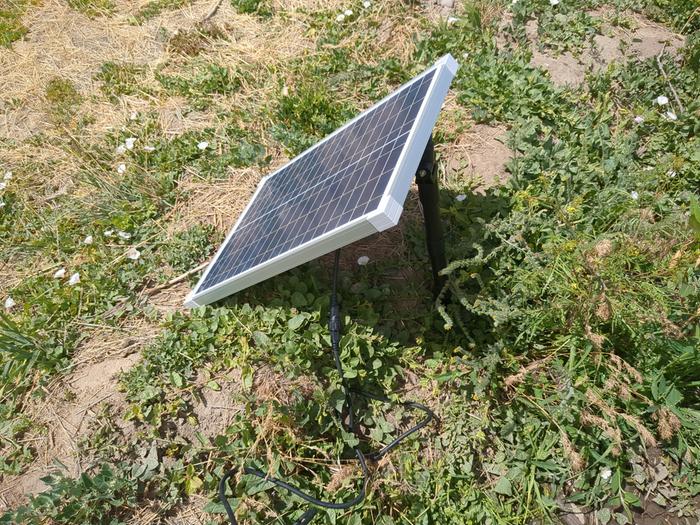
- the area where the pump and panel will be installed
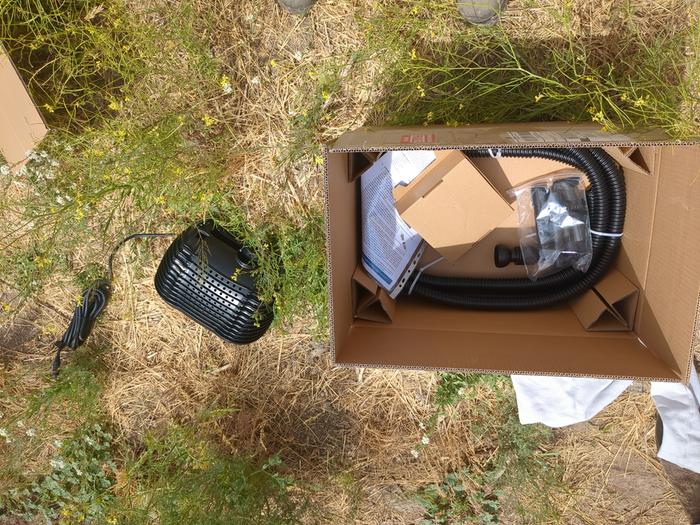
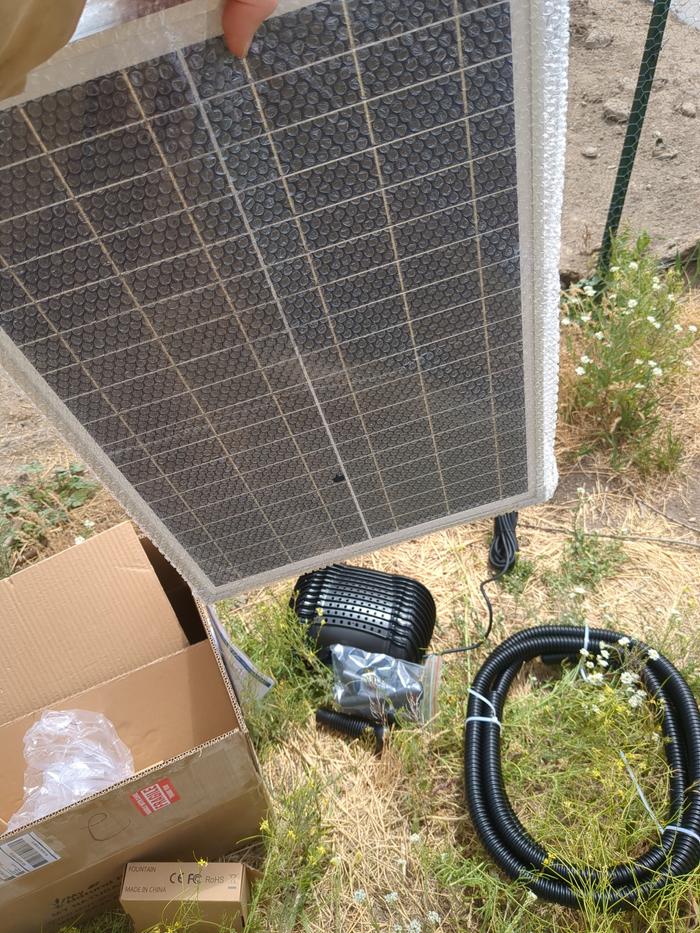
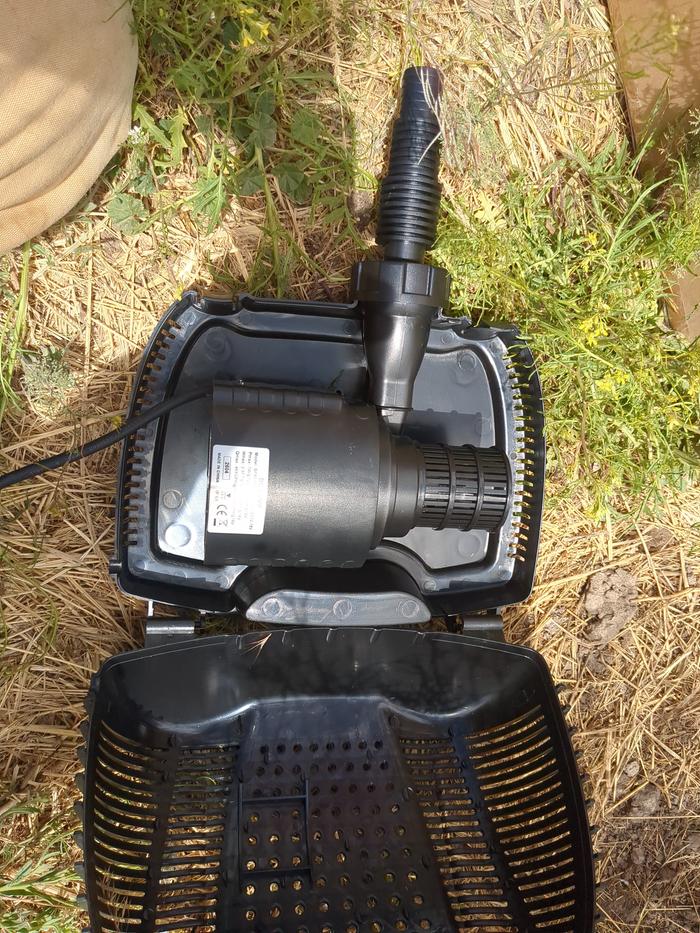
- the pump and panel before you install/assemble them
- in-progress installation
- description of the materials and process, including how 5gpm was measured
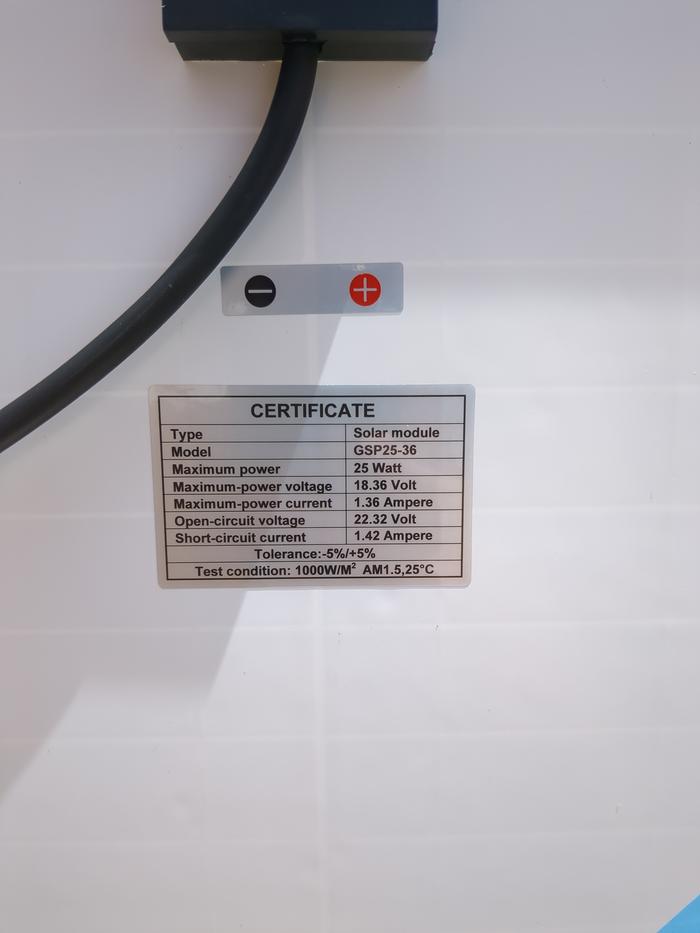
I used a 25W submersible solar-powered pond pump (
this one specifically). I pulled it out of the box, assembled it, and stuck it in the pond. I set the solar panel up on the ground facing south. I had the output hose going into a 5 gallon bucket and took a video of the water filling up the bucket and it took about 45 seconds to fill it (so under a minute).
- the completed installation and water coming out of the pipe (see video)