• Post Reply Bookmark Topic Watch Topic
  • New Topic
permaculture forums growies critters building homesteading energy monies kitchen purity ungarbage community wilderness fiber arts art permaculture artisans regional education skip experiences global resources cider press projects digital market permies.com pie forums private forums all forums
this forum made possible by our volunteer staff, including ...
master stewards:
  • Nancy Reading
  • Carla Burke
  • r ranson
  • John F Dean
  • paul wheaton
  • Pearl Sutton
stewards:
  • Jay Angler
  • Liv Smith
  • Leigh Tate
master gardeners:
  • Christopher Weeks
  • Timothy Norton
gardeners:
  • thomas rubino
  • Jeremy VanGelder
  • Maieshe Ljin

How to get keyhole gardens to fit my rectangular veggie patch?


Posts: 32
  • Mark post as helpful
  • send pies
    Number of slices to send:
    Optional 'thank-you' note:
  • Quote
  • Report post to moderator
Yeah, sounds like a dumb question but I'm very serious.
But my veggie patch is about 25' x 50'. Has always been planted in rows. I've been reading the benefits of keyholes. I just can't get my mind to wrap around this one. Either they are going to be HUGE keyholes with quite a bit of inaccesable space in the backs of the beds, or... I'd be making an incredibly intricate pattern of connected keyholes which would take much more time to plan than boring old rows.
Any ideas appreciated!
 
steward
Posts: 3999
Location: Wellington, New Zealand. Temperate, coastal, sandy, windy,
115
  • Mark post as helpful
  • send pies
    Number of slices to send:
    Optional 'thank-you' note:
  • Quote
  • Report post to moderator
I've struggled with this one! My space is small and rectilinear and I've decided to embrace the straight boundary lines rather than fighting them. Everyone's siuation is different and many of the more 'iconic' permaculture things like circles/spirals, animals and loads of other things just don't work for me.
I've read all the stuff about creating maximum surface area etc, but by far the most practial solution is for me to use straight timber that's lying around, making straight beds. Some have kind of keyholes, more 'crenulations' I suppose.
I initially made the paths way too narrow as it was all about maximum growing space. Bad, bad idea when it comes to handling a wheelbarrow or moving big things around. Whenever I fiddle with garden layout, I widen them.
 
Posts: 18
Location: New York State about 25 miles south of Syracuse.
  • Mark post as helpful
  • send pies
    Number of slices to send:
    Optional 'thank-you' note:
  • Quote
  • Report post to moderator
I think Eliot Coleman has the right idea when he plants very intense 30" wide rows with 1' walking paths between them. He also plants things like onions in bunches because they will make the space they need for themselves. Check out what he is doing, I think he has it right.
 
Posts: 103
  • Mark post as helpful
  • send pies
    Number of slices to send:
    Optional 'thank-you' note:
  • Quote
  • Report post to moderator
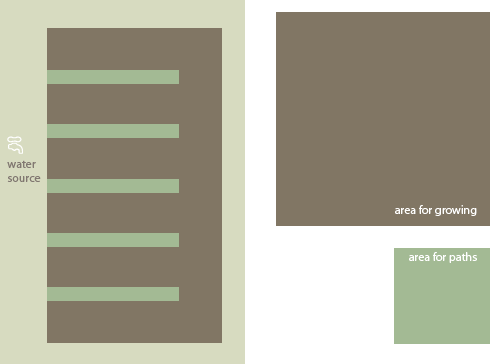
There's three options here that I can think of. The first would entail splitting your whole garden plot in half with a new path, 25ft in, and then turning the two opposing ends of the garden into new beds parallel with the new path. So for example, the path/bed design in this image will be one side of the garden, with 25 foot paths to the end, and the other side will be an exact mirror image:


Another option is to just take the existing beds and do equidistant keyholes every so often. They don't have to be deep, only 1 or 2 feet to provide easy access, but depending on how you do it in relation to the existing beds, this way could actually end up decreasing your overall surface area, unless you shift the existing beds or make them wider than they already area. This method would require a fair amount of work to make happen.

The third option is to not use keyholes, but to plant in wavy rows as opposed to straight rows. As has been demonstrated in many a permaculture book, wavy rows provide more plants in the same area as straight rows. I can't find an image to demonstrate this, but if you take a piece of paper and draw a straight line 10 inches long with x's every inch apart on the line, and then draw curvy line 10 inches long with x's every inch on the line, there's going to be more x's on the wavy line than the straight line, allowing you to grow more food in a smaller space. This is essentially the same benefit as keyhole beds so if this sounds easier for your set up, it may be something worth trying.
 
Posts: 153
Location: Davie, Fl
1
  • Likes 1
  • Mark post as helpful
  • send pies
    Number of slices to send:
    Optional 'thank-you' note:
  • Quote
  • Report post to moderator
Here is a photo of the keyholes we use on the farm. This is part of our showcase area. You can see our two herb spirals in the background too. It works great and helps to educate folks how to set up there home gardens. The fencing is for trellising crops. Sorry for the photo, it seems that this is the only one I have that shows the paths clearly. This photo was shortly after we first created it.

The keyhole beds are 4ft wide and the paths are 18 inches. The part across from the paths is 5ft. This allows us (including shorter folks) to harvest from every direction.


As far as commercially producing, we use 200ft bio-intensive sheet mulch beds that are about 4ft wide and 3 feet high. We have 18-24inch foot path. Every 10 feet we change crops.
 
pollinator
Posts: 11853
Location: Central Texas USA Latitude 30 Zone 8
1261
cat forest garden fish trees chicken fiber arts wood heat greening the desert
  • Likes 1
  • Mark post as helpful
  • send pies
    Number of slices to send:
    Optional 'thank-you' note:
  • Quote
  • Report post to moderator
That photo is very helpful to show how to fit keyholes into a rectangular space.

 
Posts: 40
Location: St. Paul, MN, USA
1
  • Mark post as helpful
  • send pies
    Number of slices to send:
    Optional 'thank-you' note:
  • Quote
  • Report post to moderator
Those keyhole beds look a lot like regular raised beds... I thought the point was to create more "edge" so you can have the forest edge effect? We were trying to make ours include tall elements so there is shade around the edge of the keyhole and kind of the sun trap thing in the center. Is the idea just to have a bed with a path down the center instead of around a square or row?

They look nice but I don't see how they are different than a normal square/rectangle raised bed with a path around instead of down the center. I pictured keyholes as having tall rear ends and increasingly shorter plantings as you move toward the light source on the open end. Is that how those beds look when the trellis/plantings are at peak size?
 
Tyler Ludens
pollinator
Posts: 11853
Location: Central Texas USA Latitude 30 Zone 8
1261
cat forest garden fish trees chicken fiber arts wood heat greening the desert
  • Mark post as helpful
  • send pies
    Number of slices to send:
    Optional 'thank-you' note:
  • Quote
  • Report post to moderator
The main idea of the keyhole shape is to use the least amount of space for paths. There's no rule says you have to plant them a certain way. You can plant them however you want.

 
Jason Long
Posts: 153
Location: Davie, Fl
1
  • Mark post as helpful
  • send pies
    Number of slices to send:
    Optional 'thank-you' note:
  • Quote
  • Report post to moderator

Kelly Rued wrote:I pictured keyholes as having tall rear ends and increasingly shorter plantings as you move toward the light source on the open end. Is that how those beds look when the trellis/plantings are at peak size?

Yes and no; it completely depends on the micro-climates you are trying to create. With a design like this you can create different micro-climates in every bed, or you can repeat them to gain more production and ease of harvesting.

These are rounded keyholes, the picture doesn't do that justice. They definitely do not have as much edge as other areas of our property but they have enough edge.

Here in South Florida, creating strong sun traps is not the greatest idea. We have very hot summer days that would fry a lot of our plants. In the winter time, a sun trap can become beneficial as the nights get cold. The greatest part about permaculture is that every designer has a different idea.

These keyholes may look like regular raised beds, but to me, they look like a bunch of keyholes connected together.

Tyler Ludens wrote:The main idea of the keyhole shape is to use the least amount of space for paths. There's no rule says you have to plant them a certain way. You can plant them however you want.


Exactly, just follow basic principles. Different regions are going to have different results
 
pollinator
Posts: 4437
Location: North Central Michigan
43
  • Mark post as helpful
  • send pies
    Number of slices to send:
    Optional 'thank-you' note:
  • Quote
  • Report post to moderator
i have a lot of ROUND beds in my large rectangular food forest garden area..I have berry and nut and wild plum hedges on three of the 4 sides and asparagus / fruit tree on the east..and circular beds around fruit trees in the center gardens..plus some odd shape beds between the circles..

it doesn't make the BEST use of the area but that is what I had planted at first was the fruit trees with circular beds..so I went with it that way..and I like it..I have lawn paths and edged beds but am still fighting pulling quack grass..or crab or whatever the heck it is..have it out of most beds but a few are still infested
 
pollinator
Posts: 181
Location: Omaha, NE
17
3
  • Mark post as helpful
  • send pies
    Number of slices to send:
    Optional 'thank-you' note:
  • Quote
  • Report post to moderator
When planning keyholes for a large bed, I like to alternate sides so that one sinuous bed is created (without branches) that can be watered with a single soaker hose. That greatly simplifies your irrigation infrastructure and allows you to use the cheap recycled-rubber soaker hoses that work fine with very low water pressure. Putting the paths on contour can also be a lazy way to create bioswales without extra digging.

I spend a lot of time doodling keyhole designs for various shapes of beds during boring meetings, etc., and I developed the following methodology for large areas that are accessible all around the outside:
1. Determine your standard reach. Most designs use a reach of 24" which results in 48" wide beds, but if your clients include children, etc. the reach may be different.
2. Find the least accessible point in the bed, usually the middle.
3. Find the point in the perimeter closest to the least accessible point.
4. The first path goes from this point in the perimeter, through the least accessible point, continuing to 48" (2*reach) from the other edge.
5. Starting from the opposite side of the bed, make the second and third paths 48" (2* reach) from the first path. Continue working out from the middle until the whole bed is accessible.

If there's another methodology that results in less path area than this one, I'd love to hear it!
 
Posts: 415
Location: Georgia
17
  • Mark post as helpful
  • send pies
    Number of slices to send:
    Optional 'thank-you' note:
  • Quote
  • Report post to moderator

Ben Stallings wrote:When planning keyholes for a large bed, I like to alternate sides so that one sinuous bed is created (without branches) that can be watered with a single soaker hose. That greatly simplifies your irrigation infrastructure and allows you to use the cheap recycled-rubber soaker hoses that work fine with very low water pressure. Putting the paths on contour can also be a lazy way to create bioswales without extra digging.

I spend a lot of time doodling keyhole designs for various shapes of beds during boring meetings, etc., and I developed the following methodology for large areas that are accessible all around the outside:
1. Determine your standard reach. Most designs use a reach of 24" which results in 48" wide beds, but if your clients include children, etc. the reach may be different.
2. Find the least accessible point in the bed, usually the middle.
3. Find the point in the perimeter closest to the least accessible point.
4. The first path goes from this point in the perimeter, through the least accessible point, continuing to 48" (2*reach) from the other edge.
5. Starting from the opposite side of the bed, make the second and third paths 48" (2* reach) from the first path. Continue working out from the middle until the whole bed is accessible.

If there's another methodology that results in less path area than this one, I'd love to hear it!


The measurements of Emelia Hazelip/Synergistic Gardening are: beds, 4 feet in width, 10" to 30" height and 20" wide paths. Keep that in mind and bend a shape them to
your best advantage and you will not come out bad. You will see the path narrow as plants mature but still be able to get around. I keep my beds mulched with wheat
straw and my paths mulched with pine straw. The pine straw allows me to move around in the garden right after a rain if I want to. It is very clean.
 
Kelly Rued
Posts: 40
Location: St. Paul, MN, USA
1
  • Mark post as helpful
  • send pies
    Number of slices to send:
    Optional 'thank-you' note:
  • Quote
  • Report post to moderator
Thanks for extra design info on keyhole beds. I was confused about what made a bed a "keyhole" design since I see some them in many shapes and varying degrees of roundness. Sometimes they have tall rear layers (like trees and shrubs) but usually they are knee-high or lower plantings and look a lot like normal raised beds with straight paths between them (though the paths may not go all the way through, creating that "E" shape).

From this thread it sounds like it's really all about the paths/access and maximizing the planting area.

I think we already built this kind of thing into our design but using patio pavers as stepping stones for access in deep beds. Not a good solution for wheelbarrows or carting in a lot of annual seedlings, but for no till perennial beds I think it will let us plant more space around/between the pavers.
 
Alex Ames
Posts: 415
Location: Georgia
17
  • Mark post as helpful
  • send pies
    Number of slices to send:
    Optional 'thank-you' note:
  • Quote
  • Report post to moderator
Use of edge incorporating a small herb spiral into a flower bed which weaves it's way across my back yard.
I have tried to attach a photo but not sure if it took.
IMG_1519.JPG
[Thumbnail for IMG_1519.JPG]
edge
 
Alex Ames
Posts: 415
Location: Georgia
17
  • Mark post as helpful
  • send pies
    Number of slices to send:
    Optional 'thank-you' note:
  • Quote
  • Report post to moderator

Alex Ames wrote:Use of edge incorporating a small herb spiral into a flower bed which weaves it's way across my back yard.
I have tried to attach a photo but not sure if it took.


Well I am getting the pictures but not the correct pictures. This shows a small herb spiral that contains thyme, oregano,
rosemary, onion chives and garlic chives. It also has a very popular bird bath.
IMG_1518.JPG
[Thumbnail for IMG_1518.JPG]
 
Posts: 31
Location: Brentwood, Tennessee, USA
7
  • Mark post as helpful
  • send pies
    Number of slices to send:
    Optional 'thank-you' note:
  • Quote
  • Report post to moderator
Here is what I did in my garden spot. It is a rectangular area at the bottom of a slope where the previous owner planted an orchard.
IMG_0139.JPG
[Thumbnail for IMG_0139.JPG]
IMG_0140.JPG
[Thumbnail for IMG_0140.JPG]
IMG_0141.JPG
[Thumbnail for IMG_0141.JPG]
 
Posts: 57
Location: Ottawa, Canada
10
  • Mark post as helpful
  • send pies
    Number of slices to send:
    Optional 'thank-you' note:
  • Quote
  • Report post to moderator
In Gaia's Garden Toby talks about a keyhole design based on the veins of a leaf. The main branch is a path in the middle to the center of the garden, wide enough to get a wheelbarrow through, then that branches off into smaller paths wide enough for a person to work, but too small for the wheelbarrow. These in turn also branch off into smaller paths.

I could see this being easily adapted to a rectangular space.


Posts: 4
Location: Texas Hill Country
  • Mark post as helpful
  • send pies
    Number of slices to send:
    Optional 'thank-you' note:
  • Quote
  • Report post to moderator
This might be an old subject but for those using the search button (like me) for 'keyhole gardens' here is my response.

If you are interested in using your kitchen scrapes to feed and water your garden beds, then the plants can not be any further than 3 foot away from that basket. This is the main component to make a keyhole garden work. So if you don't want to change the whole layout of your beds, then I would say dig out as many basket areas as needed and place the chicken wire in them. Fill these with your kitchen scrapes, your friends and neighbors and if have to a restaurant too in order to feed/water the garden.
 
Cory Arsenault
Posts: 57
Location: Ottawa, Canada
10
  • Mark post as helpful
  • send pies
    Number of slices to send:
    Optional 'thank-you' note:
  • Quote
  • Report post to moderator
Dar,

Keep in mind that are be two types of keyhole gardens. The kind you're describing seem to be the African-style ones that have a compost area in the middle where you can place food scraps, plant cuttings and water. They also tend to be quite high; 3-4 foot raised beds. Then there are the regular keyhole garden which is really just a rectangular garden bent into a circle shape with a path into the center (where the compost area would be in an Africa-style one).

 
Enjoy the full beauty of the english language. Embedded in this tiny ad:
Back the BEL - Invest in the Permaculture Bootcamp
https://permies.com/w/bel-fundraiser
reply
    Bookmark Topic Watch Topic
  • New Topic