• Post Reply Bookmark Topic Watch Topic
  • New Topic
permaculture forums growies critters building homesteading energy monies kitchen purity ungarbage community wilderness fiber arts art permaculture artisans regional education skip experiences global resources cider press projects digital market permies.com pie forums private forums all forums
this forum made possible by our volunteer staff, including ...
master stewards:
  • Nancy Reading
  • Carla Burke
  • r ranson
  • John F Dean
  • paul wheaton
  • Pearl Sutton
stewards:
  • Jay Angler
  • Liv Smith
  • Leigh Tate
master gardeners:
  • Christopher Weeks
  • Timothy Norton
gardeners:
  • thomas rubino
  • Jeremy VanGelder
  • Maieshe Ljin

Looking for input on a batch box rocket stove for use in heating water for radiant floor

 
Posts: 46
Location: Kentucky
22
6
forest garden foraging cooking food preservation medical herbs rocket stoves wood heat homestead
  • Likes 2
  • Mark post as helpful
  • send pies
    Number of slices to send:
    Optional 'thank-you' note:
  • Quote
  • Report post to moderator
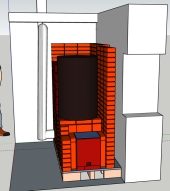
Dimensions are based upon Peter van den Berg's   5” base dimensions. Used a P-channel dropping down to just below the opening of the port, fabricated from two 1” square tubes coming in from the sides feeding a 1” X 2” (inside is 7/8 x 1 7/8”) rectangular tube with a cut back facing the riser, just below the top of the port. Slight modification of the port, keeping the same dimensions, but raising it up one inch off floor, creating a small threshold before the heat riser.

This attempt being made with used firebrick (mostly pieces), some new firebrick full size, and a few half high for the combustion chamber and lower part of the riser. Red clay brick (mods, so they are slightly smaller than the firebrick, necessitating some finagling) for the riser. Using a broken kiln shelf as a door. Floor of combustion chamber is flat for now, but will cut bricks or mold refractory mix for floor that angles from sides towards the center, once design is set.

I am at the testing stage of dry stack bricks. It will smoke a bit when first lit, but a draft is established fairly easily with the door open. Restart from coals is very quick. Keeping wood not too densely packed and not too close to the door or blocking the port. Once the wood is fully involved and the bricks heat up, closing the door down to about 4-5 sq in primary air, coming in below the door, I'm getting heat without smoke & a very mild roar, flames a short way into the riser. But only got up to max 530 deg F checking the inside temp of the top brick of the riser. I was hoping to get to a higher temp!

Taking the lid off the combustion chamber to inspect, the bricks forming the port and the combustion chamber are clean except in the top corners. There is also some soot on the inside top 1/3 of the door and part of the first brick of the roof. There is no soot inside the bottom about 1/4 of the heat riser, but some soot inside the rest of the heat riser. Remainder of the fire is mostly ash.

The port had been raised in an earlier trial and error of a floor channel/pre port tube that didn't seem to make a difference, and I wanted to lower it in the port without cutting, so I raised the port, without effect. Removed the floor channel, went to the earlier style P-channel.  Do I need to pull the stove apart and bring the port back down to the floor?

There are lots of cracks between bricks I have not yet sealed with clay slip. I intend to cover it with a clay/perlite mix for insulation. Will that bring the temperature up to expected range? Is the riser sucking air between the bricks and cooling the air?

I don't have testers, just the temp gun, so I'm going by exhaust color, sound, flame, and color of bricks  inside the stove after the burn.

Just found my pyrometer, what placement would give me usable info?

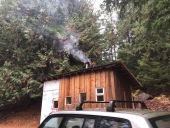
Intending this for use outside, to heat a water heater tank within a surround of an insulated 50 gallon drum, exhaust running between the tanks. Water heater tank will be topless or vented to atmosphere, so no boom squish. Water will be run continuously via circulating pump to second larger mixing tank and back. (thermosiphoning from tank to tank impractical due to height of the riser) This mixing tank will be insulated and also open to atmosphere. (Using mixing tank vs mixing valve, as it acted weird in the prior iteration of the system, when we had the old style wood boiler.) The tank serves water to a manifold in the house supplying hot water to a radiant floor with two zones of PEX tubing (max 140 degrees F) via another circulating pump. This water only goes to the hydronic system, so no Legionella concern. The intention is to fill the batch box a few times a day, depending on the temperature outside (central Kentucky), to keep the water warm. The water heating system replaces an old Kentucky wood gobbler type outdoor wood boiler that is too corroded now to repair. We also run a Fisher stove, retrofit with a heat riser in a bell that serves as a primary heat source, but need heat going to the radiant floor of the kitchen and downstairs in the main part of the house/shop.

Am I way off base in application?

Suggestions for optimization? Or is it doing ok, but my expectations are too high?
batchbox.jpg
batch box with riser dry stacked
bb-p-tube-position.jpg
batch box showing position of p-channel
bb-P-tube.jpg
batch box inside showing position of port and lower end of p-channel
bb-primary-air.jpg
batch box front showing primary air intake under door
bb-inside-riser.jpg
batch box looking down inside of riser
 
Rocket Scientist
Posts: 1809
Location: Kaslo, BC
525
building solar woodworking rocket stoves wood heat greening the desert
  • Likes 3
  • Mark post as helpful
  • send pies
    Number of slices to send:
    Optional 'thank-you' note:
  • Quote
  • Report post to moderator
Hi Joan,  

Lots of things to consider with your build. Here are some suggestions.

1) I see 3 great reasons why the floor channel is better than the original P-channel. The secondary air positioned on the floor of the firebox makes it easier to replace, the stub acts as way to prevent wood from clogging up the port and also to help super heat the secondary air.

2) The small threshold just before the port modification you made. Was that to help keep ash from getting into the port? I know small modifications like this might not seem important but if the cross sectional area of the port gets changed in this way, it will probably affect the quality of the burn.

3) The high mass heat riser will work but it would be better if you could make it from insulated materials. Insulated firebrick, perlite/clay or ceramic fibre board or blanket.

4) The angled floor bricks in the burn chamber are Peters way to help direct the coals to the centre to help them to combust more completely with a single burn. With multiple consecutive burns however, they loose a lot of their function and actually make it a bit harder to clean out the ash. So depending on your burning style will determine whether they are needed or not.

5) Looking at your photo down your heat riser, I see black soot on the bricks. They should be totally clean from top to bottom, indicating that you are achieving the higher temps that should be in the riser. The density of the bricks is part of you problem I would assume. All can be solved from #3

6) All those cracks not yet filled will definitely affect the performance of your stove.

7) Your IR gun or pyrometer as I think you are referring to it. Not sure what you mean by "placement"?

 
Joan Candalino
Posts: 46
Location: Kentucky
22
6
forest garden foraging cooking food preservation medical herbs rocket stoves wood heat homestead
  • Likes 1
  • Mark post as helpful
  • send pies
    Number of slices to send:
    Optional 'thank-you' note:
  • Quote
  • Report post to moderator
Thanks for such a quick response!

"1) I see 3 great reasons why the floor channel is better than the original P-channel. The secondary air positioned on the floor of the firebox makes it easier to replace, the stub acts as way to prevent wood from clogging up the port and also to help super heat the secondary air. "
We tried a floor channel first, dimensioned like that in PVDB batchrocket.eu build, but missing the info on how high to make the vertical bit and how close to the port it should be for a 5" system. I ran the stove twice in this configuration, with various distances from the port. Then tried to lower the height of the air output in the port by raising the port (same dimensions, just higher). I could feel no sense of air movement into the channel, and it did not seem to change the cleanliness of the burn in any configuration.
So, we tried the original P-channel.
We can go back to the floor channel if we need to.

"2) The small threshold just before the port modification you made. Was that to help keep ash from getting into the port? I know small modifications like this might not seem important but if the cross sectional area of the port gets changed in this way, it will probably affect the quality of the burn."
The reason for the threshold was as above. Trying to only change one thing at a time. The cross sectional area of the port is the same, just raised 1". Part of the question is if raising it up does make any difference.

"3) The high mass heat riser will work but it would be better if you could make it from insulated materials. Insulated firebrick, perlite/clay or ceramic fibre board or blanket. "
No doubt. Was trying to use what I had on hand. Insulated firebrick is very expensive and can only get the hard firebrick locally. Was thinking to insulate around the central brick riser if I decide this is the right configuration. Or i might mold one out of an insulating refractory mix.

"4) The angled floor bricks in the burn chamber are Peters way to help direct the coals to the centre to help them to combust more completely with a single burn. With multiple consecutive burns however, they loose a lot of their function and actually make it a bit harder to clean out the ash. So depending on your burning style will determine whether they are needed or not. "
So I may just leave it flat for ease of cleanout. Thanks

"5) Looking at your photo down your heat riser, I see black soot on the bricks. They should be totally clean from top to bottom, indicating that you are achieving the higher temps that should be in the riser. The density of the bricks is part of you problem I would assume. All can be solved from #3 "
I agree, I am not achieving the temps I want. The bottom part up to about the height of the combustion chamber is clean, but the rest is sooted up. So the clay bricks are serving as mass but not insulation, and would need to be insulated around or replaced with a different riser.

"6) All those cracks not yet filled will definitely affect the performance of your stove."
Quite a bit, apparently. Ok, thanks, I know that will need to be changed.

"7) Your IR gun or pyrometer as I think you are referring to it. Not sure what you mean by "placement"? "
Had used a hand held cheap temperature gun to check temp of inside of top bricks in the riser. But I just found my pyrometer, and can place the thermocouple within the system wherever it seems it would give us meaningful information.

Not arguing! Trying to understand and discuss to see where to go next.


[not sure how to use the "quote" function]


Joan Candalino
Posts: 46
Location: Kentucky
22
6
forest garden foraging cooking food preservation medical herbs rocket stoves wood heat homestead
  • Mark post as helpful
  • send pies
    Number of slices to send:
    Optional 'thank-you' note:
  • Quote
  • Report post to moderator
So my current thinking is to replace the brick riser with a cast clay/perlite one that will fire (harden, anyway, even if not vitrified) through use.
I have scrap clay from the pottery studio that fires at cone 6 to mix with the perlite.
ID will be 5".
10" or 12" OD?
Should this bring riser temps to where they should be?

If I go back to using a floor channel, what height should the stub be in relationship to the port size (one brick high)? And how far away from the port?

Should I bring the port back down to the floor?

 
Gerry Parent
Rocket Scientist
Posts: 1809
Location: Kaslo, BC
525
building solar woodworking rocket stoves wood heat greening the desert
  • Mark post as helpful
  • send pies
    Number of slices to send:
    Optional 'thank-you' note:
  • Quote
  • Report post to moderator
To quote the person you want to address, just click the "quote" button. This will bring up a reply window with everything (words, links, pictures etc) in that post.
If you only want a part of the information, just delete what is not wanted, just be sure to keep the computer code "[quote  /quote]" there. Use the "preview" button to verify how your post will look before submitting.

Peter talks about where to introduce secondary air on his site using his floor channel: "The air flow is optimized in such a way that the top half of the port receives the majority of the secondary air stream."
He also gives a sketchup link here: floor channel sketchup file
You can use the online sketchup program at sketchup.com if you don't have it installed on your computer. A very useful tool.
From memory, distance from the port to the end of the floor channel is roughly 1.5"
You certainly don't have to bring it down to the floor, but for the reasons I mentioned earlier, it would be beneficial.

As a rocket scientist, every spot you put your thermometer can give you useful information. I don't know what yours is rated to, but assume its not high enough to give any burn chamber temps.
Helpful spots to know temps are if you are close to a combustible wall, or what the bench temp is under a blanket after sitting overnight at a glance, whether more mass could be added to increase your thermal battery heat time...etc.
Getting to know what your average exhaust temps are can be helpful in determining efficiencies. A candy thermometer inserted somewhere at head level in the vertical stack is a good place to put one.

A 10" OD which will give you 2.5" riser thickness should do nicely for your perlite/clay riser. It will definitely be much better than any high mass riser.
 
Joan Candalino
Posts: 46
Location: Kentucky
22
6
forest garden foraging cooking food preservation medical herbs rocket stoves wood heat homestead
  • Mark post as helpful
  • send pies
    Number of slices to send:
    Optional 'thank-you' note:
  • Quote
  • Report post to moderator
Will have to check out the online sketchup program. Haven't been able to pull in skp files.
Have seen what's on batchrocket.eu - Designs. Didn't find a measure for optimum height of stub. Are you saying that the top of the stub goes half way up the port?

Distance from the end of the floor channel to the port at 1.5"? I was trying it at about 1", so perhaps not optimum. Combustion chamber was cleaner after a burn with the p-channel than the floor channel, but optimizing the floor channel distance to the port and height of the stub might prove better yet, if I can know what those dimensions are.

My Pyrometer is rated for 2500 deg F.  (I am a potter)

Will try the perlite/clay riser.
 
Gerry Parent
Rocket Scientist
Posts: 1809
Location: Kaslo, BC
525
building solar woodworking rocket stoves wood heat greening the desert
  • Likes 1
  • Mark post as helpful
  • send pies
    Number of slices to send:
    Optional 'thank-you' note:
  • Quote
  • Report post to moderator
In the sketchup file, Peters floor channel stub measures 4 3/4" tall. The angled wing helps to direct the hot air into the top half of the port. I don't think its a super important figure to get exactly right just as long as its close. I think its the same for the distance away from the port - Enough room for air to flow freely around the stub but not too close to cause a restriction.
If Peter knows otherwise, I'm sure he'll chime in with corrections to my madness.


Joan Candalino
Posts: 46
Location: Kentucky
22
6
forest garden foraging cooking food preservation medical herbs rocket stoves wood heat homestead
  • Likes 1
  • Mark post as helpful
  • send pies
    Number of slices to send:
    Optional 'thank-you' note:
  • Quote
  • Report post to moderator
I replaced the brick heat riser with a cast clay/perlite one (molded in a peep hole for the thermocouple of the pyrometer, wrapped the casting with metal to protect it),
brought the port opening back down to the floor,
used a clay slip to stick everything together,
found a kiln shelf for the roof of the combustion chamber (height and fit issues made it better than using bricks in trying to solidly seat the riser, but concerned it might crack),
removed the P-tube and went back to a floor channel with a stub 1/2 the height of the port, for secondary air but increased the csa.

Smokes like crazy upon first lighting.
But, after wood is fully involved leaving the door open, when I shut the door and bring the primary air down to about 4 sq in, exhaust is clear and flame runs about half way up the riser, with a rams head shape and secondary air then seems to draw.
Using ideal dry sticks, cedar, and some dry oak, I can get the temp at the top of the riser to 1000 deg F. Then it cruises around 500.

Need to burn the paint off the top of the metal surround for the riser, and insulate the combustion chamber and lower section of heat riser (especially the roof of the combustion chamber, as the kiln shelf is refractory but not insulative)

Next step is forming a box around the combustion chamber to fill with either perlite or ash, for insulation. Come summer I can replace this with foam crete, if all works well. Or coat the inside with ITC100, if we find some extra cash.

Will post picture as soon as I figure out this new phone.


Joan Candalino
Posts: 46
Location: Kentucky
22
6
forest garden foraging cooking food preservation medical herbs rocket stoves wood heat homestead
  • Likes 1
  • Mark post as helpful
  • send pies
    Number of slices to send:
    Optional 'thank-you' note:
  • Quote
  • Report post to moderator
Latest update - built a surround for the combustion chamber, filled it with ash for insulation. Outside temp of box while firing is ambient.

Frame made to support tank above. Heat goes between that filled tank and another cylinder inside a tank and a half 55 gallon drum, perlite between the last two, except some kaowool wrapped at top. Like a giant insulated pot skirt. Half drum on top of 55 gallon drum has hole for 8" stovepipe.

Water filled tank has a loose fitting lid, so not pressurized. Water is pumped to a second larger mixing tank via circulation pump. Water circulates from that mixing tank to the house zones and back via a second circulation pump.

Built in a peep hole for the thermocouple to the pyrometer, a few inches below the top of the insulated heat riser.  Protected the access with a pipe wrapped with kaowool.

So far not getting a huge temp increase in water going to the house, but I'm hoping once we slowly get the temp up to where we want it, it will be easier to keep it there with less frequent firings.

Max temp so far 1700 deg F, with ideal wood.  Cruises around 1300.

Fairly quickly establishes a draw. Smokes a little at first. Once fully involved and the door shut down to small primary air and the opening of the secondary air, getting a nice gentle roar, clean exhaust, and flames up to the peep hole. Inside of the combustion chamber is clean of soot after a burn.
rs-tanks.jpg
setup
setup
rs-box.jpg
rocket stove in surround
rs-clean-inside.jpg
clean inside the combustion chamber after a burn
 
Joan Candalino
Posts: 46
Location: Kentucky
22
6
forest garden foraging cooking food preservation medical herbs rocket stoves wood heat homestead
  • Mark post as helpful
  • send pies
    Number of slices to send:
    Optional 'thank-you' note:
  • Quote
  • Report post to moderator
Would have liked to see the temp of water rise faster.

Did I guess at too large a gap between top of riser and water tank? The bottom of the water tank is curved inward, so higher in the middle. See pix
rs-tank-inside.jpg
[Thumbnail for rs-tank-inside.jpg]
rs-tank-in-tank.jpg
[Thumbnail for rs-tank-in-tank.jpg]
 
Replace the word "snake" with "danger noodle" in all tiny ads.
rocket mass heater risers: materials and design eBook
https://permies.com/w/risers-ebook
reply
    Bookmark Topic Watch Topic
  • New Topic