• Post Reply Bookmark Topic Watch Topic
  • New Topic
permaculture forums growies critters building homesteading energy monies kitchen purity ungarbage community wilderness fiber arts art permaculture artisans regional education skip experiences global resources cider press projects digital market permies.com pie forums private forums all forums
this forum made possible by our volunteer staff, including ...
master stewards:
  • Nancy Reading
  • Carla Burke
  • r ranson
  • John F Dean
  • paul wheaton
  • Pearl Sutton
stewards:
  • Jay Angler
  • Liv Smith
  • Leigh Tate
master gardeners:
  • Christopher Weeks
  • Timothy Norton
gardeners:
  • thomas rubino
  • Jeremy VanGelder
  • Maieshe Ljin

Time to Panic, Help!

 
Posts: 17
Location: Pagosa Springs, CO Usa
  • Likes 1
  • Mark post as helpful
  • send pies
    Number of slices to send:
    Optional 'thank-you' note:
  • Quote
  • Report post to moderator
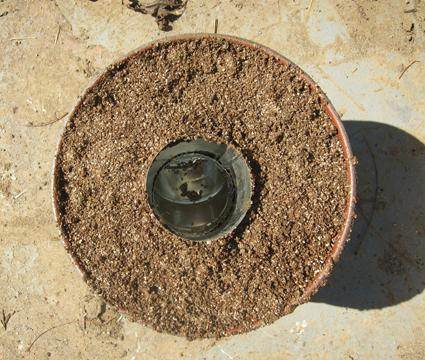
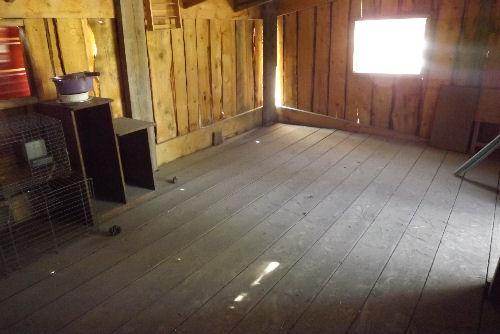
Evening all, Im new here and new to homesteading and am thrilled to be about to embark on the 1st leg of my families journey. I have a moment of desperation coming up in 2 weeks time. The property we are moving onto has an old chicken coop we are cobing the chinks up in and will be living in until we build our new straw bale/cob home in the spring. Its located in Colorado and the winters are bitterly cold. We will have limited electricity and want to build a rocket heater inside the building to warm us through the snowy winter. I managed to get a 55 gallon oil drum from a local oil change place, need to burn out the icky and want a fast and economical pocket rocket type we can build. Ive watched numerous videos on all types but just looking for some reassurances from experienced builders! I planned on a basic "U" shape so the burn is on top of the barrel and not easy to get sparks onto the wood floor. Im thinking fire bricks on the floor for the base but not sure what type of piping I will need. All Ive really seen is the single wall black pipe. Can that go all the way through in the "U" shape or do I need to make a brick one inside? Here is an example of what i was thinking of doing. What do you think, will it work for 4 -5 months in a one room cabin? Plan to have top of pipe go outside of cabin through a hole in the wall I will cover in sheet metal to keep from catching wood walls on fire from the heat.

 
pollinator
Posts: 4154
Location: Northern New York Zone4-5 the OUTER 'RONDACs percip 36''
67
hugelkultur fungi books wofati solar woodworking
  • Likes 1
  • Mark post as helpful
  • send pies
    Number of slices to send:
    Optional 'thank-you' note:
  • Quote
  • Report post to moderator
Kimberly : W.O.W., did you go deep down into the FALL to begin a move to your new home, it's all right it will be the start of a great adventure and many stories for your great grands to hear ! What size is your chilken coop how high is the ceiling !?!!
Could you take ownership of your straw bales now, stack them Covered on pallets off of the ground either against the outside of your home, or in a position to make a wind break / sheltered spot exposed to the sun - think micro climate ! Any thing you can do to create a separate "mud room" space* before you come all the way inside will also be a big help as will just having a big ol' tarp creating a dead air space between out doors and your existing roof will be a plus esp. with a snow load for insulation ! I would make a rock crib, or stack cinder blocks and bricks to make dead air space and thermal mass under your 'pocket rocket' as it can 'glow orange red' if well fueled when the rest of the house is cold !
Dry stacked pavers and bricks stacked waist high-ish around your stove and relocated as needed, will teach you the right spots and shapes, and as thermal mass will absorb and re-radiate heat w/out endangering children, pets, and walls !
You need to have some weeper holes around the piece of Sheet tin that you will be using to pass your stovepipe outside (through a window opening?) , I would rather see a dedicated store bought Stove Pipe Thimble / stove pipe jack tho they are pricey, I have seen two crimped # 10 cans slipped into a short length of larger stove pipe to make a thimble . I mentioned the tin sheet as you may need to suspend something insulated above your pocket rocket and below your ceiling for protection against a form of 'old wood pyrolysis' hope fully you can have that , a small drying rack and a place for the tea kettle that you will need to use to get some moisture back into the air during those days where it never gets up to freezing a week at a time !
Vapor barriers,-boy are they important, as wet insulation is worse than no insulation ! Reflextix well sealed is pricey but better than plastic which will out gas and fail if baked for long periods of time ! To protect your insulation every heated pot must have a lid. Old time farmers used pebbles or cracked corn kept near their wood stove, heated toasty and poored into boots to warm and dry their foot gear out over night ! This is actually much much better than baking footgear too near the fire and safer, cheeper and much kinder to the boots than any power'd boot driers out there! ( I have seen boot driers left on in work boots left at a work site in the company trailer over the weekends ruin Hundreds of dollars of boots - leather and ''rubber" !
I have built a few rocket stoves and they worked Very well, I have only found two ways to remove the wood ashes which you will probably need to do every 2-3 days ,try to minimize the amount of tree bark you burn , The Two are let the fire go out , cool, and scoop out ashes or let the fire go out, cool and dis and re- assemble to clean , i dont know what you mean about ' the burn is on the top of the barrel ' like all types of rocket stoves if its on it needs to be watched like a three yr old !
Triple wall pipe is nice if you can get it - You could try the RE-Stores run by 'habitat for humanities' in your area, unfortunately handymen and permies types have wised up to this and usually have friends who tip them off when some good stuff comes in, also used stove pipe can't be sold some places , but, if your nearest RE-store is not two far away , Its worth the trip, also freecycle, and Craigslist ! I have given you a lot to think about and I am sure many others will chime in to help !
Keep us informed as to whats going on in your world ! Allen L.

* the mud room should be lower than the rest of your chicken house so that you have a cold sink Below the Bottom of your Door Opening, and don't actually pump heat out through the top of the door as a wave of very cold air falls into your house at the bottom !
 
gardener
Posts: 791
Location: Tonasket washington
54
  • Likes 1
  • Mark post as helpful
  • send pies
    Number of slices to send:
    Optional 'thank-you' note:
  • Quote
  • Report post to moderator
the feed tube goes down to 3 or 4 inches from the bottom.
the chimney is flush with the penetration and yes you need an insulated pipe for a pocket rocket to go through a roof or wall.
for indoor set up i suggest a sand pan and then fire brick on its side to give the clearances. with a 55 gal i would add a layer of insulation (perlite and clay) 1" thick or suspend the sand pan 1 inch off the floor.
also you will have to put heat shields up if the stove is within 30 inches of a wall or ceiling (personally i would do this anyways and make myself some space.) best installation for a pocket rocket is in the middle of the room.
build the pocket rocket outside and test it before putting it in the house, make darn sure the top has no air leaks (a small batch of cob works well for this) also if you need a cooler cooking surface than the bare steel a layer of cob on the tome tends to work pretty well.
 
allen lumley
pollinator
Posts: 4154
Location: Northern New York Zone4-5 the OUTER 'RONDACs percip 36''
67
hugelkultur fungi books wofati solar woodworking
  • Mark post as helpful
  • send pies
    Number of slices to send:
    Optional 'thank-you' note:
  • Quote
  • Report post to moderator
what Ernie said he's the boss !
 
Kimberly Sanchez
Posts: 17
Location: Pagosa Springs, CO Usa
  • Mark post as helpful
  • send pies
    Number of slices to send:
    Optional 'thank-you' note:
  • Quote
  • Report post to moderator
Wow! All I can say is thank you so much you guys! Im literally in the last few days of prepping to move into our little space and get started so this came just in time, thank you so much! I will be posting lost of pics and questions Im sure as we go along, thank you again! Can I create a cob base for the barrel to sit on since I will be cobing around it instead of a sand pan?
 
allen lumley
pollinator
Posts: 4154
Location: Northern New York Zone4-5 the OUTER 'RONDACs percip 36''
67
hugelkultur fungi books wofati solar woodworking
  • Likes 1
  • Mark post as helpful
  • send pies
    Number of slices to send:
    Optional 'thank-you' note:
  • Quote
  • Report post to moderator
Kimberly Sanchez : What you are trying to do is create insulation below the pocket rocket, on carefull consideration after you build it and try it and are ready to move it inside, I would start off with a piece of cement board to level the floor then an air gap, a large sand pan 3' in diameter or larger, A layer of reflective foil then at least a couple of inches of sand to make sure the barrel sets level and stable, then put three to four inches of cob or sand in the bottom of the drum to reduce the heat radiation from the bottom of the drum, for safety and longevity ! This means that you must shorten the feed tube by the depth of the sand /Cob at the bottom of the barrel, do it after you move it inside other wise the barrel will be to hard to move !

again you are probably going to want to build a partial wall around the pocket rocket to absorb most of the heat and re-radiate it at a lower temp. Ernie says where ever you are within 30'' of a wooden, make that burnable object you will want a heat barrier with an air gap behind that - He's the boss, add reflective foil to all the barriers ! G'luck pyro-Al
 
Kimberly Sanchez
Posts: 17
Location: Pagosa Springs, CO Usa
  • Mark post as helpful
  • send pies
    Number of slices to send:
    Optional 'thank-you' note:
  • Quote
  • Report post to moderator
Gotcha! Ok, its making more sense in my head now, thank you. So cement board, sand pan, firebricks to create air pocket, reflective foil, cob that up good about 6 inches, add barrel, set internal rocket structure, can I use the single wall stove pipe for that part? Then cob around the whole barrel, use a double insulated pipe for the flue and the part going through the wall. Sound about right? Im trying to figure materials and costs ect.

We had planned on using the 6 inch wide single wall pipe for the internal parts, and doing a self made double wall insulate piping for the top like the picture below. Does this need to be the whole length of the pipe that starts as soon as it leaves the top of the barrel? Mind you, the pic below is just an example, we planned on doing the inside pipe the same 6 inches wide and the outside pipe maybe a 10 inch piece?


allen lumley
pollinator
Posts: 4154
Location: Northern New York Zone4-5 the OUTER 'RONDACs percip 36''
67
hugelkultur fungi books wofati solar woodworking
  • Mark post as helpful
  • send pies
    Number of slices to send:
    Optional 'thank-you' note:
  • Quote
  • Report post to moderator
kim; I am working on the rest of your questions but i dont understand the picture as it is no part of a pocket rocket what am I loking At Allen L.
 
Kimberly Sanchez
Posts: 17
Location: Pagosa Springs, CO Usa
  • Mark post as helpful
  • send pies
    Number of slices to send:
    Optional 'thank-you' note:
  • Quote
  • Report post to moderator
Of course if anyone has a better, easier and cheaper way to heat this one room space Im all for it! Has to NOT be electrical.
All spaces in the walls have been cobed and filled in, but it will still be a very cold snowy winter to live through before we can start to build our house.

 
Kimberly Sanchez
Posts: 17
Location: Pagosa Springs, CO Usa
  • Mark post as helpful
  • send pies
    Number of slices to send:
    Optional 'thank-you' note:
  • Quote
  • Report post to moderator
Hang on let me grab the url I found this idea from, might make more sense, sorry!

insulated pipe for rocket stove

 
allen lumley
pollinator
Posts: 4154
Location: Northern New York Zone4-5 the OUTER 'RONDACs percip 36''
67
hugelkultur fungi books wofati solar woodworking
  • Mark post as helpful
  • send pies
    Number of slices to send:
    Optional 'thank-you' note:
  • Quote
  • Report post to moderator
Kim : i am almost afraid to answer questions as you have changed plans some how ? O. K. now i get in you have made a typr of insulated pipe,what did you use for insulation and sizes please ! Allen L.
 
Kimberly Sanchez
Posts: 17
Location: Pagosa Springs, CO Usa
  • Mark post as helpful
  • send pies
    Number of slices to send:
    Optional 'thank-you' note:
  • Quote
  • Report post to moderator
I was reading what you both said about how it SHOULD be built inside instead of what i thought it should be is all. Not trying to be complicated, just looking at both your lists of what needs to be built. I have not built anything yet, we move up there on the 30th, this coming next week, Im trying to scramble and figure out what i can build as fast as possible as snows will be coming the week after.
 
Kimberly Sanchez
Posts: 17
Location: Pagosa Springs, CO Usa
  • Mark post as helpful
  • send pies
    Number of slices to send:
    Optional 'thank-you' note:
  • Quote
  • Report post to moderator
If I can buy a smaller barrel, say a 5 gallon one, like what Ive seen in Ianto`s cob house, would that be warm enough you think? GO TO 4minutes in to see it.


Youtube Video Is Here

For some reason the video is not embedding so here is the direct link.
 
allen lumley
pollinator
Posts: 4154
Location: Northern New York Zone4-5 the OUTER 'RONDACs percip 36''
67
hugelkultur fungi books wofati solar woodworking
  • Mark post as helpful
  • send pies
    Number of slices to send:
    Optional 'thank-you' note:
  • Quote
  • Report post to moderator
kim : o.k. got it let me catch up ! 1st) make it, 2nd) test it out doors, 3) prepare the base in the house, 4) set barrel level and steady, 5) add cob with lots of straw in it straw will burn up your cob will be insulative, 6) shorten the feed tube by the amount that you added cob to bottom of 55 gal drum 7) finish putting the pocket rocket together, 8 ) run stove pipe up through roof - you will need to make up insulative sections at least 3 foot below and 3 feet above ! - how much will that weigh I am discounting the idea of running stove pipe from the middle of the room to any exit out through a outside wall because I wouldn't trust the stove pipe within 30 ' of the ceiling - if youve got your heart set on it lets talk ! Pyro AL.
 
Kimberly Sanchez
Posts: 17
Location: Pagosa Springs, CO Usa
  • Mark post as helpful
  • send pies
    Number of slices to send:
    Optional 'thank-you' note:
  • Quote
  • Report post to moderator
Thanks, yeah Im thinking the 55 gallon barrel is way to ambitious for this quick fix. Im thinking the smaller one to deal with the winter, as we build the actual cob house I will save the 55 gallon drum for that mass heater! Im sorry Im being so confusing, its a whole new world for me!
 
allen lumley
pollinator
Posts: 4154
Location: Northern New York Zone4-5 the OUTER 'RONDACs percip 36''
67
hugelkultur fungi books wofati solar woodworking
  • Mark post as helpful
  • send pies
    Number of slices to send:
    Optional 'thank-you' note:
  • Quote
  • Report post to moderator
Kimberly Sanchez : a 5 gall pail would last about 2-3 days of moderately hard use, consider it if you have unlimited 5 gal pails and want to spend at least an hr every other day making them, Ianto Evans Describes in his Rocket Mass Heaters how a smaller barrel burning the same amount of wood actually has to radiate the heat of its skin at a higher temp than a larger one ! Thats why when a little kid wants to climb in your lap for a snuggle they feel so warm ! I think nothing smaller than a 30 gal barrel, but lets use what you've got - Does this mean that you havent burned the paint off of the barrel yet ?
 
Kimberly Sanchez
Posts: 17
Location: Pagosa Springs, CO Usa
  • Mark post as helpful
  • send pies
    Number of slices to send:
    Optional 'thank-you' note:
  • Quote
  • Report post to moderator
Yes, our other family that currently lives on the property has burnt off the oil residue on the inside and the paint off the outside.
 
allen lumley
pollinator
Posts: 4154
Location: Northern New York Zone4-5 the OUTER 'RONDACs percip 36''
67
hugelkultur fungi books wofati solar woodworking
  • Mark post as helpful
  • send pies
    Number of slices to send:
    Optional 'thank-you' note:
  • Quote
  • Report post to moderator
Kimberley Sanchez : its 1 a.m. here in New York, and i need shut eye , make a list of your questions and i should be up at 7 a.m. here to look at them ! Pyro - Al.
 
Kimberly Sanchez
Posts: 17
Location: Pagosa Springs, CO Usa
  • Mark post as helpful
  • send pies
    Number of slices to send:
    Optional 'thank-you' note:
  • Quote
  • Report post to moderator
m exhausted and heading to bed too, thanks hon!

Maybe Im over tired but here goes.

1.I guess what Im looking for is a basic materials needed list for this project (55 gal drum, 1 room)
2. Basic build instructions.

I feel stupid at this point, Ive watched hundreds of videos on this, read tons of info,m thought i had t figured out, now realizing I was no where near it..lol..sigh..heading to bed.
 
Ernie Wisner
gardener
Posts: 791
Location: Tonasket washington
54
  • Mark post as helpful
  • send pies
    Number of slices to send:
    Optional 'thank-you' note:
  • Quote
  • Report post to moderator
Kim a 120# grease can from your local version of jiffy lube would make a smaller system.

what exactly are the plans you are trying to follow? there is no insulation in the pocket rocket. usually we put insulation under it because it gets very hot down low.
here are the instructions. https://plus.google.com/u/0/102386522735745222307/posts/4dhApFFR6cC and https://plus.google.com/u/0/102386522735745222307/posts/NG6H1CdGrrY

that should get you on your way.


in this photo album the pictures of us building a pocket rocket are pretty step by step http://www.facebook.com/groups/220001861459666/ only thing different is the size.

lots of pictures.

http://www.facebook.com/groups/220001861459666/#!/groups/220001861459666/photos/
 
allen lumley
pollinator
Posts: 4154
Location: Northern New York Zone4-5 the OUTER 'RONDACs percip 36''
67
hugelkultur fungi books wofati solar woodworking
  • Mark post as helpful
  • send pies
    Number of slices to send:
    Optional 'thank-you' note:
  • Quote
  • Report post to moderator
Kimberly Sanchez : We will start with an easy eye opener, in your 1st picture just to the Right of the pocket rockets stove pipe, you have an unidentified man wearing a yellow neckerchief , then Erica and then Ernie Wisner , (we caught his better side!) Both Stewards on these pages, and very Knowledgeable about every facet of this craft !

Starting from the beginning and Following Ernies lead, The finished Feed Tube should end about 3-4'' above the bottom of the barrel, which means testing it at 1 length and the bringing it inside putting in some straw filled cob, Shortening the feed tube by the depth of the cob ,checking the final leveling and stableness of your rocket ! - Final assembly, - I would not cob up any of the outside of the barrel! 1) it needs to be able to radiate out all the heat it can, 2) It will last longer if NOT Cob'd , 3) A waist high-ish wall of dry stacked bricks, stones, pavers say a foot -18'' out from the barrel - Think secondary containment for the dragon that lives in your barrel, this does not need to be air tight and probably should not be, after you have lived with this for a while you can use a sand Clay-slip mortar to further stable-ize your wall around your pocket rocket !

Now we get to talk about how high the ceiling is inside your chicken coop,- and the age, size, and height of your immediate and extended family, by the time you create 1 or 2 layers of air gap out of radiant reflective material below your ceiling/roof and come down below that 18'' ( ADD the thickness of the stove pipe to how far down into the room the stove pipe will hang) - - think about what you are going to use for hangers that will not pinch and probably not even touch your radiant heat reflective foil. - And - you are creating a barrier that you are going to get so tired of walking around !!!

Having said that, the extra length of stove pipe is an additional radiating surface that is your last chance to get extra heat energy into your living space before you throw it away out doors -

Fans , Because of the way electricity is made/regulated there is no more efficient use of Electricity than to run an Electrical Motor- i.e. fan - (newer motors ARE better ! ) a good fan can carry heat away better than any thing else i can think of ! A good Fan or two should be part of your 1st line of defense against over heating, and no I don't have a plan for when the Elect goes out !)

Clean-outs, we talked about cleaning the stove, we need to talk about Clean-outs , if again you want the extra radiant heat surface of a horizontal run of stove pipe through your living space you will need at least 1 'Tee"shaped piece of stove pipe with an Inspection/clean-out cap where your stove pipe goes from vertical to horizontal , Every piece of stove pipe should have at least 2 self tapping sheet metal screws to join it to its neighbor short screws are best when you find you need to clean the pipe sections !

Out of Doors you can try getting away with just an elbow where you again go vertical to a height at least two lengths above highest point of the roof !- BUT it will not last as long as a properly installed 'Tee" with a clean out on the bottom and a WEEP HOLE in the bottom to drain condensation from the bottom !

General stove pipe stuff , I would try these places to see if you could score some insulated pipe , or any pipe you could use "Habitat for Humanity"s RE-stores, always worth a visit if you have one close by, just to see the place and talk to clerks, Join your local freecycle groups and as always there is Craigslist ! - The heavy, Black stove pipe is made for wood stoves and nothing else is as good except Insulated stove pipe !

O.K., i think I'm caught up! i'm off to review the videos that Ernie sent you ! Pyro_Al
 
allen lumley
pollinator
Posts: 4154
Location: Northern New York Zone4-5 the OUTER 'RONDACs percip 36''
67
hugelkultur fungi books wofati solar woodworking
  • Mark post as helpful
  • send pies
    Number of slices to send:
    Optional 'thank-you' note:
  • Quote
  • Report post to moderator
Kimberly Sanchez : Ernie has sent you pages of 76 and 77 of Ianto Evans' Great book 'Rocket Mass Heaters' hopefully you can blow it up and read it !

I want you to go to - www.rocketstoves.com - and get the downloadable pdf copy of this For $15,00 U.S.,* Nether Ernie or I get a penny out of this. Instead you get my apology, I just assumed that you had read it !


* my computer is a Mac and does not play well with others, I could not get the other stuff to down load ! Pyro-Al.
 
Kimberly Sanchez
Posts: 17
Location: Pagosa Springs, CO Usa
  • Mark post as helpful
  • send pies
    Number of slices to send:
    Optional 'thank-you' note:
  • Quote
  • Report post to moderator
Thank you everyone for all your help. I think there has just been so many videos of many different people Ive been getting it all confused. Im going to go read the things you have all suggested and get the "other stuff" OUT of my head! Thank you!
 
allen lumley
pollinator
Posts: 4154
Location: Northern New York Zone4-5 the OUTER 'RONDACs percip 36''
67
hugelkultur fungi books wofati solar woodworking
  • Mark post as helpful
  • send pies
    Number of slices to send:
    Optional 'thank-you' note:
  • Quote
  • Report post to moderator
Kimberley Sanchez : If i could I would, i would send this message to the 'Back to the future ' Kimberley Sanchez of mid March 2013 , Its a fact - life is a series of tradeoffs, Your Pocket rocket will be able to run well on wood that would choke a regular wood stove and love it. Start w dry wood and kindling and you will be fine !

Your future self will be burning wood in your "Rocket Stove Mass Heater ", it will require frequent feedings of DRY Small Wood over a period of 3-4 hours to give you 20-24 hrs of stored heat! March Kim will need to start thinking about where she is going to get wood NOW/THEN to lay up for the 2013 -2014 Heating season, October Kim will need to retrain herself on how to burn wood in her new ''Rocket Mass Heater ", Lucky,Lucky Kim !

Hope you are getting most of this and its helping your mind set - Not driving you crazy ! Pyro-maticly Yours ,- Allen L.
 
Ernie Wisner
gardener
Posts: 791
Location: Tonasket washington
54
  • Mark post as helpful
  • send pies
    Number of slices to send:
    Optional 'thank-you' note:
  • Quote
  • Report post to moderator
Kim I say it in our workshops and i will say i to you. " dont rely on youtube" most of the folks have no idea how there attempts are going to work.

you have the information now to make an informed decision. you need to make sure that you have the clearance to the ceiling and the walls to keep the stove from burning your coop down. this can be helped by stacking bricks around the back and sides of the stove.
they will not only save the walls but will hold some heat for a long time helping keep your house warm.
 
Kimberly Sanchez
Posts: 17
Location: Pagosa Springs, CO Usa
  • Mark post as helpful
  • send pies
    Number of slices to send:
    Optional 'thank-you' note:
  • Quote
  • Report post to moderator
Thank you Ernie, for more than you know! Everything I have dreamt of to have this new life is because of what you guys do, love you more than you know!!
 
Posts: 100
  • Mark post as helpful
  • send pies
    Number of slices to send:
    Optional 'thank-you' note:
  • Quote
  • Report post to moderator
what part of colorado?
 
Kimberly Sanchez
Posts: 17
Location: Pagosa Springs, CO Usa
  • Mark post as helpful
  • send pies
    Number of slices to send:
    Optional 'thank-you' note:
  • Quote
  • Report post to moderator
Pagosa Springs!
 
allen lumley
pollinator
Posts: 4154
Location: Northern New York Zone4-5 the OUTER 'RONDACs percip 36''
67
hugelkultur fungi books wofati solar woodworking
  • Mark post as helpful
  • send pies
    Number of slices to send:
    Optional 'thank-you' note:
  • Quote
  • Report post to moderator
-Kim S. (and family) G'luck , Stay safe and sane in your new-ish home !
 
Posts: 12
  • Mark post as helpful
  • send pies
    Number of slices to send:
    Optional 'thank-you' note:
  • Quote
  • Report post to moderator
I would advise you to get something with a door that you can feed easily and clean the ash out without taking the stove apart. Look on craig's list, even put in an ad asking for a cheap or free woodstove. I've heated with a sheepherder's stove and that worked well and is cheap enough. You need to be careful or you are going to burn that coop down.
 
I think I'm turning Japanese. I really think so. This tiny ad thinks so too:
Switching from electric heat to a rocket mass heater reduces your carbon footprint as much as parking 7 cars
http://woodheat.net
reply
    Bookmark Topic Watch Topic
  • New Topic