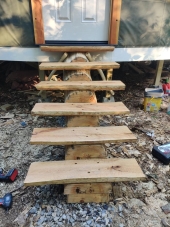
Is it the prettiest wooden stool ever made? No. But is it the ugliest? Yeah, perhaps... However, did it achieve the goal of making a strong stool from a log with minimal material waste and using only a chainsaw and a hatchet (and a drill and a few nails)? Yes!
I have always liked designs that utilize every part of the raw material by planning to do so from the start. The
zero-log bench was made with this in mind, but it still had a bit of waste. I had the idea kicking around in my head for a while of how to cut a sixteen inch log into a stool that would be sturdy and produce no waste wood, and this project is the result of that. The "nearly" part had to be added to the title because the kerf of the chainsaw removes a fair amount of material and a tiny amount gets chopped off to make the feet at the end, but other than that it uses everything.
Requires:
A log of ~10-16 inch diameter and ~16 inch length
Chainsaw
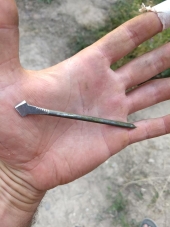
12x nails (16d)
Hatchet
Drill with ~1/8" drill bit
If the log does not have square cuts on the ends, now would be the best time to correct that. Next the log has to be cut into three pieces: the stool top surface and the two legs. I split the log roughly in parallel thirds, but on the next iteration I would make the center slab thinner so it can be nailed through directly. Using a chainsaw to do this step is pretty tedious, if you have a froe and a mallet it would go much smoother and even waste less material.
After the legs and top surface are separated, use a square to mark a section on the bottom of one of the legs such that there is an isosceles right triangle that intersects both bottom corners of the leg and is centered on the leg (picture shows this better). Cut that triangle out, then use the first leg to mark the same triangle on the other leg and cut that out. A stool with just two legs is a recipe for tippy-ness so this effectively makes four points of ground contact instead of two.
The triangles that were just cut out should have two perpendicular faces on them and they will now be used to brace both legs. Put the stool top surface on the ground and place both legs on top of it, then align the triangular gussets toward the middle of the stool. They will likely intersect if you put them both on center, so stagger them slightly (last picture shows this). At this stage you could decide to have the flat faces of the legs pointing outward and/or align the edge of the legs with the edge of the top surface. I chose neither of those things because I wanted the raw wood exposed and I wanted the base to be wide enough for stability.
I pre-drilled all nail holes to prevent splitting of the wood. I used two nails in each direction through the thin edges of the corner gussets and two toe-nails through the edge of the top surface into each leg. This is why I would make the slab thinner next go-around, it would be nice to nail through the top surface directly and the top slab is already about ten times stronger than it needs to be. The legs should be cut so that about a 2-inch square contacts the ground at each point. The stool can be easily levelled by placing on a flat surface and trimming the longest leg as necessary
Finally I knocked off the sharp edges with a hatchet. The stool could definitely use some planing, sanding, and finishing, but I don't have any of the tools out here for those operations.
If you have a froe and a mallet, I think you could make these in about an hour each. The ripping of the legs from the top slab was the most time consuming and laborious part for me. An even more stable stool could be made by flaring the legs outward, trimming the top accordingly, and cutting an obtuse angle out of the base for the gussets. If you have a lot of firewood cut to sixteen inch lengths but not split yet, consider turning a couple pieces into stools like these!
This is part of the
MoPID series of permaculture innovations that I am working on during my time at Wheaton Labs. Check out the thread if you'd like to follow along.


.png)
 8
8


Skill verified by Mike Haasl")