posted 13 years ago
Chris , You are just trying to fill in gaps, make your bricks just a little more uniform and tight fitting, you want to be able to take this apart when you are done!
Just clay and water to make a thick slurry , like a thin pancake batter this should give you a coating that sticks uniformly, small air bubbles are fine at this stage.
While you are not doing any thing to ruin a bucket save this bucket for this job, and you can wait for the clay to settle-out, pour off the water, and seal the bucket
or float some plastic wrap or Aluminum foil on top to save this for later.
I want you to fill in the bottom with bricks, your 4.5 X7.5 is a good number. I like the larger size of your feed tube you can always restrict the flow by covering part way with a brick.
you should have some perlite or other insulation under your Burn Tunnel to help every thing come up to temperature fastest - unless you really want some of your heat to go into your
underlying concrete pad ! This is a personal choice and if you are trying to limit your thermal mass bench for any reason you may want to let some heat go into your concrete slab!
Hope fully you managed to get a 55 gal drum with one end open, a plain/blank top, and clamping band! ( a second blank top would be nice) It should be burned out - the gunk/liner
from the inside and the paint off of the outside, its kind of the next step !
You do have a copy of Ianto Evans' great book, 'Rocket Mass Heaters' , don't you ! it really helps at this next step. Again you are SOooo close - PYRO_magicly yours Allen L.
I see a single notched brick ,you will probably need to do that later to build the base for your barrel to set on !
Success has a Thousand Fathers , Failure is an Orphan
LOOK AT THE " SIMILAR THREADS " BELOW !


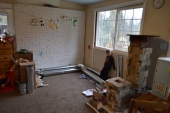
![[Thumbnail for IMG_3375.JPG]](/t/19562/a/7367/IMG_3375.JPG "Filename: IMG_3375.JPG
Description:")


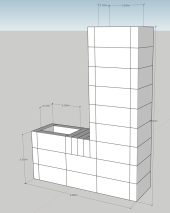
![[Thumbnail for IMG_0888.JPG]](/t/19562/a/7372/IMG_0888.JPG "Filename: IMG_0888.JPG
Description:")