|

|

|

|

|

|
|
|
|
|
|
|
|

|

|

|

|

|


It can be done!
mekennedy1313 wrote:
We have just purchased almost 11 acres out in the country of NE Ontario, Kirkland Lake.
I'm concerned about overheating surrounding surfaces such as the exterior wall the unit would be placed against.
how to convert a chest freezer to a fridge
Where liberty dwells, there is my country. -- Benjamin Franklin
Silver wrote:
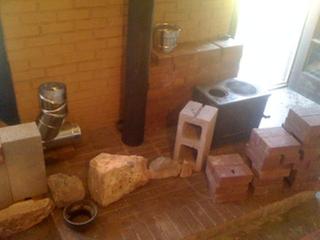
Ernie and Erica built one in their home. You can see in the pictures how they dealt with insulating the walls. http://picasaweb.google.com/eawisner/DanaAnnexRocketStove#
It can be done!
Need more info?
Ernie and Erica
Wood burning stoves, Rocket Mass Heaters, DIY,
Stove plans, Boat plans, General permiculture information, Arts and crafts, Fire science, Find it at www.ernieanderica.info
It can be done!

Need more info?
Ernie and Erica
Wood burning stoves, Rocket Mass Heaters, DIY,
Stove plans, Boat plans, General permiculture information, Arts and crafts, Fire science, Find it at www.ernieanderica.info

Need more info?
Ernie and Erica
Wood burning stoves, Rocket Mass Heaters, DIY,
Stove plans, Boat plans, General permiculture information, Arts and crafts, Fire science, Find it at www.ernieanderica.info

brice Moss wrote:
I geuss the next question is how I would go about talking you into running a workshop at my place next summer while the weather's nice.
 . Are you planning to use a standard chimney thimble for walls?
It can be done!

Need more info?
Ernie and Erica
Wood burning stoves, Rocket Mass Heaters, DIY,
Stove plans, Boat plans, General permiculture information, Arts and crafts, Fire science, Find it at www.ernieanderica.info
 .
.It can be done!
Need more info?
Ernie and Erica
Wood burning stoves, Rocket Mass Heaters, DIY,
Stove plans, Boat plans, General permiculture information, Arts and crafts, Fire science, Find it at www.ernieanderica.info
It can be done!
Need more info?
Ernie and Erica
Wood burning stoves, Rocket Mass Heaters, DIY,
Stove plans, Boat plans, General permiculture information, Arts and crafts, Fire science, Find it at www.ernieanderica.info
It can be done!
Need more info?
Ernie and Erica
Wood burning stoves, Rocket Mass Heaters, DIY,
Stove plans, Boat plans, General permiculture information, Arts and crafts, Fire science, Find it at www.ernieanderica.info
Need more info?
Ernie and Erica
Wood burning stoves, Rocket Mass Heaters, DIY,
Stove plans, Boat plans, General permiculture information, Arts and crafts, Fire science, Find it at www.ernieanderica.info
 1
1
1
1
Need more info?
Ernie and Erica
Wood burning stoves, Rocket Mass Heaters, DIY,
Stove plans, Boat plans, General permiculture information, Arts and crafts, Fire science, Find it at www.ernieanderica.info
Ernie wrote:
(kinda like a good knife its a simple thing that does its job brilliantly despite any "improvements")
Need more info?
Ernie and Erica
Wood burning stoves, Rocket Mass Heaters, DIY,
Stove plans, Boat plans, General permiculture information, Arts and crafts, Fire science, Find it at www.ernieanderica.info

find religion! church
kiva! hyvä! iloinen! pikkumaatila
get stung! beehives
be hospitable! host-a-hive
be antisocial! facespace
Sometimes the answer is not to cross an old bridge, nor to burn it, but to build a better bridge.
find religion! church
kiva! hyvä! iloinen! pikkumaatila
get stung! beehives
be hospitable! host-a-hive
be antisocial! facespace
Sometimes the answer is not to cross an old bridge, nor to burn it, but to build a better bridge.
Sometimes the answer is not to cross an old bridge, nor to burn it, but to build a better bridge.
Something is screwy here on 'permies' ,.. It is hard to post anything over a few lines.
First of all the extra expense of construction "might" only pay for itself if you have a high cost for fuel. If you have a free or nearly free source of sticks to run the stove, it would not pay for the added construction cost.
It seems that the load chamber would need to be air tight in order to draw air through your intended intake... (More construction cost and harder to load fuel.)
It seems to me, if you can breathe in the room, then the moisture in there will not harm the stove burn. If the moisture is so high that the stove can't burn, then there won't be anyone conscious in the room to notice.
find religion! church
kiva! hyvä! iloinen! pikkumaatila
get stung! beehives
be hospitable! host-a-hive
be antisocial! facespace
Sometimes the answer is not to cross an old bridge, nor to burn it, but to build a better bridge.
If you put the outside air source outlet near the stove intake, it won't draw air from your intake into the stove, after the outside air source pipe heats up. The hotter the outside air source gets, the harder it will be to draw hot air down. The stove will draw its air from cracks around the room and your fresh hot outside air pipe could draw in reverse. (Hot expanding gases want to go up not down.)
If the room was airtight it wouldn't be comfortable for people.
find religion! church
kiva! hyvä! iloinen! pikkumaatila
get stung! beehives
be hospitable! host-a-hive
be antisocial! facespace
travis laduke wrote:
that's... a lot of pipe. Did they put clean-outs in? I didn't see.
tel jetson wrote:
getting ready to install a rocket stove to heat a sauna in the next week or so. there won't be a lot of thermal mass involved, so I'm expecting the exhaust to be rather warmer than a typical mass heater. I'm wondering if I can preheat air to the feed tube using some of the heat in the exhaust. I would run a six inch stove pipe from outside through a ten inch exhaust pipe then to the feed tube. it's an eight inch system, so the area inside the ten inch pipe should be just right with a six inch pipe inside it.
is this a terrible idea? just trying to salvage some of that energy that will be headed out the exhaust.
Sometimes the answer is not to cross an old bridge, nor to burn it, but to build a better bridge.
find religion! church
kiva! hyvä! iloinen! pikkumaatila
get stung! beehives
be hospitable! host-a-hive
be antisocial! facespace
tel jetson wrote:
I think you've talked me out of it.
Sometimes the answer is not to cross an old bridge, nor to burn it, but to build a better bridge.

|
In the renaissance, how big were the dinosaurs? Did you have tiny ads?
grow your own garden and build your own home, in Montana, for free-ish
https://wheaton-labs.com/bootcamp
|