|

|

|

|

|

|
|
|
|
|
|
|
|

|

|

|

|

|


Tinknal wrote:
I've seen concrete pipe used in sewer installations. It comes in a variety of dimensions and I think I could find one the right dimensions for the heat riser. Any opinions of this?
Len wrote:
The inside of the riser should be no larger than the burn tunnel.... I would suggest the riser should be the smallest diameter in the whole system.... This doesn't really make sense as the gases are hottest there and so take up the most room, but that is what works. ... Best if burn tunnel and riser are the same CSA...
Patio slabs, they come 18x18 to 36x36 (at least here) two layers would cover the cracks between them and they add mass right where you need it to keep your beds from over heating and to extend the time between burns.
Try fixing 3 above first... I have seen systems with a big space between riser and barrel that still seemed to work.
Projects, plans, resources - now on the Permies.com digital marketplace.
Try the Everything Combo as a reference guide.
Tinknal wrote:
I've seen concrete pipe used in sewer installations. It comes in a variety of dimensions and I think I could find one the right dimensions for the heat riser. Any opinions of this?
Tinknal wrote:
Thanks Erica. I suspected that the heat could damage the concrete in some way but I had to ask. I suspect that maybe a riser with about 2 inches of asbestos would be optimal. Of course that kind of material would be hard to find now and would create other potential problems. I spent 3 years in the asbestos abatement industry and I'm thinking of all the different materials that got thrown away (including tons and tons of ordinary fire brick).
Projects, plans, resources - now on the Permies.com digital marketplace.
Try the Everything Combo as a reference guide.
Erica Wisner wrote:
I don't think they're gonna let asbestos back on the market anytime soon. If you still like the stuff after removing it, you must have some good tricks for keeping the dust down and limiting exposure. Care to share any?
Tinknal wrote:
Well Erica, the trick would be to encapsulate it. In this application I would put it in a double walled cylinder and weld it shut, with maybe a few small holes to keep it from exploding. It really is a great insulator. I've seen steam fittings with 2 inches of asbestos on them that were room temp to the touch that after removal it would met plastic from a foot away. I would think it would be perfect for providing that heat differential on the inside and outside of the heat riser. As deadly as asbestos can be you need to be aware that we are all exposed to it every day, and have been our entire lives. The key is to limit our exposure.
Projects, plans, resources - now on the Permies.com digital marketplace.
Try the Everything Combo as a reference guide.
Cliff (Start a rEVOLution, grow a garden)
careinke wrote:
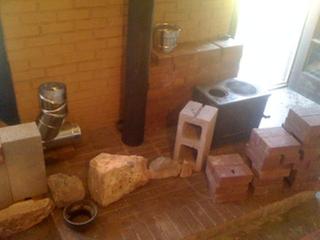
OK I have started construction. Here is a time lapse video of what I did today.
http://www.youtube.com/watch?v=NtX0B00qIeA

Cliff (Start a rEVOLution, grow a garden)
Cliff (Start a rEVOLution, grow a garden)
careinke wrote:
Actually got to light the stove today! It draws (pushes?) very well. Now to work on the mass storage.
Lessons learned:
1. It's easy to add too much water to your cob mixture.
2. The video gets boring when you are off making cob.
3. Pyrex cake pans explode!!!
Video:
http://www.youtube.com/watch?v=W3cs4uZpufc&feature=player_embedded
Projects, plans, resources - now on the Permies.com digital marketplace.
Try the Everything Combo as a reference guide.
wardd wrote:
mica
Erica Wisner wrote:
... that I can afford.
Projects, plans, resources - now on the Permies.com digital marketplace.
Try the Everything Combo as a reference guide.
Erica Wisner wrote:
Worth trying; haven't found a piece of mica big enough to try it yet...
Got a source? We can give you a discount coupon for us or Cob Cottage workshops, if you have a source for mica in large sizes that we can play with.
-Erica Wisner
![[Thumbnail for Untitled.png]](/t/1078/a/1494/Untitled.png "Filename: Untitled.png
Description:")
Tinknal wrote:
Here is a first draft of my planned system. It is an overhead view. I'm sure there will be many revisions, this is just a starting point. I highly encourage everyone to trash, dis, and generally scoff at these plans, as long as you have viable improvements or suggestions.
Thanks, Big Al
Projects, plans, resources - now on the Permies.com digital marketplace.
Try the Everything Combo as a reference guide.
Erica Wisner wrote:
Given these constraints, I think if you want the triple-pass in the section nearest the combustion, you will need to go up vertically to fit all the pipes in the bench with good clearances. Making it a single-pass here could work fine, especially since this is the hottest pipe and will heat a good thickness of cob.
-Erica Wisner
http://www.ErnieAndErica.info
Tinknal wrote:
Erica, I would be interested in any information you have. I was thinking that with an air space rather than an insulated area around combustibles (bearing in mind that the combustibles are covered with drywall) that 1 inch would be sufficient.
Bear in mind that I live in a location where codes are not as stringent ( read nearly nonexistent) as you are accustomed to.

Projects, plans, resources - now on the Permies.com digital marketplace.
Try the Everything Combo as a reference guide.

Cliff (Start a rEVOLution, grow a garden)
Tinknal wrote:
Erica, I would love to have a custom designed system. The trouble is that if it cost a nickle to shit I would have to throw up.
careinke wrote:
Erica,
There is one guy on the web selling his plans for $35. It is for an all brick design for the stove. I know at least one person who bought the plans (not me).
Projects, plans, resources - now on the Permies.com digital marketplace.
Try the Everything Combo as a reference guide.

Erica Wisner wrote:
LOL. Well, good thing you're smart then.
I don't think you need a custom design, and you are likely to pick up anything useful from our recent design from a basic description. I'll let you know when I have the basic drawing up.
I wouldn't expect to sell too many plans to the folks on these forums, as everybody seems to have their own ideas. But some people will pay to avoid the hassle of the experimental learning curve, especially if they are busy and in the "time is money" mindset.
Some folks don't need the "why," just want something to work right the first time, and be able to plan it step by step with a budget and timetable.
Ernie can build a boat from "study plans" if he wants to. But if he sees a good design with time-saving cut plans and construction details, he will spend the money.
Good plans save time, and sometimes materials; reliable information could have saved us at least $70 on our last boat, plus about 2 weeks' labor, on failed experimental materials.
Thanks for the reference. I think I know the guy you mean.
-Erica
Cliff (Start a rEVOLution, grow a garden)
Silver wrote:
As I've said to Ernie before. The tinker people here wouldn't be interested, but I think once the stove has passed testing, there will be a market for a combustion chamber kit.
Plans/video are a good option too.
I'm too cheap to plans, but I would consider attending a class if there was one within reasonable driving distance. I'd much rather put my hands on and ask questions.
Projects, plans, resources - now on the Permies.com digital marketplace.
Try the Everything Combo as a reference guide.
Silver wrote:
... I would consider attending a class if there was one within reasonable driving distance. I'd much rather put my hands on and ask questions.
Projects, plans, resources - now on the Permies.com digital marketplace.
Try the Everything Combo as a reference guide.
![[Thumbnail for ehhaust-revision.png]](/t/1078/a/1503/ehhaust-revision.png "Filename: ehhaust-revision.png
Description:")
Tinknal wrote:
Can the exhaust be split? This would eliminate a lot of headaches for me. How much would you have to step down the split portion from the full diameter portion?
 ) Normally, you want to have constant CSA throughout. CSA for 8inch round is 50sqin so two 6in runs might work (28sqinch each for 56sqin total). After you rejoin, to 8inch again, a straight run may help. I personally think (but have yet to try.... I have built and fired up to the top of riser so far) that the smaller pipes should be a bit big to make up for increased resistance to flow due to larger total circumference.... experiment!
Foxfire7893 wrote:
yeah, I will have to agree with that. The going back to 8" for a bit of a run I believe would balance the draw out between the two pipes. Of course, you could always run one pipe all the way down and then back again and then all the way back down making a little wider bench to sit on or to lay on. This would give you a continual run.
Projects, plans, resources - now on the Permies.com digital marketplace.
Try the Everything Combo as a reference guide.
Cliff (Start a rEVOLution, grow a garden)
careinke wrote:
I am trying to find out what a "normal" temperature range is for the barrel top when running your RMH. Mine seems to like to run right around 450 F. Although I have had it up to 800 F. It seems that when it gets above 600 F the fire starts to creep up the sticks and I have to let it burn down before adding more wood.
So if any of you have been taking temp measurements I would be interested in your results.
Thanks
Projects, plans, resources - now on the Permies.com digital marketplace.
Try the Everything Combo as a reference guide.
Cliff (Start a rEVOLution, grow a garden)

|
I remember because of the snow. Do you remember tiny ad?
building a permaculture community with hands on permaculture
https://wheaton-labs.com/bootcamp
|