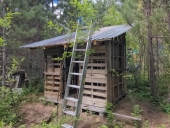
We have piles and piles of rough-cut lumber from our summer of milling. They've been drying outside for about 2 months in high Whidbey Island humidity, so not very dry yet. We've used this lumber for outside projects, but this is our first indoor application, a firewood rack.
Our lumber is generally quite thick, often thicker than even "true dimension", so online plans are not exactly applicable. Plus most online DIY plans we found were actually commercial plans, requiring us to buy ridiculous fixtures for rack lumber...not much fun. Truth be told, much of our lumber ain't all that straight and never consistently sized. We were milling pretty much by the seat of our pants. Plus, we're not selling any, and every project (like this rack) is a custom job, so weird lumber is actually a plus, adding character.
We're using mostly Alder, as we have lots of it and it is less useful in outside applications (rots much more quickly than the Doug Fir). We did use Doug Fir for the load-bearing middle shelf and braces, both for its extra strength and just to mix up the colors. We decided not to stain anything, giving us a chance to see how natural wood colors age inside. We have LOTS of furniture to build, so this experience will help. How it dries indoors next to the stove in this assembled state will be an education.
The "plans" (photo 1) were just a rough concept, but we stayed true to them. The hole next to our wood stove is 92"x 64" x 24", so we pre-cut the pieces outside on a chop-saw, then assembled it in the room where it is going, as it would be too hard to carry about. (photo 2)
In photo 3, things are taking shape. We used #10x3" T25 Torx head deck screws, driving them with a 60V DeWalt drill, predrilled with a 3/32" bit. We initially tried using our 20V drill, but it didn't have sufficient torque to sink the screw heads all the way. Left exposed, they would have scratched up the floor something awful.
My build-style is always measure twice/cut once mixed with a very healthy dose of fixturing and clamping. Always takin' it slow.
Photo 4 is the back of the rack, getting ready to lift into place. We did it this way for strength, but like the look so much, we plan to use it for the rest of our cabinetry.
Brilliant!! I like your design and the cubbies for kindling. The back braces are attractive as well as functional. So sturdy. I wish you could build me one!!!
I think you will find the wood dries nicely next to the wood stove. Mine has in my experience coupled with the ceiling fan.
Joy to You
To avoid criticism do nothing, say nothing, be nothing. -Elbert Hubbard. Please critique this tiny ad:


 11
11